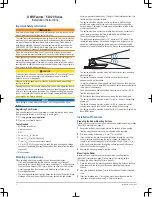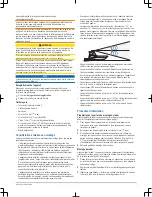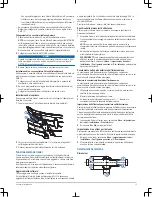
NOTICE
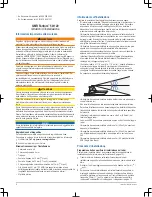
Use caution when connecting the cable to the radar. If you attempt to
connect the cable at an angle, you may damage the pins on the
NETWORK port.
3
Turn the ring on the cable clockwise to secure the cable to the radar.
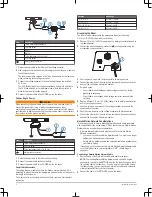
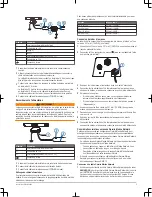
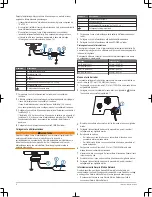
Installing a Garmin Marine Network Adapter Cable
If necessary, you can use the included Garmin Marine Network adapter cable
to connect this device to your chartplotter or GMS 10 network port expander.
1
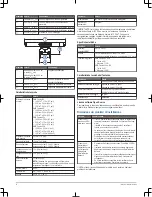
Connect the Garmin Marine Network cable to the device, and route it to
your chartplotter or port expander.
2
If it is not already pre-installed, connect the included adapter to the end of
the Garmin Marine Network cable.
3
Connect the adapter cable to your chartplotter or port expander.
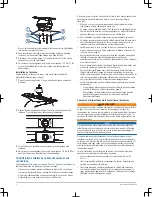
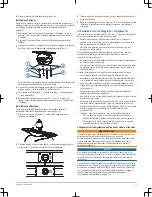
Installing the Cable Cover
You must mount the radar, route all cables, and connect them to the radar
before you can install the cable cover.
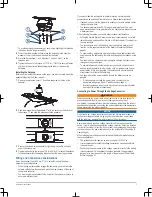
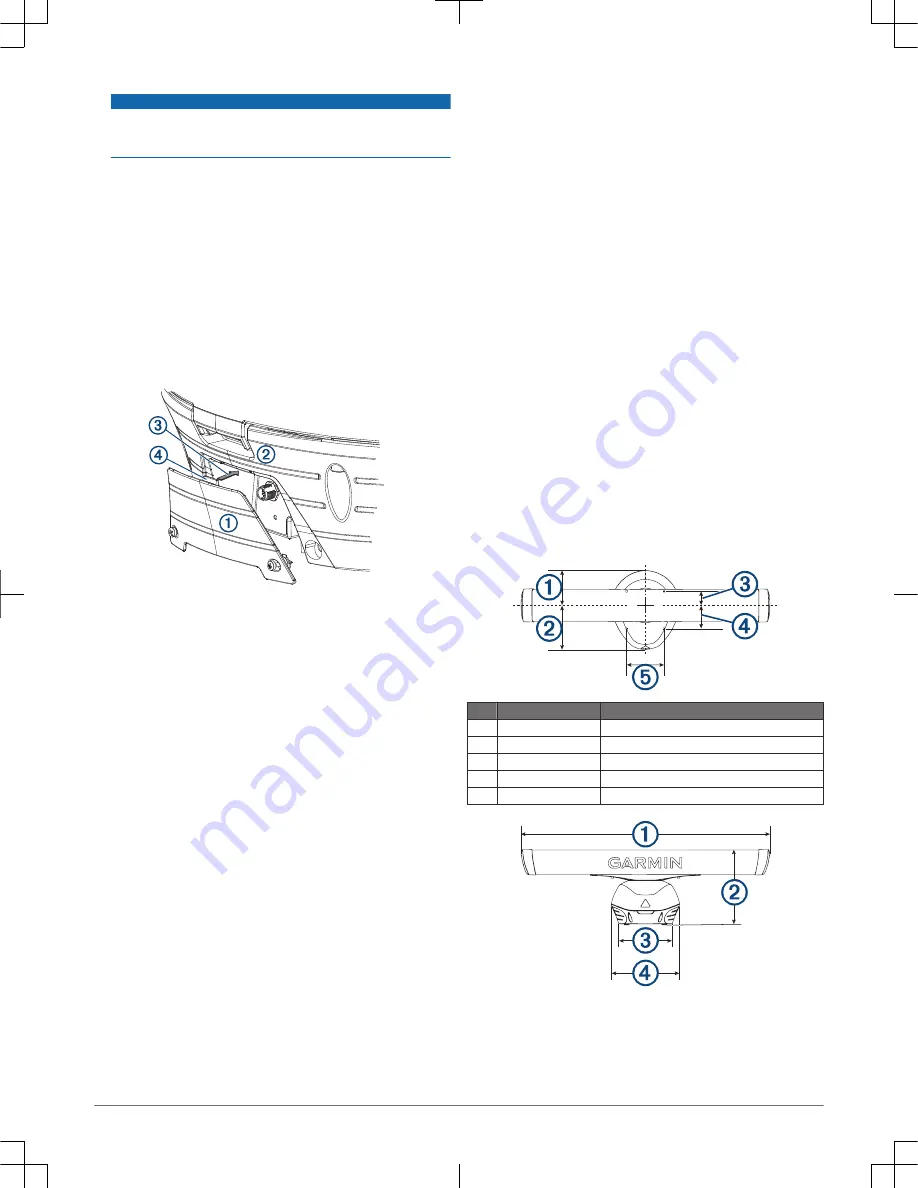
1
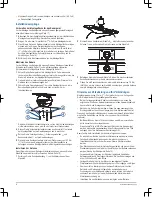
Hold the cable cover
À
parallel to the side of the pedestal
Á
.
2
Slide the cable cover onto the pedestal
Â
, and slide the tab
Ã
into the slot
on the pedestal.
3
Secure the cable cover to the pedestal using the attached screws.
Radar Operation
All functions of this radar are controlled with your Garmin chartplotter. See the
Radar section of your chartplotter's owner's manual for operating instructions.
To download the latest manual, go to www.garmin.com/manuals.
If you have more than one radar on your boat, you must be viewing the radar
screen for the radar you want to configure.
Software Update
You must update the software when you install this device.
If your Garmin chartplotter has Wi
‑
Fi
®
technology, you should update the
software using the ActiveCaptain
™
app on a compatible Android
™
or Apple
®
device. If your chartplotter does not have has Wi
‑
Fi technology, you should
update the software using a memory card and a Windows
®
computer.
For more information, go to support.garmin.com.
Specifying the Antenna Size
Before you can use the radar on your system, you must specify the antenna
size.
1
Turn on the radar and all devices connected to the Garmin Marine
Network.
An antenna-selection prompt appears on the connected chartplotters.
NOTE: If the entire system is being turned on for the first time, the
antenna-selection screen is part of the initial setup process.
2
Select the installed antenna size for each open-array radar installed on the
boat.
TIP: If you need to specify a different antenna size, while viewing the radar
screen for the radar you want to change , select Menu > Radar Setup >
Installation > Antenna Configuration > Antenna Size, and select the
antenna size.
Front-of-Boat Offset
The front-of-boat offset compensates for the physical location of the radar
scanner on a boat, if the radar scanner does not align with the bow-stern axis.
Measuring the Potential Front-of-Boat Offset
The front-of-boat offset compensates for the physical location of the radar
scanner on a boat, if the radar scanner does not align with the bow-stern axis.
1
Using a magnetic compass, take an optical bearing of a stationary target
located within viewable range.
2
Measure the target bearing on the radar.
3
If the bearing deviation is more than +/- 1°, set the front-of-boat offset.
Setting the Front-of-Boat Offset
Before you can set the front-of-boat offset, you must measure the potential
front-of-boat offset.
The front-of-boat offset setting configured for use in one radar mode is applied
to every other radar mode and to the Radar overlay.
1
From a Radar screen or the Radar overlay, select Menu > Radar Setup >
Installation > Front of Boat.
2
Select Up or Down to adjust the offset.
Setting a Custom Park Position
By default, the antenna is stopped perpendicular to the pedestal when it is not
spinning. You can adjust this position.
1
From the radar screen, select Menu > Radar Setup > Installation >
Antenna Configuration > Park Position.
2
Use the slider bar to adjust the position of the antenna when stopped, and
select Back.
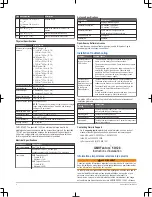
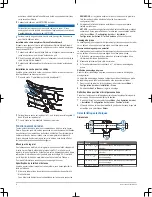
Specifications
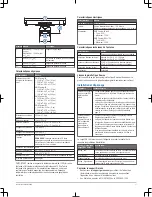
Dimensions
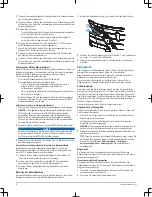
Item Measurement
Description
À
185.9 mm (7
5
/
16
in.)
Center of rotation to the rear of the pedestal
Á
234.7 mm (9
1
/
4
in.)
Center of rotation to the front of the pedestal
Â
86 mm (3
25
/
64
in.)
Center of rotation to the rear mounting holes
Ã
114 mm (4
1
/
2
in.)
Center of rotation to the front mounting holes
Ä
200 mm (7
7
/
8
in.)
Distance between the mounting holes
Installation Instructions
5


