8-6
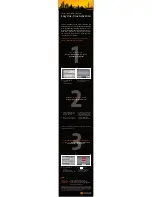
The track storing function may be turned on and off by highlighting the first
status field and pressing CLR. From the next field, the track may be set to
“wrap” around through available memory (deleting the oldest track information
and using the memory to store the new track position), or to “fill” available
memory and then stop. The amount of memory, used at any given moment,
is also displayed. When available memory is filled or the track is no longer
needed, it may be cleared by highlighting “Clear Track Log?” and pressing
ENT. If the “fill” option is selected, a “memory full” message will be displayed
when all available memory has been used and you must clear the track log
to store additional track information.
The ground track is stored at a frequency that you can define either by: Time
“Interval”, “Resolution”, or “Distance”. Select the desired frequency unit by
highlighting this field and pressing CLR.
To store the Ground Track at selected time Intervals...
· Highlight the recording criteria field (third line) and select “Interval” with
CLR.
· Press ENT.
· Enter the time interval between stored positions starting with hours,
then minutes, then seconds. Press ENT after entering data in each
numeric field.
To store the Ground Track by Distance...
· Highlight the recording criteria field and select “Distance” with CLR.
· Press ENT.
· Enter the distance, and press ENT. When your position moves this
distance in any direction, a new position is added to the stored ground
track. NOTE: “Distance” storage may be preferable to “Resolution”
storage if the ground track will include a large number of turns.
If the planned course will be primarily straight line travel, you should select
“Resolution” storage. In this application, considerably less memory is used
for the same distance traveled.
To store the Ground Track by Resolution...
· Highlight the recording criteria field and select “Resolution” with CLR.
· Press ENT.


