background image

Working from the Map Page is a simple process that centers around the use of

the cursor. Controlled by the rocker keypad, the cursor is an important tool allow-
ing you to pan to other areas on the map display, view waypoint information, create
waypoints, specify a GOTO target and create routes. To get a feel for using the Map
Page and the cursor, try the following exercise:

1. Using the rocker keypad to move the cursor, try following a highway (or other fea-

ture) near your position. Simply press and hold one side of the rocker keypad to
move more quickly. Notice how a data field appears above the map, showing the
bearing and distance from present position to the cursor, along with the latitude/
longitude of the cursor.

2. Using the rocker keypad, continue moving the cursor in any direction until you find

an airport or navaid. Once you find one, place the cursor over that waypoint so that
its identifier is highlighted.

3. Press ENTER to view the database information for the selected waypoint. If an air-

port is selected, use the LEFT/RIGHT keys on the rocker keypad to select between
‘Airport’, ‘Runway’ and ‘Comm’ information pages. 

4. When finished reviewing the information press QUIT to return to the Map Page.

(Pressing QUIT a second time will end the panning operation and return the map to
your present position. For now, we’ll stay in panning mode and leave the selected
waypoint highlighted on the map.)

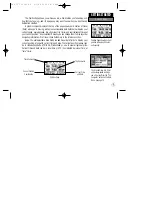
Use the rocker keypad to pan
to other areas on the map 
display. When panning, an 
on-screen cursor appears for
reference.

Place the cursor over an on-
screen airport or navaid to
highlight the item, then press
ENTER to view database
information for the selected

item.

20

SIMULATOR TOUR

Viewing Waypoint Info

Waypoint

Identifier Field

Waypoint 

Symbol Field

Waypoint Position

‘File Tabs’ for

other info types

GPS III Pilot B2  4/1/99 2:02 PM  Page 20

Summary of Contents for GPS III

Page 1: ...Owner s Manual Reference GPS III Pilot B2 4 1 99 2 01 PM Page 1 ...

Page 2: ...tten permission of GARMIN GARMIN Corporation hereby grants permission to download a single copy of this man ual and of any revision to this manual onto a hard drive or other electronic storage medium to be viewed and to print one copy of this manual or of any revision hereto provided that such electronic or printed copy of this manual or revi sion must contain the complete text of this copyright n...

Page 3: ...the basic features of the unit and provides a quick start orientation to the GPS III Pilot Section Two Simulator Tour provides a step by step lesson in how your new GPS III Pilot would oper ate in actual flight by utilizing the built in simulator mode Section Three Reference provides details about the advanced features and operations of the GPS III Pilot by topic Before getting started with your G...

Page 4: ...GPS III Pilot over airbag panels or in a place where the driver or passengers are likely to have an impact with it in an accident or collision The mounting hardware provided by GARMIN is not warranted against collision damage or the consequences thereof WARNING For vehicular operations it is the sole responsibility of the operator of the vehicle to operate his or her vehicle in a safe manner maint...

Page 5: ...rrect the interference by relocating the equipment or connecting the equipment to a different circuit than the affected equipment Consult an authorized dealer or other qualified service technician for additional help if these remedies do not correct the problem Operation is subject to the following conditions 1 This device may not cause harmful interference and 2 this device must accept any interf...

Page 6: ...VARY FROM STATE TO STATE IN NO EVENT SHALL GARMIN BE LIABLE FOR ANY INCIDENTAL SPECIAL INDIRECT OR CONSE QUENTIAL DAMAGES WHETHER RESULTING FROM THE USE MISUSE OR INABILITY TO USE THIS PRODUCT OR FROM DEFECTS IN THE PRODUCT SOME STATES DO NOT ALLOW THE EXCLUSION OF INCIDENTAL OR CONSEQUENTIAL DAMAGES SO THE ABOVE LIMITATIONS MAY NOT APPLY TO YOU To obtain warranty service call the GARMIN Customer ...

Page 7: ...Page 9 Map Page 10 HSI Page 11 Highway Page 12 Main Menu 13 Viewing Database Info 14 Going to a Waypoint 15 Cancel GOTO Active Route 16 SIMULATOR TOUR 17 REFERENCE Satellite Status Page 27 Position Page 32 Map Page 35 HSI Page 40 Vertical Navigation 44 Highway Page 46 Waypoint Categories 48 Nearest Page 53 User Waypoints 55 GOTO 61 TracBack 64 Routes 66 Active Route Page 70 v INTRODUCTION Table of...

Page 8: ...NDIX A Mounting Instructions 88 APPENDIX B Specifications 90 APPENDIX C Wiring Interfacing 91 APPENDIX D Antenna Remote Mounting 92 APPENDIX E Messages 93 APPENDIX F Map Datums 95 APPENDIX G Navigation Terms 98 APPENDIX H Index 100 GPS III Pilot B2 4 1 99 2 01 PM Page vi ...

Page 9: ...RTED Unit Features Antenna detachable Function Keys LCD Display Battery Door Rocker Keypad Power Backlight Key red To change the screen orientation press and hold the PAGE key GPS III Pilot B2 4 1 99 2 02 PM Page 1 ...

Page 10: ... scales on the Map Page Also adjusts scale on the Highway and HSI pages ROCKER KEYPAD Controls the movement of the cursor is used to select options and positions and to enter data CURSOR A solid black bar which can be moved up down left and right with the keypad to select indi vidual fields on the display see above DEFAULT A system selected format built into the operating software or the unit s me...

Page 11: ...f the unit and turn the ring 90 counterclockwise 2 Install the batteries and close the battery compartment door When replacing the GPS III Pilot s batteries observe the polarity markings engraved in the plastic case 3 Lock the door in the closed position by rotating the metal ring 90 clockwise Battery life varies due to a variety of factors including temperature and backlighting You may find that ...

Page 12: ... you how to initialize your new GPS III Pilot on page 5 Initialization is only necessary under the following conditions The first time you use your receiver new from the factory After the receiver has been moved over 500 miles with the power off from the last time you used it If the receiver s memory has been cleared and all internally stored data has been lost Because the GPS III Pilot relies on ...

Page 13: ... is pointing up To turn the GPS III Pilot on press and hold the red power key The Welcome Page will be displayed while the unit conducts a self test Once testing is complete the Welcome Page is replaced by the Database Page which shows the effective date for the Jeppesen database followed by a warning page then by the Satellite Status Page A message will inform you to select initialization method ...

Page 14: ...necessary to remote mount an anten na inside the cockpit or install an outside antenna Contact your local GARMIN dealer and inquire about the GA 26 Remote Antenna part number 010 10052 02 or the GA 56 Low Profile Antenna part number 010 10040 01 Have you selected the right area when initializing Check for the correct approximate position on the Map Page press PAGE until the Map Page appears see pa...

Page 15: ...ch of these pages in order to give you some insight into how they help you navigate We ll go over all of them in more detail in the reference section Press the PAGE key to move through each of the main pages in normal fashion Press the QUIT key to sequence through the main pages in reverse order 7 GETTING STARTED Main Page Sequence Highway Page HSI Page Map Page Active Route Page Position Page Sat...

Page 16: ...tellites are indicated on the sky view and the signal strength bars by their cor responding number from 01 through 32 The sky view shows where it is looking in the sky for each satellite by indicating the direction and elevation angle above the horizon The signal strength bars depict the relative strength of the signal from each satellite being received The taller the bar the stronger the signal T...

Page 17: ...these fields more in the reference section Below the user selectable data fields are additional data fields to display your current position along with current time and date The current position readout can be in latitude longitude UTM UPS Maidenhead or one of several regional grids Current time and date can be in local time or UTC Coordinated Universal Time or zulu time Position Page showing curr...

Page 18: ...lways pointing north oriented along your desired course or it can automatically rotate to keep your current direction of travel track at the top of the screen North Up is the default setting Nearby airports VORs NDBs intersections and user waypoints are depicted on the map each with its own unique symbol with the identifier listed directly above the waypoint s symbol We ll cover more about the GPS...

Page 19: ...urrent scale indicated at the bottom of the page The scale setting represents the distance from the center of the CDI to full left or right limits The HSI depicts your ground track heading using a rotating compass card Don t confuse this with the aircraft heading indicated on your panel On a windy day these two figures can differ significantly The HSI page also provides a TO FROM indication and ve...

Page 20: ...nt direction of travel Directly below the distance reading is the time required to reach your desti nation or the next waypoint in a route in hours minutes or minutes seconds The pointer at the bottom of the page also shows the bearing to your destination relative to your current track If the pointer points straight ahead you re heading directly to your destination If you move off course the highw...

Page 21: ...rm various configuration settings including system settings selection of position format and units of measure time display setting various alarms enabling the built in simulator feature and interface options with other equipment To change units of measure for distance and speed 1 Select the Setup option from the Main Menu as described above and press ENTER 2 Highlight the Units tab with the rocker...

Page 22: ...database information by entering the identifier name or city for the desired facility 1 Press MENU twice to display the Main Menu 2 Highlight Waypoints and press ENTER A series of tabs appear for each category of waypoint information airports runways comm frequencies VORs NDBs intersec tions user entered waypoints Select the desired category using the rocker keypad 3 To view information by identif...

Page 23: ...he Map Page 1 With the Map Page displayed use the rocker keypad to place the cursor over the desired destination waypoint If no waypoint exists at the destination location the GPS III Pilot will automatically create one named MAP in the step below 2 Press GOTO NRST and then ENTER to navigate to the selected location To GOTO a listed waypoint on the Nearest Page 1 Press and hold the GOTO NRST key t...

Page 24: ... a route the current destination is marked with an arrow on the left hand side of the screen If no destination has been specified using the GOTO key or a route no waypoints will be listed on the page For more information on using routes see page 66 in the Reference section To cancel the current GOTO destination select Cancel GOTO from the GOTO Options Page Use the LEFT RIGHT keys on the rocker key...

Page 25: ...urrently off you ll need to start by turning it on To turn the GPS III Pilot on press and hold the red power key The Welcome Page will be displayed while the unit conducts a self test Once test ing is complete the Welcome Page is replaced by the Database Page then by a warn ing page and finally by the Satellite Status Page Since we ll be using the simulator mode we don t need to wait for the recei...

Page 26: ...teps but as you cycle through the main pages notice that the simulator imitates satellite reception and shows that information on the Satellite Status Page The Position Page will show the last known position as a starting location If you ve already initialized the receiver as outlined in the Getting Started section the starting location should be very close to your current position We ll use this ...

Page 27: ...ted with the top of the page always pointing north North Up oriented along your desired course Course Up or it can automatically rotate to keep your current direction of travel at the top of the screen Track Up Let s try panning around on the map display to see how that process works and then we ll find a nearby airport VOR NDB or intersection and navigate to it First we will need to select an app...

Page 28: ...avaid Once you find one place the cursor over that waypoint so that its identifier is highlighted 3 Press ENTER to view the database information for the selected waypoint If an air port is selected use the LEFT RIGHT keys on the rocker keypad to select between Airport Runway and Comm information pages 4 When finished reviewing the information press QUIT to return to the Map Page Pressing QUIT a se...

Page 29: ...t time we get started so let s plug a speed into this simulator to animate the displays To enter a simulated speed and animate the displays 1 Press PAGE repeatedly until the HSI Page appears see page 22 2 Enter a simulated speed of 100 knots using the rocker keypad Press UP on the rock er keypad repeatedly to select 100 The speed readout is on the upper right corner of the HSI Page 3 Press PAGE or...

Page 30: ...icate how far off course you are and in what direction The scale for the CDI is indicated at the bottom of the page The scale represents the distance from the center of the CDI to full left or right limits As you approach the waypoint a TO FROM indicator will signal waypoint cross ing The current speed distance to the next waypoint time to the next waypoint and vertical speed to target are all dis...

Page 31: ...it easy to see at a glance which way you re headed The pointer arrow at the bottom of the page indicates the direction to the destination waypoint bearing relative to the direction you are moving track If the pointer points straight ahead you re heading directly to the waypoint If not turn in the direction of the pointer and the pointer will swing around pointing straight ahead as you begin moving...

Page 32: ...r keypad to enter the new name UP DOWN to change the first character S RIGHT to move to the next character I and repeat Press and hold UP or DOWN to cycle through the charac ters more quickly Once the new name is spelled out press ENTER to accept it 3 Now let s use a special symbol to identify the location Highlight the waypoint symbol field immediately right of the name field and press ENTER Use ...

Page 33: ...d select the Airports tab to see up to nine nearest airports along with bearing and distance to each To GOTO a nearest airport 1 Using the UP DOWN keys on the rocker keypad highlight the desired airport 2 Press GOTO NRST followed by ENTER to designate the airport as your destination To view the Jeppesen data for a nearest airport 1 Using the UP DOWN keys on the rocker keypad highlight the desired ...

Page 34: ...ht the Airspaces tab 3 Use the UP DOWN keys to highlight the desired airspace if more than one is listed and press ENTER That s it You ve covered the basics and you re ready to venture off on your own Operating the GPS III Pilot is just as simple as you ve seen here in the Simulator Tour but in real applications you won t need to change speed and track with the rocker keypad That s all done automa...

Page 35: ...ition track and speed by selecting and using the best satellites in view You can also access the GPS III Pilot s contrast feature from this page To adjust the screen contrast 1 Press LEFT or RIGHT on the rocker keypad to adjust the level of contrast and press ENTER to save the new contrast setting Sky View and Signal Strength Bars The sky view and signal strength bars give you an indication of wha...

Page 36: ...ions Searching the GPS III Pilot is looking for any available satellites in view AutoLocate the GPS III Pilot is initializing and collecting new almanac data This process can take up to 5 minutes depending on the satellites currently in view Acquiring the receiver is collecting data from available satellites but has not collected enough data to calculate a position fix 2D Navigation at least three...

Page 37: ... if the antenna is shaded or the unit is used indoors Battery Level Indicator The Satellite Status Page also features a battery level indicator located to the left of the sky view which displays the strength of the unit s batteries The battery indicator will not appear if the receiver is operating on external power NOTE The battery level indicator is calibrated for alkaline batteries NiCad and lit...

Page 38: ...efer to the operation setup section see p 79 To turn the screen backlighting on 1 Cycle through the three levels of backlight by repeatedly pressing the red power key To turn the screen backlighting off 1 Press the red power key Whenever the GPS III Pilot s backlighting is off the bulb icon disappears from the Satellite Status Page Satellite Status Page Options Many features of the GPS III Pilot a...

Page 39: ...cation the GPS III Pilot was used To select AutoLocate highlight AutoLocate and press ENTER Initialize Position allows you to designate your approximate position in order to speed up satellite acquisition This option may be used in lieu of AutoLocate above and typically provides a position fix quicker To initialize your starting position 1 Highlight Initialize Position and press ENTER 2 Designate ...

Page 40: ... displayed in local time or UTC zulu time The lower left hand corner of the page shows your current latitude and longitude in degrees and minutes default Units of measure and the position readout are selectable from the Main Menu as outlined on page 77 Average speed max speed trip odometer and timers can each be reset from the Main Menu as described on page 75 2D Altitude Entry When the GPS III Pi...

Page 41: ...e fields 2 When the Estimated Accuracy and or Measurement Time figures reach the desired value s highlight Save and press ENTER To cancel the averaging function highlight Discard and press ENTER 3 The Waypoint Definition Page appears with a three digit number assigned as a name for the new waypoint To save the waypoint with this name highlight Done and press ENTER Or 4 To change the waypoint name ...

Page 42: ...eld you wish to change using the rocker keypad and press ENTER 3 Select the type of data you want to appear on this field and press ENTER Restore Defaults resets all data fields to the factory default settings To restore the factory default settings highlight Restore Defaults and press ENTER Change Fields allows you to custom tailor the information that appears on the Position Page Select the desi...

Page 43: ...urrent speed all defaults A bearing pointer lets you know if you re heading toward your destination If the pointer points straight ahead you re heading directly to it If the pointer points any direction other than up turn toward the arrow until it points up then continue in that direction Each data field may be configured to display any one of twenty eight data options Zooming and Panning There ar...

Page 44: ... GOTO right from the Map Page To select an on screen airport or navaid with the panning pointer 1 Use the rocker keypad to highlight the desired item 2 To view additional database information about the selected item press ENTER MARK 3 To exit the information pages press QUIT To GOTO a highlighted waypoint 1 With the waypoint highlighted press GOTO NRST followed by ENTER The GOTO function can be us...

Page 45: ...data types including Average AVG Speed Bearing Distance ETA to Destination DEST Speed Time to Destination Track and a Trip Odometer See page 98 for descriptions of navigation terms To change a data field 1 Highlight Change Fields and press ENTER 2 Highlight the data field you wish to change and press ENTER 3 Select the type of data you want to appear on this field and press ENTER Measure Dist allo...

Page 46: ... Data Aviation Data Line Track Log Active Route Lines Lat Long Grid Lines Wpt User Waypoints Waypoint Text Active Route Wpts Apt Large Medium Small Airports and Text Nav VORs NDBs Intersections and Text Ctrl Controlled Airspace Class B C D SUA Special Use Airspace Restricted MOA Other City Large Medium Small Cities and Text Road Freeway Nat l Highway Local Highway Local Road Other States Prov Rive...

Page 47: ...rts navaids active route waypoints user waypoints state provincial bound aries rivers lakes and cities select the appropriate tab per the chart on page 38 and press ENTER Highlight the zoom field for the desired feature and press ENTER Select the maximum scale at which the feature should appear on screen or Off to never dis play and press ENTER Highlight the text field for the desired feature and ...

Page 48: ... adjustable for 0 25 1 25 or 5 0 nautical mile statute mile kilometer The default setting is 1 25 which represents the distance from the center of the CDI to full left or right limits To change the CDI scale use the IN OUT zoom keys As you reach your destination a TO FROM indicator at the center of the HSI will indicate waypoint passage Along the right hand side of the page top when display is ver...

Page 49: ...waypoint To maintain the OBS course and retain automatic sequencing you must also select the Release Hold option described on the following page To manually set a course to the destination waypoint 1 Highlight Set OBS and Hold and press ENTER An OBS data field will appear on the HSI display 2 Select the desired OBS course using the LEFT RIGHT keys on the rocker keypad and press ENTER The D bar on ...

Page 50: ...you to choose the data displayed on four user selectable data fields There are twenty nine available data types including Average AVG Speed Bearing Distance ETA at Destination DEST Speed Time to Destination DEST Track and a Trip Odometer See page 98 for descriptions of data terms To change a data field 1 Highlight Change Fields and press ENTER 2 Highlight the data field you wish to change and pres...

Page 51: ...ion and altitude to a final target altitude at a specified location Once the profile is defined message alerts and additional data on the HSI Page will keep you informed of your progress NOTE To use the vertical navigation feature your speed must be greater than 35 knots and you must be navigating to a GOTO destination or using a route When using the vertical navigation features a VNAV indicator m...

Page 52: ...ighted press ENTER Select Before or After and press ENTER This setting designates whether the offset distance defines a point before you reach the destination waypoint or after you reach the destination waypoint 7 When using a route the VNav Waypoint field allows you to specify which route waypoint will be used for the vertical navigation profile By default the GPS III Pilot will select the last w...

Page 53: ...will lock to prevent changes in speed from altering the profile At 500 feet above the target altitude an Approaching Target Altitude mes sage is provided The time to vertical navigation Time to VNV figure will go blank and the VNAV indicator will disappear from the HSI Page WARNING GPS accuracy may be degraded by the U S Department of Defense imposed Selective Availability SA program With SA on GP...

Page 54: ...ur intended course line Your course is represented by the center line down the middle of the graphic highway As you head toward your destination the highway perspective will move to indicate your progress to the waypoint and which direction you should steer to stay on course If you are navigating a route the highway display will show each route way point in sequence with the route course indicated...

Page 55: ... There are twenty seven available data types including Average AVG Speed Bearing Distance ETA at Destination DEST Speed Time to Destination DEST Track a Trip Odometer and a bearing pointer See page 98 for descrip tions of navigation terms To change a data field 1 Highlight Change Fields and press ENTER 2 Highlight the data field you wish to change and press ENTER 3 Select the type of data you want...

Page 56: ... approach departure arrival class B class C TMA CTA TRSA VOR Identifier city state facility name position freq indication of co located DME or TACAN NDB Identifier city state facility name position freq Int Intersection name region country nearest VOR User Wpt Name position user comments reference waypoint User List Name symbol total number of user waypts created To view waypoint information 1 Pre...

Page 57: ...es KLAX and JFK becomes KJFK Airport identifiers that use numbers such as H34 or 7M5 do not use the K prefix Some waypoints in the database may have the same identifier When you have entered a waypoint name that is not unique a Duplicate Waypoint Page appears prompting you to select the desired waypoint A list showing each duplicate by way point category and region country makes it easy to identif...

Page 58: ...h the rocker keypad Once the name appears on screen continue to press UP DOWN on the rocker keypad to view all entries for that name 4 When the desired waypoint is displayed press ENTER Airport Information Page The Airport Information Page displays the identifier facility name city position elevation and available fuels for the selected airport Position and elevation informa tion will be in the fo...

Page 59: ... ENTER Communication Information Page The Communication Information Page displays the identifier and radio frequen cies for the selected airport along with any usage restrictions which may apply to a given frequency When a frequency type is followed by an that frequency will have usage restrictions typically based upon sector and or altitude To view usage restrictions for a communication frequency...

Page 60: ...nd frequency for the selected NDB If the facility broadcasts weather information it will be indicated by a WX appearing next to the transmitting frequency Intersection Information Page The Intersection Information Page displays the identifier position region and country for the selected intersection The page also shows the bearing and distance to the nearest VOR facility NOTE The VOR displayed is ...

Page 61: ...nine nearest with identifier bearing to and distance NDBs nine nearest with identifier bearing to and distance Ints nine nearest with identifier bearing to and distance User Wpts nine nearest with name bearing to and distance ARTCC five nearest with bearing to distance and frequency s FSS five nearest with bearing to distance freq s and VOR for duplex operations Airspaces up to three depending on ...

Page 62: ... to the Nearest Page You can easily set a GOTO course directly to a nearest waypoint In an emergency a few simple keystrokes can guide you to the closest point to set down See page 61 for more detail about the GPS III Pilot s GOTO features To GOTO a nearest waypoint highlight the desired waypoint from the Nearest Page press GOTO NRST and ENTER Airspace information also includes the frequency s of ...

Page 63: ...art etc or by referencing bearing and distance from a previously stored waypoint or present position Average Position position samples can be averaged over time and the result saved as a user waypoint Averaging reduces the effects of selective availability and improves the accuracy of the position reading See page 33 for more info Marking Present Position The GPS III Pilot s mark feature lets you ...

Page 64: ...ypoint name and press ENTER when finished 5 To save the waypoint in memory highlight Done and press ENTER Creating User Waypoints by Text Entry User waypoints may be created by manually entering the position coordinates or by entering the bearing and distance from an existing waypoint or present position To create a new user waypoint by manually entering its coordinates or by bearing distance from...

Page 65: ...he new waypoint Remember to press ENTER once each data item is selected with the rocker keypad 8 To save the new waypoint in memory highlight Done and press ENTER Waypoint Options The Waypoint Options were displayed using the first three steps above In addition to New Waypoint there are additional options which vary depending on whether you are viewing Jeppesen database waypoints or user defined w...

Page 66: ...int Edit Page for a user waypoint 1 Press the rocker keypad to highlight the desired user waypoint on the map display and press ENTER Or 2 Highlight Waypoints from the Main Menu and press ENTER Select the desired file tab If User Wpt is selected press MENU select Edit Waypoint and press ENTER If User List is selected highlight the desired waypoint and press ENTER From the Waypoint Edit Page highli...

Page 67: ...e bearing or distance fields to change the reference waypoint information Press ENTER to begin editing 2 Use the rocker keypad to enter the new information Press ENTER to accept the new information A user waypoint s position may also be edited graphically using the map display To move a waypoint s position on the map display 1 From the Waypoint Edit Page press MENU to display the Waypoint Edit Opt...

Page 68: ...waypoint 1 Highlight Delete Waypoint and press ENTER A confirmation screen is displayed 2 ENTER to delete or QUIT to cancel Display Options lets you select how the highlighted user waypoint will appear on the map display Options are provided to show symbol name symbol comment or symbol only To change the display options for a user waypoint 1 Highlight Display Options and press ENTER 2 Highlight th...

Page 69: ...r after designating a position on the map display To GOTO a waypoint 1 Press GOTO NRST The GOTO page shows a series of file tabs for Recent waypoints User waypoints or Spell n Find 2 To GOTO a recently used waypoint select the Recent tab highlight the desired way point and press ENTER 3 To GOTO a user waypoint select the User tab highlight the desired waypoint and press ENTER 4 To enter the identi...

Page 70: ...lity name or city applicable to airports VORs and NDBs only 1 Press GOTO NRST and select the Spell n Find tab as described on the previous page 2 Highlight the facility name or city name field as desired and press ENTER 3 Use the rocker keypad to enter the facility name city As you enter the first few char acters the GPS III Pilot s Spell n Find feature will scroll through the database display ing...

Page 71: ...e way See page 64 for more information about TracBack Cancel GOTO cancels the current GOTO destination and resumes navigation of any previously selected route If no route is currently in use bearing distance etc will remain blank until a destination waypoint is defined To cancel the current GOTO destination highlight Cancel GOTO and press ENTER TracBack allows you to retrace your path based upon a...

Page 72: ... home airport before you get started To clear the track log and define the starting point for a TracBack route 1 Press MENU twice to display the Main Menu 2 Highlight Track Log and press ENTER 3 Highlight Clear Log and press ENTER 4 Press ENTER to delete the track log data or press QUIT to cancel To create and activate a TracBack route 1 Enable track log recording and leave the GPS III Pilot on to...

Page 73: ...k log closest to the destination Also existing track log waypoints that are not contained in any route will be erased to free more memory The GPS III Pilot will create the new waypoints using the first available three digit number If the Track Log Setup Page s interval field is set to Time the route may not fol low your exact path Keep the interval field set to Resolution for best results If the r...

Page 74: ...e 5 Highlight the first waypoint name field and press ENTER to begin entering the name of an existing waypoint in memory 6 Use the rocker keypad to enter the name of the route waypoint and press ENTER 7 Highlight the next waypoint name field press ENTER and repeat step 6 until all route waypoints have been added to the route Route List The GPS III Pilot s Route List displays all the routes current...

Page 75: ...ight the route name field top line and press ENTER to begin editing 4 Use the rocker keypad to enter the desired name and press ENTER when finished When a route is highlighted on the Route List additional functions are available from the Route Options To display the Route Options press MENU with the Route List displayed The following Route Options are available New Route allows you to create a new...

Page 76: ...lows you to remove the selected route from memory The waypoints contained in the route will still appear in memory but not as part of the route To delete a route from memory 1 Highlight Delete Route and press ENTER A confirmation page will appear 2 Press ENTER to delete the route or QUIT to cancel Delete All allows you to remove all routes from memory The waypoints con tained in all stored routes ...

Page 77: ...mediately follow the new route waypoint and press MENU A pop up menu appears with additional options Highlight Insert Wpt and press ENTER to display a blank line for the new waypoint Enter the name of the new waypoint and press ENTER 5 To delete a waypoint from the route highlight the waypoint you wish to delete and press MENU Highlight Remove Wpt on the pop up menu and press ENTER To edit a route...

Page 78: ... will show each waypoint by name of the active route along with the desired course distance to waypoint time to each waypoint fuel requirements or sunrise sunset times at each route waypoint As you navigate the route the informa tion on the Active Route Page will automatically update to indicate the destination waypoint and any remaining interim waypoints From the Active Route Page you can change ...

Page 79: ... 3 Enter an hourly fuel flow if desired in the fuel field using the same steps above 4 Enter the date and time of departure the current date time will be offered automatical ly using the same steps above 5 Press QUIT to return to the Active Route Page and use the LEFT RIGHT portion of the rocker keypad to select the planning figures to the immediate right of each listed route waypoint s identifier...

Page 80: ...ot available See page 69 for route editing information Review Wpt allows you to view the Waypoint Definition Page for the cur rently highlighted waypoint in the route If no route waypoint is highlighted this option is not available See page 48 for waypoint review information Delete Route allows you to remove the current route from memory The way points contained in the route will still appear in m...

Page 81: ...ows you to review database information and create edit delete user waypoints See pages 48 52 and pages 55 59 Routes allows you to create edit activate or delete routes See pages 66 70 Track Log lets you specify whether or not to record a track log an electronic breadcrumb trail recording of your path and defines how it is recorded This submenu page also provides an indicator of the percentage of t...

Page 82: ...the most efficient use of memory and TracBack performance The distance value entered in the Interval Value field is the maximum left right deviation allowed from the last defined ground track before recording a new point Distance Records track log based on a user defined distance between points Interval Value defines the distance or time interval used to record the track log Clear Log allows you t...

Page 83: ...d winds aloft The winds aloft function will calculate wind direction speed and the head tail wind component To calculate density altitude and true airspeed 1 Select the Density Altitude file tab using the rocker keypad 2 Highlight the Indicated Altitude field and press ENTER Enter the altitude from your altimeter and press ENTER 3 Highlight the Calibrated Airspeed field and press ENTER Enter the a...

Page 84: ...reviously determined on the Density Altitude page the calculated figure will automatically appear here as the default 4 The Head Tail Wind Wind From and Wind Speed figures will appear at the bottom of the page Setup provides a group of pages to perform various system setup functions including selection of position format units of measure setting various alarms con figuring the display and backligh...

Page 85: ...rspace alarms for Class B Class C Class D Restricted Areas MOAs Other SUAs and Mode C Veils Altitude buffer above below airspace limits Nearest Runway surface type and Minimum Runway Length for nearest airport search Position Position Format latitude longitude UTM UPS Maidenhead regional grids Map Datum selection Interface Format NMEA RTCM GARMIN proprietary Mode setting for use with PC or a secon...

Page 86: ...nly available when Track Control is set to User Track Altitude allows you to specify a user defined altitude for your simulated position To select a simulator setting 1 For track control highlight the Track Control field and press ENTER Select Auto Track or User Track and press ENTER 2 For simulated speed user track or altitude highlight the desired field and press ENTER Enter the desired value us...

Page 87: ...ng ensures accurate readings from the battery gauge on the Satellite Status Page see page 29 Contrast lets you adjust the screen for optimum viewing in all lighting conditions Screen contrast is set using an on screen bar scale Contrast can also be set from the Satellite Status Page as described on page 27 To set the screen contrast 1 Highlight the Contrast field and press ENTER 2 Use the LEFT RIG...

Page 88: ...nches or Millibars Temperature lets you select temperature readouts in degrees Fahrenheit or Celsius To select a units setting 1 Highlight the desired field and press ENTER to display the available options 2 Select the desired option and press ENTER 3 If User Mag Var is selected in the Heading field highlight the heading reference field immed iately to the right and press ENTER Enter the magnetic ...

Page 89: ...onfirm Battery Timer provides a running count of how long the GPS III Pilot has been in operation with the current batteries The timer automatically stops when using an external power source The timer will automatically reset when depleted batteries are replaced but can also be manually reset To select a battery timer setting 1 Highlight the Battery Timer field in the right hand column and press E...

Page 90: ...is the difference in hours and minutes between local time and UTC time To enter the local time zone 1 Highlight the Local Time Zone field and press ENTER 2 Select the desired offset amount in hours and minutes using the rocker keypad and press ENTER 3 Highlight the offset direction field immediately to the right and press ENTER 4 Select Behind UTC or Ahead of UTC as appropriate and press ENTER Tim...

Page 91: ...an Arrival at ____ message occurs when you are within the alarm distance you entered Off Course Alarm provides an alarm message Off Course Alarm when you deviate off course beyond the specified limits To set the arrival and or off course alarms 1 Highlight the Arrival Alarm or Off Course Alarm field and press ENTER 2 Select On or Off as desired and press ENTER 3 If enabling the alarm highlight the...

Page 92: ...n added margin of safety For example if the buffer is set at 500 feet and you are more than 500 feet above or below an airspace you will not be notified with an alert message If you are less than 500 feet from the floor ceiling limits of the airspace you will be notified with an alert message The default setting for the altitude buffer is 200 feet To turn an airspace alarm on or off and enter an a...

Page 93: ...altitude below the upper limit However if the actual upper limit is also charted in AGL the GPS III Pilot will provide the alert at all altitudes Nearest Settings Runway Surface determines which surface type or types will be included when display ing nearest airports on the Nearest Page Available types include Any includes water landing facilities Hard Only surface Hard or Soft surface and Water O...

Page 94: ...the datum if you are using a map or chart that specifies a different datum If no datum is specified you may select each datum applicable to your region until you find the datum that provides the best positioning at a known point WARNING Selecting the wrong map datum can result in substantial position errors When in doubt use the default WGS 84 datum for best overall performance To change the posit...

Page 95: ...nd press ENTER 2 Select the desired setting and press ENTER 3 If the GARMIN format is selected highlight the Transfer Mode field and press ENTER Select the desired setting and press ENTER The Transfer Mode field allows you to specify what infor mation to request or send to a second GPS III Pilot The Host setting lets you control all data transfer functions from the second GPS III Pilot or from a P...

Page 96: ...sired mounting surface and press into place 4 Place the adhesive side of the smooth piece of Velcro on the bottom of the unit between the rubber anti skid bumps and press into place 5 Mount the unit placing one piece of Velcro on top of the other To mount the GPS III Pilot using the bracket 1 Select a location for the unit that provides a clear and unobstructed view of the sky for the GPS antenna ...

Page 97: ...o place in the upper bracket and snap the thumb tab clips into the notches on the top of the GPS III Pilot 4 For additional security place the 3mm locking knob into the hole at the rear of the upper bracket and GPS III Pilot Use only the knobs supplied Using incorrect hardware may damage the mount and or GPS III Pilot To reassemble the bracket and adjust viewing angle 1 Match the pin holes on the ...

Page 98: ...ther solvents to come into contact with the case To clean the case and lens use a soft cloth and a household window cleaner PHYSICAL Case Fully gasketed high impact plastic alloy waterproof to IPX7 standards Size 6 15 H x 2 W x 1 23 D 15 6 x 5 1 x 1 23 cm Weight Approx 9 ounces 255g w batteries Temperature Range 5 to 158ºF 15º to 70ºC Memory Back Up Internal Lithium Battery PERFORMANCE Receiver Di...

Page 99: ...con receiver for use with the GPS III Pilot Other beacon receivers with the correct RTCM format may be used but may not correct ly display status or allow tuning control from the GPS unit The GPS III Pilot may be hard wired to a vehicle s electrical system 10 32 VDC using an optional power data cable Consult the wiring diagram to the right for proper connections The male connector on the back of t...

Page 100: ...hable antenna up to 6 feet away from the GPS III Pilot unit using a suction cup mount This mount should only be used inside a vehicle GA 26 Remote Antenna allows you to mount an amplified antenna outside the vehicle up to 8 feet away using supplied magnetic or suction cup mounts Trunk lip and permanent flange mounts are also available GA 56 Low Profile Antenna allows you to permanently mount an am...

Page 101: ...sources to verify the position indicated Inside Airspace Your aircraft has entered the boundaries of special use or controlled airspace Leg not Smoothed The upcoming route leg is too short for smooth waypoint transitions Memory Battery Power Low The battery that sustains user memory is low and should be replaced by an authorized service center as soon as possible Failure to do so may result in los...

Page 102: ...ed to add more than 30 waypoints to a route Route Memory Full Route memory is full and no additional routes can be added from another GPS III Pilot or uploaded from a PC Route Waypoint Deleted A route waypoint entered does not exist in the database and has been deleted from the route Route Waypoint Locked A route waypoint was locked when the data base was updated since the waypoint does not exist ...

Page 103: ...sia CH 1903 CH 1903 Switzerland Chatham 1971 Chatham 1971 Chatham Island New Zealand Chua Astro Chua Astro Paraguay Corrego Alegr Corrego Algre Brazil Djakarta Djakarta Batavia Sumatra Island Indonesia Dos 1968 Dos 1968 Gizo Island New Georgia Islands Easter Isld 67 Easter Island 1967 European 1950 European 1950 Austria Belgium Denmark Finland France Germany Gibraltar Greece Italy Luxembourg Nethe...

Page 104: ...land NAD27 Canada North American 1927 Canada and Newfoundland NAD27 Canal Zone North Am 1927 Canal Zone NAD27 Caribbn North American 1927 Caribbean Barbados Caicos Islands Cuba Dom Rep Grand Cayman Jamaica Leeward and Turks Islands NAD27 Central North American 1927 Central America Belize Costa Rica El Salvador Guatemala Honduras Nicaragua NAD27 CONUS North Am 1927 Mean Value NAD27 Cuba North Ameri...

Page 105: ...Sapper Hill 43 Sapper Hill 1943 East Falkland Island Schwarzeck Schwarzeck Namibia Sth Amrcn 69 South American 69 Argentina Bolivia Brazil Chile Colombia Ecuador Guyana Paraguay Peru Venezuela Trinidad and Tobago South Asia South Asia Singapore SE Base Southeast Base Porto Santo and Madiera Islands SW Base Southwest Base Faial Graciosa Pico Sao Jorge and Terceira Islands Azores Timbalai 1948 Timba...

Page 106: ...ition and altitude to the target altitude at the location specified in the Vertical Nav settings Leg Dist The distance between two route waypoints Leg Fuel The fuel required to travel from a route waypoint to the next waypoint in sequence in the route Leg Time The time required to travel from a route waypoint to the next waypoint in sequence in the route Max Speed The maximum second by second spee...

Page 107: ...to a ground position Also referred to as ground track Trip Odometer A running tally of distance travelled since last reset Also see Odometer Turn The angle difference between the bearing to your destination and your current track L indicates you should turn left R indicates you should turn right The degrees indicate the angle you are off course VMG Velocity Made Good The speed you are closing in o...

Page 108: ...11 Bug Indicator 22 40 C Cancel GOTO 16 Cautions ii Cities on Map 39 Contrast 8 27 Course 98 Course Error 98 Cursor 2 D D bar 11 Data Entry 2 Database Info viewing 14 Date and Time Setup 82 Default 2 Dilution of Precision DOP 30 Distance 98 E E6B 75 Enter Mark Key 2 Estimated Position Error EPE 30 Estimated Time of Arrival ETA 98 F Field 2 G GOTO Function 15 21 36 61 62 GOTO Nrst Key 2 GOTO Option...

Page 109: ...5 NMEA Output Formats 87 O Off Course 83 98 Offset local time 82 Odometer 72 Output Setup 87 P Package Contents i Page Key 1 2 7 Page Sequence 7 Panning 20 35 36 Pointer Arrow 11 Position Averaging 33 Position Format 86 Position Page 9 32 Position Page Options 33 34 Power Key 1 2 Power Off 2 6 Power On 2 5 17 Q Quit Key 1 2 7 R Railroads on Map 30 Receiver Status 8 27 29 Reference Waypoints 57 Riv...

Page 110: ...g 70 71 Troubleshooting 6 Turn 98 U Unit Features 1 Units of Measure 80 UTC time 82 UTM Coordinates 86 V Velocity Made Good VMG 98 Vertical Navigation VNAV 44 45 75 W Warranty iv Waypoints 48 60 Categories 48 Comments 59 Create By Text 56 Create On Map 56 Deleting 58 60 Deleting All 58 Deleting by Symbol 58 Editing 58 59 Editing Options 60 Going to 21 Information Pages 20 49 52 List Options 57 58 ...

Page 111: ...GPS III Pilot B2 4 1 99 2 02 PM Page 103 ...

Page 112: ... KS 66062 USA GARMIN Europe Ltd Unit 5 The Quadrangle Abbey Park Industrial Estate Romsey SO51 9AQ UK GARMIN Asia Corp 3F No 1 Lane 45 Pao Hsing Road Hsin Tien Taipei Taiwan R O C Web Site Address www garmin com Part Number 190 00127 00 Rev B GPS III Pilot B2 4 1 99 2 02 PM Page 104 ...

Reviews: