background image

Reference

44


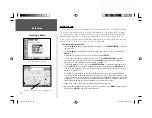
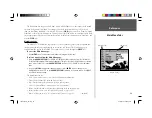
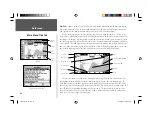
Main Menu: Tide Tab

Tide Tab—

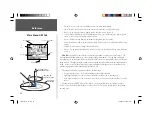
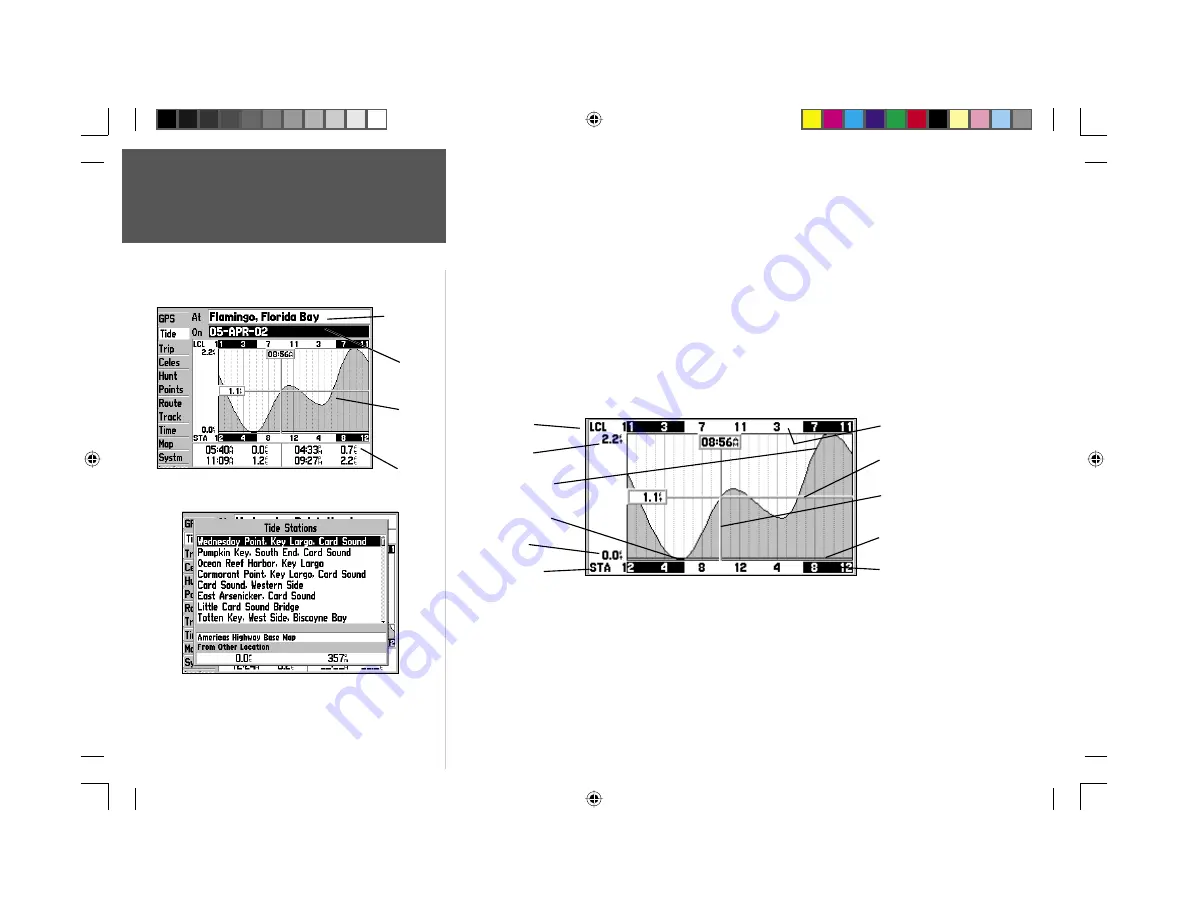
 shows a graphical chart which displays tide station information in a 24 hour span starting 

at midnight station time. You can choose from different dates and over 3000 tide stations around the 
USA coastline, Alaska, Hawaii, Western Canada and several of the Caribbean Islands.

The top of the page displays the tide station being referenced, below that the date. The top of the 

chart shows a 24-hour block of local time (LCL) for your position, with the reported station time (STA) 
appearing at the bottom.  Daytime (light bar) and nighttime (dark bar) show across the time scale, with 
the time progressing from left to right (local time scales and sunrise/sunset info may not be available for 
a few stations).  The solid, light vertical lines represent 4-hour increments, and the light, dotted vertical 
lines are 1-hour increments.  A gray, vertical line (with a block at the top displaying time) indicates the 
time of day when using current date and will intersect the tide graph to show their relation.

The tide curve shows as a shaded area, with higher tides being taller and lower tides shorter.  The 

gray, horizontal line (with a block at the left displaying depth) indicates the current tide height.  The 
Mean Lower Low Water (MLLW) appears as a solid, horizontal line near the bottom of the chart (this 
line only appears if the tide ranges to the zero value or below).  The numbers directly below/above ‘LCL’ 
and ‘STA’ indicate the maximum/minimum levels, respectively.  The four data fi elds below the chart, 
indicate event times and levels at which the tide changes starting in the upper left fi eld, going down-
ward, then to the upper right and down again. 

Tide Tab

Station
Name

Date

Tide
Chart

Event
Times

Select from a list of tide stations.

Local Time

Station Time

Day

Night

MLLW

Current Time Bar

Max. Level

Min. Level

Current Tide Height Bar

High Tide Curve

Low Tide Curve

190-00185-10_0A.indd   44

6/18/2002, 10:00:54 AM

Summary of Contents for GPSMAP 176

Page 1: ...owner s manual and reference guide chartplotting receiver GPSMAP 176C 176 176 manual cover indd 1 6 18 2002 10 05 03 AM...

Page 2: ...iewed and to print one copy of this manual or of any revision hereto provided that such electronic or printed copy of this manual must contain the complete text of this copyright notice and provided f...

Page 3: ...ort Help us better support you by completing our on line registration today Have the serial number of your GPSMAP 176 handy and connect to our website www garmin com Look for the Prod uct Registration...

Page 4: ...ions However there is no guarantee that interference will not occur in a particular installation If this equipment does cause harmful interference to radio or television reception which can be determi...

Page 5: ...is the property of GARMIN and is protected under the United States of America copyright laws and international copyright treaties You further acknowledge that the structure organization and code of th...

Page 6: ...responsibility to use this product prudently This product is intended to be used only as a navigational aid and must not be used for any purpose requiring precise measurement of direction distance lo...

Page 7: ...ve right to repair or replace the unit or software or offer a full refund of the purchase price at its sole discretion SUCH REMEDY SHALL BE YOUR SOLE AND EXCLUSIVE REMEDY FOR ANY BREACH OF WARRANTY To...

Page 8: ...c alloy case waterproof to IEC 529 IPX 7 Advanced Navigating and Plotting 3000 alphanumeric waypoints with selectable icons and comments Built in Americas basemap includes detailed ocean river and lak...

Page 9: ...Proximity Waypoints List 24 Going To A Destination 26 Selecting a Go To Graphically 26 TracBack Navigation 27 MOB Man Overboard 29 Creating a Route 30 Following a Route 31 Route List Page 32 Route Rev...

Page 10: ...e 30 31 Go to a Destination 26 31 Initialize the GPS Receiver 1 2 Learn about the Map Page 3 6 Mark your Current Location as a Waypoint 17 Project a Waypoint 19 Set Alarms 56 Set Up Loran TD 66 67 Use...

Page 11: ...ove the unit several hundred miles between uses the Almanac can become cold which means the orbital data is no longer valid If the Almanac is cold your unit may take longer to lock on to satel lites w...

Page 12: ...ns Automatic or Use Map If Automatic is selected the unit switches to AutoLocate mode and begins searching for satellites If Use Map is selected use the pointer on the Map page to select your approxim...

Page 13: ...wer up in the position mode with the last known location cen tered on the map display When the ARROW KEYPAD is pressed the GPSMAP 176 will enter cursor mode When the cursor is active an additional dat...

Page 14: ...the top of the screen To view additional details about an on screen waypoint or map item 1 With the desired waypoint or map item highlighted press ENTER 2 If the item is a waypoint the Waypoint Review...

Page 15: ...ROW KEYPAD to highlight Create Waypt and press ENTER 3 The New Waypoint window will appear With OK highlighted press ENTER to con rm the new waypoint using the default name and symbol based on the map...

Page 16: ...special features that speci cally relate to that page The data window located at the right side of the display provides a user selectable layout of various types of useful data Each data eld may be c...

Page 17: ...h ENT REF below it 2 Move the cursor to the desired reference point the point that you want to measure from and press ENTER 3 Move the cursor to the point you want to measure to The bearing and distan...

Page 18: ...QUIT The following options are available for display in data elds on the main pages ACCURACY Estimated accuracy of GPS position BEARING Compass direction from your position to destination COURSE Desir...

Page 19: ...NMEA data from other device WATER TEMP Water temperature if receiving proper sonar NMEA data from other device Set Up Map jumps to the Map tab of the Main Menu allowing you to con gure the map displa...

Page 20: ...point Map Tab Basemap On Off turns the built in basemap on or off Data Card Maps On Off turns all optional BlueChart MapSource data on or off Lat Lon Grid Off Auto 20 ft 800 mi sets the maximum scale...

Page 21: ...ars on the screen The Course Line shows a direct navigation line from the point navigation was initiated to a destination waypoint Track Tab Track Log Saved Tracks Zoom Auto Off 120 ft 800 mi sets the...

Page 22: ...and Off The circle represents the approximate accu racy of the unit based on EPE DOP and basemap quality You position will be within the circle Lock to Roads On Off This feature is only available if M...

Page 23: ...GPSMAP 176 s Compass Page will guide you to your destination with digital readouts and a graphic compass display which includes a bearing pointer Use this page instead of the Highway Page when travell...

Page 24: ...option and press ENTER For detailed instructions on changing the data elds and layout of the Compass Page see pages 8 9 Highway Page Whenever a Go To TracBack or Route has been activated the GPSMAP 1...

Page 25: ...des The GPSMAP 176 s Highway Page options allows you to de ne the data elds and select which waypoints and track are displayed on screen The data window located along the right side of the page provid...

Page 26: ...aved Tracks will be displayed on the Highway Page The Waypoint Tab determines if the Next Route or Other Waypoints will be displayed on the Highway Page For an item to be displayed the setting must be...

Page 27: ...n be determined by looking at the GPS tab on the Main Menu To mark your present position 1 Press and hold the ENTER key until the New Waypoint window appears then release it You will see a default thr...

Page 28: ...pear To accept the waypoint with the default name and symbol highlight OK and press ENTER To change the name symbol position or enter comments elevation or depth highlight the appropri ate eld and pre...

Page 29: ...ypoint may also be created by projecting the distance and bearing from a speci c location to a new location Start by accessing the New Waypoint page or the New Map Waypoint page To create a new waypoi...

Page 30: ...lates for a more accurate position reading To calculate the average location 1 Select Average Location from the options menu 2 The Average Location screen appears Watch as the elds change as the unit...

Page 31: ...the name symbol comment position coordinates or depth for the selected waypoint Once the changes have been made highlight OK Waypoint Review Page or Next Waypoint Edit Page and press ENTER to save th...

Page 32: ...ur current position 2 To move the waypoint press ENTER A MOVE label will now appear under the cursor arrow It may be necessary to use the IN and OUT keys to zoom the map 3 Use the ARROW KEYPAD to move...

Page 33: ...he bottom of the User page with the stored waypoints arranged in numerical alphabetical order To scroll through and review the waypoint list 1 With the ARROW KEYPAD highlight the Points tab on the Mai...

Page 34: ...3 Highlight the OK prompt and press ENTER to con rm Proximity Waypoint List The Proximity submenu of the Points tab lets you de ne an alarm circle around a stored waypoint position and can be used to...

Page 35: ...ximity Alarm and press ENTER 2 Select the desired ON or OFF setting and press ENTER The following options are available from the Proximity submenu of the Points tab Remove Point removes selected waypo...

Page 36: ...nts such as Cities Tide Stations etc from this list 4 Select a waypoint from the By Name or Nearest list then press ENTER This will display the Waypoint Review Page 5 With the Go To button highlighted...

Page 37: ...cBack routes are created by reducing your track log into a route of up to 50 turns and activating an inverted route along those points Once activated a TracBack route will lead you back to the oldest...

Page 38: ...press ENTER to save the track Press QUIT to exit To activate a TracBack using the NAV key 1 Press the NAV key then highlight the Navigate Track option and press ENTER 2 Highlight the track you wish to...

Page 39: ...n and press ENTER For more information on setting up the Track options and saved tracks see pages 447 48 MOB The GPSMAP 176 s Man OverBoard function MOB lets you simultaneously mark and set a course t...

Page 40: ...een and press ENTER Map items will not appear in the waypoint list To create a waypoint from a map item see page 18 4 To add a new waypoint to the route use the ARROW KEYPAD to select the desired map...

Page 41: ...iew page With OK highlighted press ENTER to add the point to the route 7 Repeat steps 4 6 until the desired route points have been entered Press QUIT to return to the Route List page Following a Route...

Page 42: ...oute 1 Press the NAV key highlight Stop Navigation and press ENTER To copy or delete a route 1 From the Route List use the ARROW KEYPAD to highlight the route you want to copy or delete and press MENU...

Page 43: ...the Point Review window you may choose Next highlight the next point on the route list Show Map show the point on a map window or Delete permanently deletes the waypoint from the unit and press ENTER...

Page 44: ...route point 1 Highlight the Remove option and press ENTER To move a route waypoint 1 Highlight the Move option and press ENTER 2 Move the cursor to the new map position and press ENTER To add points t...

Page 45: ...or Active Route Page use the ARROW KEYPAD to highlight the point you wish to insert the new point before To add a point to the end highlight the blank eld at the bottom of the list and press MENU 2 Hi...

Page 46: ...select the desired item 3 To enter planning information from the Route Review Page only press MENU and select Plan Route from the options list Enter the gures for Speed Fuel Flow Departure Time and D...

Page 47: ...l automatically update to indicate the next active point rst The Active Route and Route Review Pages share many of the same features and options The following route options are available from the Acti...

Page 48: ...ypoint or item from another location 1 Once the search results list for a particular item is displayed press MENU Highlight Nearest to Other and press ENTER If you are actively following a route you m...

Page 49: ...select a menu tab from the Main Menu page 1 Move the ARROW KEYPAD UP or DOWN to highlight the tab you want to view The information for the highlighted tab will automatically appear to the right If yo...

Page 50: ...ars give an indication of what satellites are visible to the receiver and whether or not they are being tracked The signal strength is shown on a bar graph for each satellite with the satellite number...

Page 51: ...tic Ocean and one over the Paci c Ocean in a geo stationary orbit over the equator Effective use of the WAAS satellite signal may be limited by your geographic location in relation to those satellites...

Page 52: ...llecting data from satellites visible at its last known or initialized position but has not collected enough data to calculate a x 2D GPS Location at least three satellites with good geometry have bee...

Page 53: ...Off The SNR will depend upon the mounting of your DGPS receiver and the distance from the DGPS transmitting station The GPSMAP 176 s GPS Info tab features an options page that provides access to func...

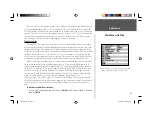
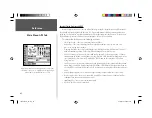
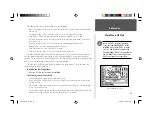
Page 54: ...ertical line with a block at the top displaying time indicates the time of day when using current date and will intersect the tide graph to show their relation The tide curve shows as a shaded area wi...

Page 55: ...arest to Other and press ENTER 3 Use the ARROW KEYPAD to select a position on the map with the Map Pointer and press ENTER 4 Select the desired station from the list and press ENTER to view the Inform...

Page 56: ...played on the Celes tab See pages 38 39 for more information on using the Find feature The location the unit is using will appear in the Date Time Position eld The timetables displayed will be based u...

Page 57: ...d a track log an electronic bread crumb trail recording of your path de ne how it is recorded or save track log data for future use The Track Tab also provides an indicator of the memory used for the...

Page 58: ...Back activation and map display of saved logs The active log stores up to approximately 2500 track log points based upon the criteria speci ed in the Track settings Up to 15 track logs may be saved in...

Page 59: ...mode WAAS backlight timeout beeper speed lter languages and current power status external power or battery scale The following settings are available System Mode select from Normal Normal Navigation o...

Page 60: ...ts are available hddd ddddd latitude longitude in decimal degrees only hddd mm ss s latitude longitude in degrees minutes seconds UTM UPS Universal Transverse Mercator Universal Polar Stereographic gr...

Page 61: ...eadings based upon a true north reference Grid provides headings based on a grid north reference and is used in conjunction with the grid position formats described on page 50 User Mag Var allows you...

Page 62: ...f Garmin Data Transfer the proprietary format used to upload download MapSource data exchange waypoint route track almanac and proximity data with a PC or another GARMIN GPSMAP 176 When you select Gar...

Page 63: ...rol a GARMIN differential beacon receiver directly from your GPSMAP 176 You may have the unit automatically scan for the DGPS beacon signal or you can enter the beacon frequency and bit rate on the un...

Page 64: ...DGPS receiver When the unit is receiving a DGPS signal the SNR Signal to Noise Ratio and Distance elds will show data The SNR range is 0dB to 30dB with 30 being the best The Distance may or may not s...

Page 65: ...at two seconds If the unit is set up to output all of the available NMEA sentences the output rate may exceed two seconds The Advanced NMEA Output Setup page will allow you to turn on off the GPS stat...

Page 66: ...d turn the alarm on and off from the control eld menu Remember to enter alarm times in the same time format UTC or local you re using for your system The unit must be on for the clock alarm to work Sh...

Page 67: ...the battery compartment and data card slot remove the batter ies when storing the unit for more than six months Do not store the GPSMAP 176 where prolonged exposure to temperature extremes may occur...

Page 68: ...rted for connection of external devices GARMIN proprietary Differential GPS DGPS NMEA 0180 0182 0183 versions 1 5 2 0 2 3 ASCII Text Output RTCM SC 104 input version 2 0 The following are the sentence...

Page 69: ...5 11 W157 5 to W142 5 10 W142 5 to W127 5 9 W127 5 to W112 5 8 W112 5 to W097 5 7 W097 5 to W082 5 6 W082 5 to W067 5 5 W067 5 to W052 5 4 W052 5 to W037 5 3 W037 5 to W022 5 2 W022 5 to W007 5 1 W00...

Page 70: ...zo Island New Georgia Islands Dutch Dutch Easter Isld 67 Easter Island 1967 European 1950 European 1950 Austria Belgium Denmark Finland France Germany Gibraltar Greece Italy Luxembourg Netherlands Nor...

Page 71: ...an Scotland Shetland Isl Wales Pico De Las Nv Canary Islands Potsdam Potsdam Germany Prov S Am 56 Prov So Amricn 56 Bolivia Chile Colombia Ecuador Guyana Peru Venezuela Prov S Chln 63 So Chilean 63 S...

Page 72: ...e of Arrival The estimated time you will reach your destination waypoint based on current speed and track ETA at Dest The estimated time you will reach a GOTO destination or the nal waypoint in a rout...

Page 73: ...commended direction to steer in order to reduce course error or stay on course Provides the most ef cient heading to get back to the desired course and proceed along your route Track The direction of...

Page 74: ...e Anchor Alarm is exceeded Lost Satellite Reception The unit is unable to continue receiving satellite signals Memory Full Unit memory is full no further data can be saved Near Proximity Point You hav...

Page 75: ...the track log and turn track recording on This will only be displayed when the track recording setting is set to Stop When Full Track Memory Full No more track data can be stored without deleting old...

Page 76: ...ode it simulates the operation of a LORAN receiver Position coordinates may be displayed as TDs and all navigation func tions may be used as if the unit was actually receiving LORAN signals Using the...

Page 77: ...anged since the waypoint was created the waypoint will now reference the active GRI chain and secondary stations and adjust the TD coordinates accordingly Remember that the GPS is not relying on the L...

Page 78: ...nufacturers have not been tested or approved for use with GARMIN products Use of such accessories could cause damage to the GPSMAP 176 and void the warranty MapSource Software CD ROMs Enhance the base...

Page 79: ...the Marine Mount Kit includes the mounting base temporary and permanent adhesive pads and a swivel bracket Non Skid Friction Mount Portable vehicle mount no installation required Carrying Case Protect...

Page 80: ...t Approx 5 minutes First Time AutoLocate Update Rate 1 second continuous GPS Accuracy 15 meters 49 feet RMS 95 typical DGPS USCG Accuracy 3 5 meters 10 16 ft 95 typical DGPS WAAS Accuracy 3 meters 10f...

Page 81: ...se Line 11 Cursor Movement 3 5 D Data Card Info 10 12 13 Data Transfer 52 58 Date Time 49 Datum Map 50 51 60 61 Daylight Savings Time 49 Declutter On Off 13 Deep Water Alarm 56 Depth Units 52 DGPS 42...

Page 82: ...Configuration Setup 7 13 Cursor 3 5 Data Fields 8 Options 6 13 Scales Zooming 5 6 Measure Distance Bearing 7 Messages 64 65 MOB Key 29 Moonrise Moonset 4 6 N NAV Key 2 6 Navigation Terms 62 63 NMEA O...

Page 83: ...System Mode 49 T Table of Contents vii Temperature Units 52 Tide Page 44 45 Time Format 49 Time Offsets 59 Time Zone 49 Time Daylight Savings 49 Timers Trip 46 TracBack Activating 27 29 48 Track Show...

Page 84: ...Notes 190 00185 10_0A indd 74 6 18 2002 10 01 21 AM...

Page 85: ...176 manual cover indd 3 6 18 2002 10 05 59 AM...

Page 86: ...The Quadrangle Abbey Park Industrial Estate Romsey SO51 9AQ U K GARMIN Corporation No 68 Jangshu 2nd Road Shijr Taipei County Taiwan www garmin com Part Number 190 00185 10 Rev A For the latest free...

Reviews: