GPSMAP
®
4000/5000 Series Owner’s Manual
3
Using Radar
Using
Radar
Using Radar
When you connect your chartplotter to an optional Garmin marine radar such as a GMR 404/406
or a GMR 18, you can view more information about your surroundings. The Garmin marine radar
connects through the Garmin Marine Network and shares radar data with all networked chartplotters.
The Garmin marine radar transmits a narrow beam of microwave energy as it rotates in a 360º
pattern. When the transmitted energy contacts a target, some of that energy is reflected back to the
radar.
WARNING:
The marine radar transmits microwave energy that has the potential to be harmful to
humans and animals. Before beginning radar transmission, verify that the area around the radar is clear.
The radar transmits a beam approximately 12° above and 12° below a line extending horizontally from
the center of the radar. Avoid looking directly at the radar, because the eyes are the most susceptible part
of the body.
To turn on the radar:
1. When you power the network on, the radar warms up. A countdown is provided to alert you when
the radar is ready. From the Home screen, select
Radar
>
Cruising
for Cruising mode, or select
Radar
>
Sentry
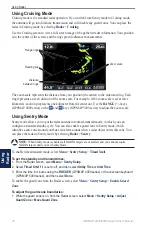
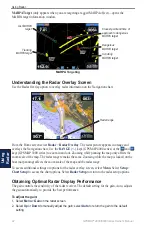
for Sentry mode. See
for more information on Cruising and Sentry
modes.
NOtE:
As a safety feature, the radar enters standby mode after it warms up. This gives you an
opportunity to verify that the area around the radar is clear before beginning radar transmission. The
microwave energy transmitted by the radar can potentially be harmful to humans and animals.
2. When the message “Ready to Transmit” appears, select
Menu
.
3. On the lower-right portion of the screen, select
Transmit Radar
. A “Spinning Up” message
appears for a few moments, then the radar begins painting an image.
To turn off the radar:
1. Press and release the
Power
key on the chartplotter (do not hold the button, or you may shut
down the chartplotter), or select
Menu
.
2. Select
Radar to Standby
.
Summary of Contents for GPSMAP 4010
Page 1: ...GPSMAP 4000 5000 Series owner s manual ...
Page 65: ......
Page 66: ......
Page 67: ......


