Force
®
Trolling Motor Control
WARNING
Do not run the motor when the propeller is out of the water. Contact with the rotating propeller may result in
severe injury.
Do not use the motor in areas where you or other people in the water may come into contact with the rotating
propeller.
Always disconnect the motor from the battery before cleaning or servicing the propeller to avoid injury.
You are responsible for the safe and prudent operation of your vessel. The autopilot features on the trolling
motor are tools that enhance your capability to operate your boat. They do not relieve you of the responsibility
of safely operating your boat. Avoid navigational hazards and never leave the motor controls unattended.
Learn to operate the autopilot on calm and hazard-free open water.
Use caution when operating the autopilot near hazards in the water, such as docks, pilings, and other boats.
CAUTION
When using the autopilot features, be prepared for sudden stops, acceleration, and turns.
When stowing or deploying the motor, be aware of slick surfaces around the motor. Slipping when stowing or
deploying the motor may result in injury.
You can connect the Force trolling motor to the chartplotter to view and control the motor using the
chartplotter.
Connecting to a Trolling Motor
You can connect the chartplotter wirelessly to a compatible Garmin Force trolling motor on your boat to control
the trolling motor from the chartplotter.
1 Turn on the chartplotter and the trolling motor.
2 Enable the Wi‑Fi network on the chartplotter (
Setting Up the Wi‑Fi Wireless Network, page 21
).
3 If multiple chartplotters are connected on the Garmin Marine Network, make sure this chartplotter is the
host of the Wi‑Fi network (
Changing the Wi‑Fi Host, page 21
).
4 On the chartplotter, select Settings > Communications > Wireless Devices > Garmin Trolling Motor.
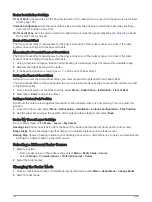
5 On the trolling motor display panel, press three times to enter pairing mode.
on the trolling motor display panel is solid blue as it searches for a connection to the chartplotter, and
turns green when the connection is successful.
After the chartplotter and trolling motor connect successfully, enable the trolling motor overlay bar to control
the motor (
Adding the Trolling Motor Controls to Screens, page 109
).
Adding the Trolling Motor Controls to Screens
After you have connected the chartplotter to the Force trolling motor, you must add the trolling motor control
bar to screens to control the trolling motor.
1 Open a screen from which you would like to control the trolling motor.
2 Select an option:
• From a combination page or SmartMode layout, select Menu > Edit > Overlays.
• From a full screen, select Menu > Edit Overlays.
3 Select Top Bar or Bottom Bar.
4 Select Trolling Motor Bar.
Repeat these steps to add the trolling motor controls to all of the screens from which you would like to control
the trolling motor.
Force
®
Trolling Motor Control
109


