190-01007-A1
System Maintenance Manual GTN 6XX/7XX Part 23 AML STC
Rev. 5
Page 6-1
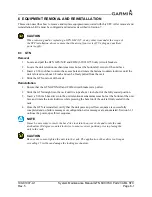
6 EQUIPMENT REMOVAL AND REINSTALLATION
This section describes how to remove and replace equipment associated with this STC. After removal and
reinstallation, LRUs must be configured and tested as described in Section 7.
CAUTION
When removing and/or replacing a GTN, GMA 35, or any other item under the scope of
the STC installation, always ensure that the aircraft power is off. Unplug any auxiliary
power supply.
6.1 GTN
Removal
1. Locate and pull the GTN GPS/NAV and COM (635/650/750 only) circuit breakers.
2. Locate the unit retention mechanism access hole at the bottom left corner of the unit face.
3. Insert a 3/32-inch hex tool into the access hole and rotate the fastener counterclockwise until the
unit is forced out about 3/8 inch and can be freely pulled from the rack.
4. Slide the GTN unit out of the rack.
Reinstallation
1. Ensure that the GTN GPS/NAV and COM circuit breakers are pulled.
2. Slide the GTN straight into the rack until it stops about 1 inch short of the fully seated position.
3. Insert a 3/32-inch hex drive into the unit retention mechanism access hole at the bottom of the unit
face and rotate the tool clockwise while pressing the bezel until the unit is firmly seated in the
rack.
4. Once the GTN is reinstalled, verify that the unit power-up self test sequence is successfully
completed and no failure messages or configuration error messages are annunciated. Section 6.1.1
outlines the power-up self-test sequence.
NOTE
It may be necessary to insert the hex drive tool into the access hole and rotate the cam
mechanism 90 degrees counterclockwise to ensure correct position prior to placing the
unit in the rack.
CAUTION
Be sure not to over-tighten the unit into the rack. The application of hex drive tool torque
exceeding 15 in-lbs can damage the locking mechanism.

