
3
Pan and zoom the map to center the location in the
crosshairs.
4
Hold to select the point indicated by the crosshairs.
5
If necessary, select a nearby point of interest.
6
Select an option:
• To start navigating to the location, select
Go
.
• To view the location on the map, select
Map
.
• To save the location, select
Save
.
• To view information about the location, select
Review
.
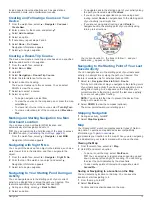
Navigating with the Around Me Feature
You can use the around me feature to navigate to nearby points
of interest and waypoints.
NOTE:
The map data installed on your device must include
points of interest to navigate to them.
1
From the map, hold
UP
.
2
Select
Around Me
.
Icons indicating points of interest and waypoints appear on
the map.
3
Select
UP
or
DOWN
to highlight a section of the map.
4
Select .
A list of points of interest and waypoints in the highlighted
map section appear.
5
Select to select a location.
6
Select an option:
• To start navigating to the location, select
Go
.
• To save the location, select
Save Location
.
• To view information about the location, select
Review
.
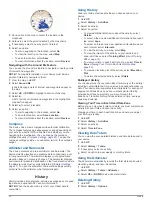
Compass
The device has a 3-axis compass with automatic calibration.
The compass features and appearance change depending on
your activity, whether GPS is enabled, and whether you are
navigating to a destination. You can change the compass
settings manually (
). To open the
compass settings quickly, you can select from the compass
widget.
Altimeter and Barometer
The device contains an internal altimeter and barometer. The
device collects elevation and pressure data continuously, even
in low-power mode. The altimeter displays your approximate
elevation based on pressure changes. The barometer displays
environmental pressure data based on the fixed elevation where
the altimeter was most recently calibrated (
). To open the altimeter or barometer settings quickly,
select from the altimeter or barometer widgets.
History
History includes time, distance, calories, average pace or speed,
lap data, and optional ANT+ sensor information.
NOTE:
When the device memory is full, your oldest data is
overwritten.
Using History
History contains previous activities you have saved on your
device.
1
Hold
UP
.
2
Select
History
>
Activities
.
3
Select an activity.
4
Select an option:
• To view additional information about the activity, select
Details
.
• To select a lap and view additional information about each
lap, select
Laps
.
• To select an interval and view additional information about
each interval, select
Intervals
.
• To view the activity on a map, select
Map
.
• To view the impact of the activity on your aerobic and
anaerobic fitness, select
Training Effect
(
).
• To view your time in each heart rate zone, select
Time in
Zone
(
Viewing Your Time in Each Heart Rate Zone
).
• To view an elevation plot of the activity, select
Elevation
Plot
.
• To delete the selected activity, select
Delete
.
Multisport History
Your device stores the overall multisport summary of the activity,
including overall distance, time, calories, and optional accessory
data. Your device also separates the activity data for each sport
segment and transition so you can compare similar training
activities and track how quickly you move through the
transitions. Transition history includes distance, time, average
speed, and calories.
Viewing Your Time in Each Heart Rate Zone
Before you can view heart rate zone data, you must complete an
activity with heart rate and save the activity.
Viewing your time in each heart rate zone can help you adjust
your training intensity.
1
Hold
UP
.
2
Select
History
>
Activities
.
3
Select an activity.
4
Select
Time in Zone
.
Viewing Data Totals
You can view the accumulated distance and time data saved to
your device.
1
Hold
UP
.
2
Select
History
>
Totals
.
3
If necessary, select an activity.
4
Select an option to view weekly or monthly totals.
Using the Odometer
The odometer automatically records the total distance traveled,
elevation gained, and time in activities.
1
Hold
UP
.
2
Select
History
>
Totals
>
Odometer
.
3
Select
UP
or
DOWN
to view odometer totals.
Deleting History
1
Hold
UP
.
2
Select
History
>
Options
.
20
History
Summary of Contents for IPH-A3095
Page 1: ...DESCENT MK1 Owner sManual...
Page 6: ......
Page 46: ...support garmin com November 2017 190 02244 00_0A...