background image

4

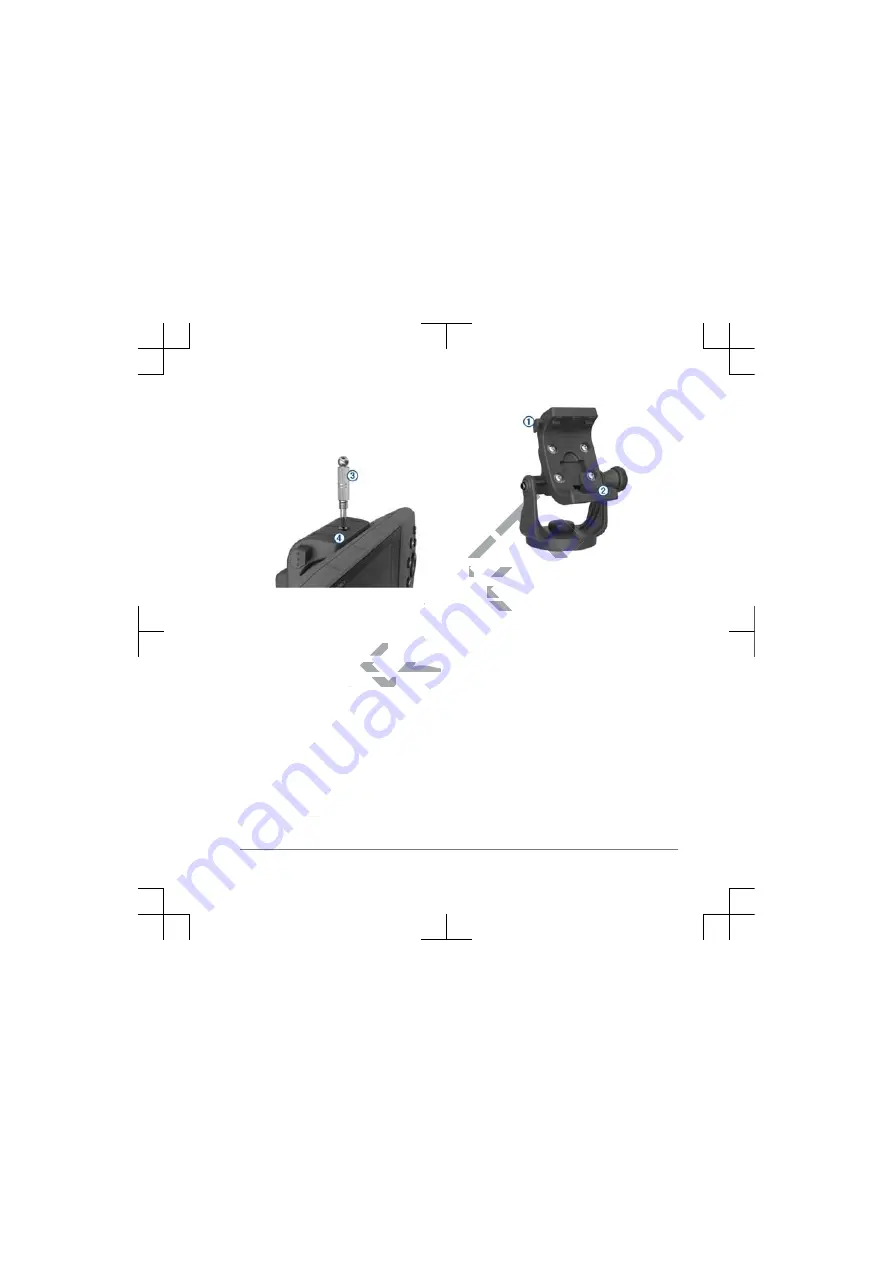
Using the security screw tool, tighten

the security screw 

 on the top of the

mount 

.

Removing the Device from

the Mount

1

Loosen the security screw.

2

Press the button 

 on the side of the

mount to release the device.

3

Lift the device out of the mount.

4

Place the weather cap 

 on the

cradle.

Important Safety Information

5

DRAFT

om

rew.

rew.

 on the side of the

on the side of the

e the device.

the device.

3

3

Lift the device o

Lift th

4

4

Place the w

Pla

cradle.

cradle

Summary of Contents for Marine Mount

Page 1: ...ording to these instructions Read all installation instructions before proceeding with the installation If you experience difficulty during the installation contact Garmin Product Support Tools Needed Drill Phillips screwdriver 9 5 mm 3 8 in wrench or socket 3 bolts or 3 screws 8 4 mm pan head machine bolts with nuts and washers and a 5 mm 1 16 in drill bit 8 4 mm pan head self tapping screws and ...

Page 2: ...template mark the pilot hole locations 3 Select an option If you intend to secure the base with machine bolts drill three 5 mm 5 32 in holes If you intend to secure the base with self tapping screws drill three 1 5 mm 1 16 in starter holes NOTE Do not make the holes deeper than half of the screw length 4 Secure the swivel base with the bolts or screws 5 Place the swivel mount bracket over the swiv...

Page 3: ...unt bracket to an optimal viewing angle and tighten the knobs The bracket clicks as you turn it Connecting Power to the Mount 1 Select a mounting location based on available power sources safe cable routing and an unobstructed view 2 Connect the cables Important Safety Information 3 D R A F T e cradle and e cradle an ounting knob until nting knob until secure secur 3 3 Rotate the swiv Rotat an opt...

Page 4: ...al contacts on the device and the mount are dry Moisture on the contacts causes equipment damage Use the weather cap to keep the mount cradle dry 1 Place the weather cap in the storage area on the mount 2 Place the bottom of your device into the cradle 3 Tilt the device back until it snaps into place 4 Important Safety Information D R A F T wire A A R A R A R A R A nnected nnec Device in the Devic...

Page 5: ... security screw 2 Press the button on the side of the mount to release the device 3 Lift the device out of the mount 4 Place the weather cap on the cradle Important Safety Information 5 D R A F T om rew rew on the side of the on the side of the e the device the device 3 3 Lift the device o Lift th 4 4 Place the w Pla cradle cradle ...

Page 6: ...D R A F T ...

Page 7: ...D R A F T ...

Page 8: ...d or its subsidiaries registered in the USA and other countries These trademarks may not be used without the express permission of Garmin 2011 2016 Garmin Ltd or its subsidiaries Printed in Taiwan www garmin com support July 2016 190 02006 92_0A D R A F T ...

Reviews: