background image

Customizing Your Device

36 

Montana 600 Series Owner’s Manual

• 

orientation Lock

—locks the 

screen orientation in portrait or 

landscape mode, or allows the 

screen to change orientation 

automatically based on the device 

orientation.

• 

Screen Capture

—allows you to 

take screen captures on the device.

• 

Battery Save

—saves battery power 

and prolongs the battery life.

• 

Calibrate Screen

page 36

.

Calibrating the Touchscreen

The screen does not normally require 

calibration. However, if the screen does 

not seem to be responding properly, 

calibrate the touchscreen.
1.  Select   > 

Setup

 > 

Display

 > 

Calibrate Screen

.

2.  Follow the on-screen instructions.

Appearance Settings

Select   > 

Setup

 > 

Appearance

.

• 

Mode

—sets a light background 

(

Day

), a dark background (

Night

), 

or automatically switches between 

the two based on the sunrise time 

and the sunset time for your current 

location (

Auto

).

• 

Day Background

—sets the 

background image used in day 

mode.

• 

Night Background

—sets the 

background image used in night 

mode.

• 

Day Highlight Color

—sets the 

color for selections in day mode.

• 

Night Highlight Color

—sets the 

color for selections in night mode.

• 

Landscape Controls

—places the 

controls on the left or right side of 

the screen when in landscape mode.

Summary of Contents for Montana 650

Page 1: ...montana 600 series owner s manual for use with models 600 650 650t...
Page 2: ...ion concerning the use of this product Garmin the Garmin logo BlueChart City Navigator and TracBack are trademarks of Garmin Ltd or its subsidiaries registered in the USA and other countries ANT ANT B...

Page 3: ...points Routes and Tracks 8 Waypoints 8 Using Sight N Go 9 Where To Menu 10 Routes 11 Tracks 13 Adventures 15 Navigation 16 Navigating to a Destination 16 Map 17 Compass 19 Elevation Plot 21 Trip Compu...

Page 4: ...rance Settings 36 Setting the Device Tones 37 Map Settings 37 Camera Settings 38 Tracks Settings 38 Changing the Units of Measure 39 Time Settings 39 Position Format Settings 39 Heading Settings 40 Al...

Page 5: ...res 1 Install the batteries page 2 2 Turn on the device page 4 3 Register the device page 5 4 Acquire satellites page 4 5 Calibrate the compass page 19 6 Mark a waypoint page 8 7 Create a route page 1...

Page 6: ...mperatures notice Alkaline batteries lose a significant amount of their capacity as temperature decreases Therefore use lithium batteries when operating the device in below freezing conditions The dev...

Page 7: ...use the device the first time fully charge the battery Charging a depleted battery takes 4 hours The device will not charge when outside the temperature range of 32 F to 113 F 0 C to 45 C 1 Plug the A...

Page 8: ...erving polarity 3 Replace the battery cover and turn the D ring clockwise 4 Hold page 1 5 Select Setup System AA Battery Type 6 Select Alkaline Lithium or Rechargeable NiMH Turning the Device On or Of...

Page 9: ...ication icons Application drawer containing more application icons Using the Touchscreen Select to open the application drawer Select to close the page and return to the previous page Select to return...

Page 10: ...riod of inactivity To change the backlight timeout see page 7 Touch the screen Alerts and messages also activate the backlight Adjusting the Backlight Brightness Note The backlight brightness may be l...

Page 11: ...ume 1 While the device is on press 2 Use the volume slider bar to adjust the volume level Profiles Profiles are a collection of settings that optimize your device based on how you are using it For exa...

Page 12: ...To save the waypoint without changes select Save To make changes to the waypoint select Edit make changes to the waypoint and select Save Finding a Waypoint 1 Select Where To Waypoints 2 Select a wayp...

Page 13: ...hes 100 select Save For best results collect four to eight samples for the waypoint waiting at least 90 minutes between samples Projecting a Waypoint 1 Select Sight N Go 2 Point the device at an objec...

Page 14: ...contain additional points of interest such as restaurants or marine services For more information go to http buy garmin com or contact your Garmin dealer Finding a Location by Name Depending on the m...

Page 15: ...ng 4 Select the city 5 Enter the house number 6 Enter the street Routes A route is a sequence of waypoints that leads you to your final destination Creating a Route 1 Select Route Planner Create Route...

Page 16: ...e select Insert The additional point is inserted before the point you are editing To remove the point from the route select Remove 6 Select to save the route Viewing a Route on the Map 1 Select Route...

Page 17: ...on the map indicates your track 3 Select Record Method 4 Select an option To record tracks at a variable rate that creates an optimum representation of your tracks select Auto To record tracks at a sp...

Page 18: ...ap The beginning and the end of the track are marked by flags 4 Select the information bar on the top of the screen Information about the track is listed Viewing the Elevation Plot of a Track 1 Select...

Page 19: ...Select Delete Yes Adventures Group related items together as an adventure For example you can create an adventure for your latest hiking trip The adventure could contain the track log of the trip pho...

Page 20: ...page opens with your route marked with a magenta line 5 Navigate using the map page 17 or compass page 19 Starting a TracBack You can navigate back to the beginning of a track This can be helpful whe...

Page 21: ...are navigating to a destination your route is marked with a magenta line on the map For information about customizing the map settings see page 37 For information about customizing the map dashboard...

Page 22: ...ount accessory with the device you must also purchase and install the mount in your vehicle 1 Select an option If you are using a mount with the device install the device in the mount Automotive profi...

Page 23: ...influence magnetic fields such as cars buildings or overhead power lines You should calibrate the compass after moving long distances experiencing temperature changes or changing the batteries 1 Selec...

Page 24: ...our original starting point As you drift from the intended course to the destination the course deviation indicator CDI provides the indication of drift right or left from the course The scale refers...

Page 25: ...Select an option Viewing Details about a Point on the Plot Select an individual point on the plot Details about the point appear in the upper left corner of the plot Resetting the Elevation Plot Sele...

Page 26: ...ed average speed maximum speed trip odometer and other helpful statistics To customize the trip computer see page 33 Resetting the Trip Data For accurate information reset the trip information before...

Page 27: ...ontally or vertically to change the orientation of the photo 3 If necessary select or to zoom in or out 4 Hold to focus 5 Release to take a photo Setting the Camera for Low Light Select Camera Low Lig...

Page 28: ...wer 2 Select a photo 3 Select Set as Wallpaper Deleting a Photo 1 Select Photo Viewer 2 Select a photo 3 Select Delete Photo Yes Navigating to a Photo 1 Select Photo Viewer 2 Select a photo 3 Select V...

Page 29: ...ions to find and download geocaches to your device Filtering the Geocache List You can filter your geocache list based on certain factors such as the level of difficulty 1 Select Geocaching Quick Filt...

Page 30: ...ache Filter 1 Select Setup Geocaching Filter Setup 2 Select a filter 3 Select an item to edit Navigating to a Geocache 1 Select Geocaching 2 Select Find a Geocache 3 Select a geocache 4 Select Go 5 Na...

Page 31: ...Only the owner of the chirp can program a chirp but anyone can find a chirp in a geocache For more information about programming a chirp see the chirp Owner s Manual at www garmin com Enable chirp Sea...

Page 32: ...select To rotate the view to the left select To rotate the view to the right select About Sharing Data Your device can send or receive data when connected to another compatible device You can share w...

Page 33: ...Select When you enter a proximity alarm area the device will sound a tone Calculating the Size of an Area 1 Select Area Calculation Start 2 Walk around the perimeter of the area you want to calculate...

Page 34: ...on To view the predicted best times for hunting and fishing select Hunt and Fish 3 If necessary select or to view a different month 4 Select a day Setting an Alarm If you are not currently using the d...

Page 35: ...ite 2 If necessary select Track Up to change the view of the satellites to be oriented with your current track toward the top of the screen 3 If necessary select Multicolor to assign a specific color...

Page 36: ...con to a new menu page select and drag the icon over the left or right arrows Select Main Menu to edit the main menu and application drawer Creating Shortcuts 1 Select Shortcuts Create Shortcut 2 Ente...

Page 37: ...ap Data Fields 1 Select Map Setup Map Dashboard 2 Select Small Data Fields or Large Data Field Changing the Data Fields Before you can change the map data fields you must enable them page 33 1 Open th...

Page 38: ...rofiles 2 Select a profile 3 Select Edit Name 4 Enter the new name 5 Select Deleting a Profile 1 Select Setup Profiles 2 Select a profile 3 Select Delete System Settings Select Setup System GPS sets t...

Page 39: ...andard NMEA 0183 output and input Text Out provides simple ASCII text output of location and velocity information RTCM Radio Technical Commission for Maritime Services allows the device to accept Diff...

Page 40: ...be responding properly calibrate the touchscreen 1 Select Setup Display Calibrate Screen 2 Follow the on screen instructions Appearance Settings Select Setup Appearance Mode sets a light background Da...

Page 41: ...Automotive Mode shows an automotive perspective with the direction of travel at the top Guidance Text allows you to select when to show guidance text on the map Dashboard selects a dashboard to displ...

Page 42: ...e maps currently loaded on the device To purchase additional maps see page 10 Map Speed adjusts the speed at which the map is drawn Camera Settings Select Setup Camera Photo Resolution changes the res...

Page 43: ...tomize units of measure for distance and speed elevation depth temperature and pressure 1 Select Setup Units 2 Select a measurement type 3 Select a unit of measure for the setting Time Settings Select...

Page 44: ...ading on the compass North Reference sets the north reference of the compass Go To Line Pointer allows you to select how the course appears Bearing Small or Large the direction to your destination Cou...

Page 45: ...ice is turned on This can be useful when you are watching for pressure fronts Save Always records pressure data every 15 minutes even when the device is turned off Plot Type Elevation Time records ele...

Page 46: ...ivity selected Select Setup Routing Activity allows you to select an activity for routing Route Transitions available only for some activities Auto automatically routes you to the next point Manual al...

Page 47: ...ailed view of bottom contours and depth soundings Simplifies map presentation for optimal use while fishing Appearance allows you to set the appearance of marine navigation aids on the map Marine Alar...

Page 48: ...up Reset 2 Select an item to reset Restoring Specific Settings to Defaults 1 Select Setup 2 Select an item to reset 3 Select Restore Defaults Restoring Specific Page Settings You can restore the setti...

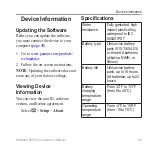
Page 49: ...ttings Viewing Device Information You can view the unit ID software version and license agreement Select Setup About Specifications Water resistance Fully gasketed high impact plastic alloy waterproof...

Page 50: ...es Alkaline batteries can rupture at high temperatures Do not use a sharp object to remove batteries caution Contact your local waste disposal department to properly recycle the batteries notice Alkal...

Page 51: ...Caring for the Device NOTICE Avoid chemical cleaners and solvents which can damage plastic components Never use a hard or sharp object to operate the touchscreen or damage may result Cleaning the Devi...

Page 52: ...the device before using or charging Extreme Temperatures notice Do not store the device where prolonged exposure to extreme temperatures can occur because it can cause permanent damage Data Managemen...

Page 53: ...of the device and lift up as instructed in the battery compartment 4 Place the microSD card in the device with the gold contacts facing down 5 Close the card holder 6 Slide the card holder toward the...

Page 54: ...ni USB port Your device and memory card optional appear as removable drives in My Computer on Windows computers and as mounted volumes on Mac computers Transferring Files to Your Computer Before you c...

Page 55: ...lders entitled Garmin Before you can delete files you must connect the device to your computer page 49 1 Open the Garmin drive or volume 2 If necessary open a folder or volume 3 Select the files 4 Pre...

Page 56: ...t When used with City Navigator maps voice prompts are sounded through the speakers on the mount The auto mounts are not waterproof Optional Maps You can purchase additional maps such as BirdsEye sate...

Page 57: ...compatible with your Garmin device Before you pair the ANT accessory with your Garmin device move 10 m 32 9 feet away from other ANT accessories Bring the Garmin device within range 3 m 10 feet of th...

Page 58: ...tance ascended Barometer The calibrated current pressure Battery Level The remaining battery power Data Field Description Bearing The direction from your current location to a destination Cadence cade...

Page 59: ...he estimated time of day you will reach the next waypoint on the route Glide Ratio The ratio of horizontal distance traveled to the change in vertical distance Data Field Description Glide Ratio to De...

Page 60: ...ed Maximum The maximum speed reached since last reset Speed Moving Avg The average speed of the device while moving since last reset Data Field Description Speed Overall Avg Your average speed since l...

Page 61: ...tance traveled since the last reset Trip Time Moving A running tally of time since the last reset Trip Time Stopped The time spent not moving since the last reset Data Field Description Trip Time Tota...

Page 62: ...Appendix 58 Montana 600 Series Owner s Manual Data Field Description Waypoint at Dest The last point on a route to your destination Waypoint at Next The next point on your route...

Page 63: ...1 Take your device out of buildings and parking garages and away from tall buildings and trees 2 Turn on the device 3 Remain stationary for several minutes My device will not charge Ensure that the li...

Page 64: ...the device from your computer 2 Turn off the device 3 Hold while you connect the device to your computer 4 Continue holding for 30 seconds or until the device goes into mass storage mode I cannot see...

Page 65: ...52 53 application drawer 5 customizing 32 area calculation 29 automotive mode 37 auto mounts 18 52 auto zoom 37 B backlight 6 timeout 7 barometer 21 BaseCamp 48 batteries 35 45 54 See also lithium io...

Page 66: ...25 photos 24 software 45 drawer See application drawer driving routes 42 E editing profiles 34 routes 11 waypoints 8 elevation plot 21 barometric altimeter 21 of a track 14 F finding addresses 11 near...

Page 67: ...ng pointer 19 with course pointer 20 north up 37 O on screen buttons 5 orientation map 37 orienting the screen 6 P photos 24 downloading 24 setting as wallpaper 24 taking 23 viewing 23 position format...

Page 68: ...ings 39 sunrise and sunset 30 56 zone 39 timer 30 tones 37 Trackback 16 tracks 13 15 archiving 15 clearing current 15 deleting 15 profiles 14 recording 13 38 saving 14 setup 38 viewing 14 track up 37...

Page 69: ......

Page 70: ...1st Street Olathe Kansas 66062 USA Garmin Europe Ltd Liberty House Hounsdown Business Park Southampton Hampshire SO40 9LR UK Garmin Corporation No 68 Zhangshu 2nd Road Xizhi Dist New Taipei City 221 T...

Reviews: