

Getting Started
WARNING
See the
Important Safety and Product Information
guide in the
product box for product warnings and other important
information.
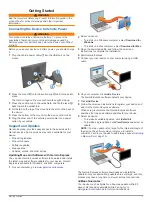
Connecting the Device to Vehicle Power
WARNING
This product contains a lithium-ion battery. To prevent the
possibility of personal injury or product damage caused by
battery exposure to extreme heat, store the device out of direct
sunlight.
Before you use your device on battery power, you should charge
it.
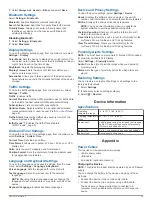
1
Plug the vehicle power cable into the USB port on the
mount.
2
Press the mount onto the suction cup until it snaps into
place.
The Garmin
®
logo on the mount should face right-side up.
3
Press the suction cup to the windshield, and flip the lever
back toward the windshield.
4
Fit the tab on the top of the mount into the slot on the back of
the device.
5
Press the bottom of the mount into the device until it clicks.
6
Plug the other end of the vehicle power cable into a power
outlet in your vehicle.
Support and Updates
Garmin Express
™
provides easy access to these services for
Garmin devices. Some services may not be available for your
device.
• Product registration
• Product manuals
• Software updates
• Map updates
• Vehicles, voices, and other extras
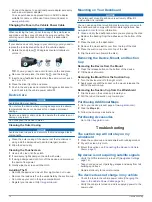
Updating Maps and Software with Garmin Express
You can use Garmin Express software to download and install
the latest map and software updates for your device. Garmin
Express is available for Windows
®
and Mac
®
computers.
1
2
Select an option:
• To install on a Windows computer, select
Download for
Windows
.
• To install on a Mac computer, select
Download for Mac
.
3
Open the downloaded file, and follow the on-screen
instructions to complete the installation.
4
Start Garmin Express.
5
Connect your nüvi device to your computer using a USB
cable.
6
On your computer, click
Add a Device
.
The Garmin Express software detects your device.
7
Click
Add Device
.
8
Follow the on-screen instructions to register your device and
add it to the Garmin Express software.
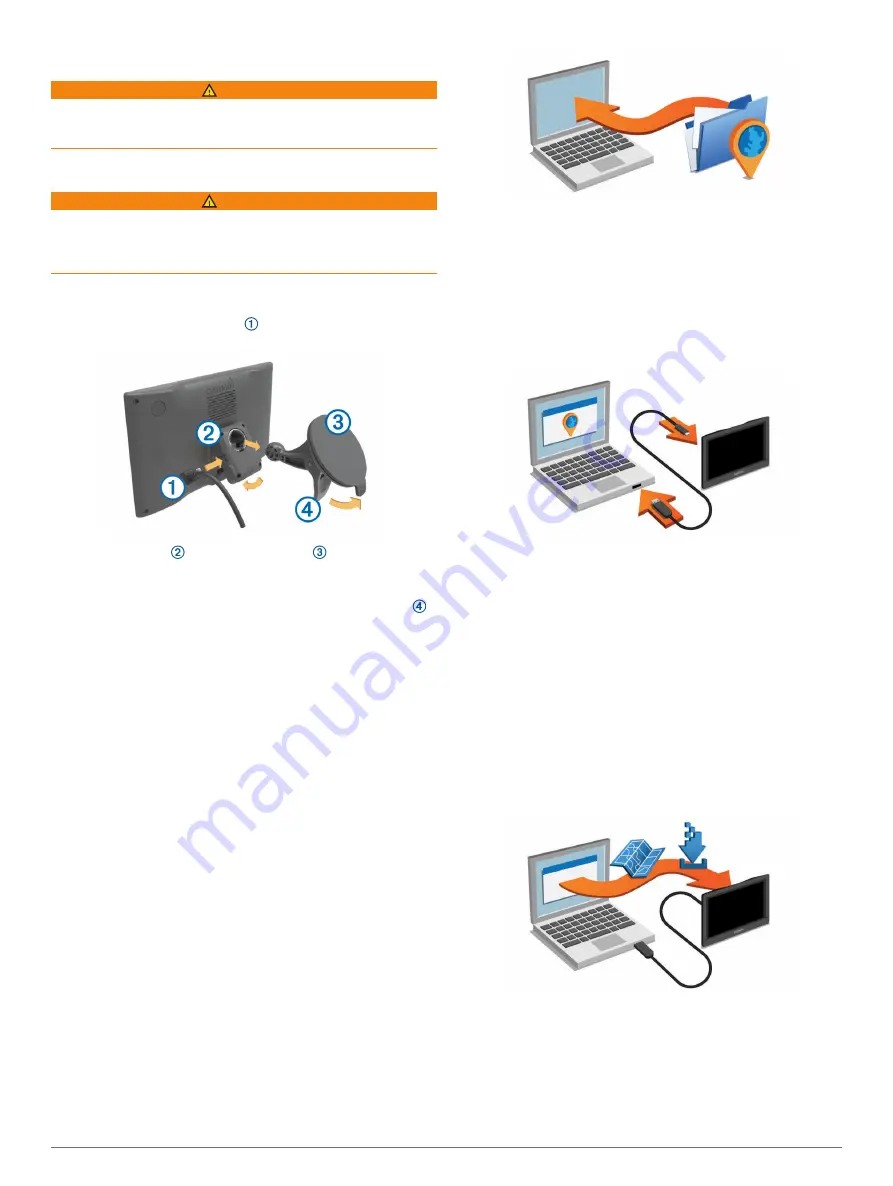
When setup is complete, the Garmin Express software
searches for map and software updates for your device.
9
Select an option:
• To install all available updates, click
Install All
.
• To install a single update, click
View Details
and select an
update.
NOTE:
If a map update is too large for the internal storage of
the device, the software may prompt you to install a
microSD
™
card in your device to add storage space (
).
The Garmin Express software downloads and installs the
updates onto your device. Map updates are very large, and this
process may take a long time on slower Internet connections.
nüMaps Guarantee
™
Your device may be eligible for a free map update within 90
days of first acquiring satellites while driving. Go to
Getting Started
1


![Navig[8]r NAVBIKE-GPS User Manual preview](http://thumbs.mh-extra.com/thumbs/navig-8-r/navbike-gps/navbike-gps_user-manual_3574097-01.webp)


