


Lifetime Subscriptions
Some models include subscriptions to lifetime features. For
more information, go to
LT
: This model includes a lifetime traffic subscription and a
traffic receiver.
LM
: This model includes a nüMaps Lifetime
™
subscription, which
provides quarterly map updates for the useful life of your
device. For terms and conditions go to
LMT
: This model includes a nüMaps Lifetime subscription,
lifetime traffic subscription, and a traffic receiver.
LMTHD or LMT-D
: This model includes a nüMaps Lifetime
subscription, lifetime digital traffic subscription, and a digital
traffic receiver.
Activating Lifetime Maps
NOTE:
Lifetime Maps are not applicable to products that do not
have pre-loaded maps.
NOTE:
Lifetime Maps entitle you to receive map updates when
and as such updates are made available by Garmin during the
useful life of one compatible Garmin product or as long as
Garmin receives map data from a third party supplier, whichever
is shorter. For the meaning of a product’s “useful life” and for
other important terms and conditions, go to
1
Go to
.
2
Follow the on-screen instructions.
NOTE:
If you register the device, you can receive e-mail
notifications when a map update is available.
Entering and Exiting Sleep Mode
You can use sleep mode to conserve battery power when your
device is not in use. While in sleep mode, your device uses very
little power and can wake instantly for use.
TIP:
You can charge your device faster by putting it in sleep
mode while charging the battery.
Press the power key .
Turning Off the Device
1
Hold the power key until a prompt appears on the screen.
The prompt appears after five seconds. If you release the
power key before the prompt appears, the device enters
sleep mode.
2
Select
Off
.
Resetting the Device
You can reset your device if it stops functioning.
Hold the power key for 12 seconds.
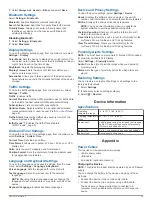
Acquiring GPS Signals
When you turn on your navigation device, the GPS receiver
must collect satellite data and establish the current location. The
time required to acquire satellite signals varies based on several
factors, including how far you are from the location where you
last used your navigation device, whether you have a clear view
of the sky, and how long it has been since you last used your
navigation device. The first time you turn on your navigation
device, it may take several minutes to acquire satellite signals.
1
Turn on the device.
2
Wait while the device locates satellites.
3
If necessary, go to an open area, away from tall buildings and
trees.
in the status bar indicates the satellite signal strength. When
at least half the bars are filled, the device is ready for navigation.
Adjusting the Screen Brightness
1
Select
Settings
>
Display
>
Brightness
.
2
Use the slider bar to adjust the brightness.
Adjusting the Volume
1
Select
Volume
.
2
Select an option:
• Use the slider bar to adjust the volume.
• Select to mute the device.
• Select for additional options.
About Automatic Volume
On devices with hands-free calling, automatic volume allows the
device to adjust the volume level based on the background
noise in the vehicle (
Automatic volume control lowers the volume of the device when
background noise is low and raises the volume level when
background noise increases.
Enabling Automatic Volume
Your device can increase or decrease the volume automatically
based on the level of background noise.
1
Select
Volume
> .
2
If necessary, select
Automatic Volume
.
3
Select
Enabled
.
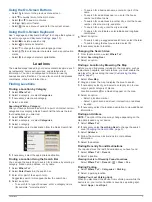
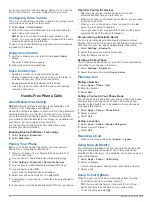
Status Bar Icons
The status bar is located at the top of the main menu. The status
bar icons display information about features on the device. You
can select some icons to change settings or view additional
information.
GPS signal status
Bluetooth
®
technology status (appears when Bluetooth is
enabled)
Current time
Battery status
Connected to Smartphone Link
Temperature
Viewing GPS Signal Status
Hold
for three seconds.
Battery Information
After the device is connected to power, it begins to charge.
in the status bar indicates the status of the internal battery.
Setting the Time
1
From the main menu, select the time.
2
Select an option:
• To set the time automatically using GPS information,
select
Automatic
.
• To set the time manually, drag the numbers up or down.
2
Getting Started


