


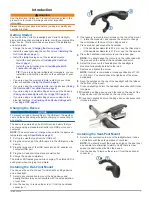


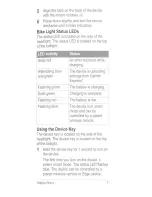

Device Settings
You can remotely control your Varia devices and customize
settings using your compatible Edge device. This section
contains instructions for the Edge 1000 device. Other
compatible Edge devices use similar settings.
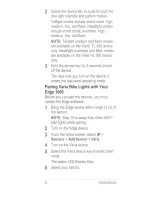
Pairing Varia Bike Lights with Your Edge
1000
Before you can pair the devices, you must update the Edge
software.
1
Bring the Edge device within range (3 m) of the sensor.
NOTE:
Stay 10 m away from other ANT+
®
bike lights while
pairing.
2
Turn on the Edge device.
3
From the home screen, select >
Sensors
>
Add Sensor
>
Varia
.
4
Turn on the Varia device.
5
Select the Varia device key to enter smart mode.
The status LED flashes blue.
6
Select your sensor.
When the sensor is paired with your Edge device, the status
icon appears solid on the connections page.
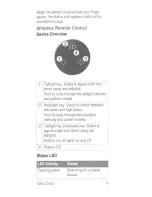
Turning Varia Devices On and Off with Your
Edge 1000
Before you can turn Varia devices on and off with your Edge
device, you must pair the devices (
Pairing Varia Bike Lights with
Your Edge 1000
, page 3
).
• To turn on all paired lights, turn on your Edge device.
• To turn off all paired lights, turn off your Edge device.
Customizing Varia Device Settings with Your
Edge 1000
Before you can customize Varia device settings with your Edge
device, you must pair the devices (
Pairing Varia Bike Lights with
Your Edge 1000
, page 3
).
1
From your Edge device, select >
Sensors
>
Varia
.
2
Select an option:
• Select
Enable
to enable the light network.
• Select
Configuration
to set the light intensity mode for all
lights in your network (
Configuration Settings
, page 3
).
• Select
Beam Angle
to automatically adjust the headlight
beam angle based on the rate of speed. Higher beam
angles are used at high speeds, and lower beam angles
are used at low speeds.
NOTE:
This setting appears when a headlight is paired
with the device.
• Select
Turn Signal Setup
to configure turn signals when
using two taillights (
Turn Signal Settings
, page 3
).
NOTE:
This setting appears when two taillights are paired
with the device.
• Select
Light Network
to view device information and
customize each light in your network (
Light Network
Settings
, page 4
).
• Select
Test Lights
to check that each light in your network
is set up correctly (
Testing the Light Network
, page 4
).
Configuration Settings
From your Edge device, select >
Sensors
>
Varia
>
Configuration
.
Auto
: Automatically adjusts the light intensity based on the
ambient light or time of day.
Day
: Sets the light intensity for day.
Night
: Sets the light intensity for night.
Power Save
: Automatically adjusts the light intensity based on
the remaining battery life of the bike light. When battery life is
low, the light intensity is reduced to prolong battery life.
Individual
: Allows you to customize the light intensity and
pattern mode for each light in your network (
Light Network
Settings
, page 4
).
Adjusting the Beam Angle During a Ride
Before you can adjust the beam angle during a ride, you must
disable the automatic beam angle setting (
Customizing Varia
Device Settings with Your Edge 1000
, page 3
).
1
Go for a ride.
2
Swipe the screen to view the bike lights data screen.
3
Select or to adjust the headlight beam angle.
Turn Signal Settings
From your Edge device, select >
Sensors
>
Varia
>
Turn
Signal Setup
.
Enable
: Allows the paired Edge device to assign and control
turn signals.
Auto Cancel
: Automatically cancels the turn signal after making
a 90° turn.
NOTE:
Your paired Edge device must have GPS turned on in
order to use the Auto Cancel setting.
Right
: Assigns the right turn signal.
Left
: Assigns the left turn signal.
Assigning Turn Signals
When using two taillights, you must indicate which light is the left
turn signal and which light is the right turn signal.
1
Pair two taillights with your Edge device (
Pairing Varia Bike
Lights with Your Edge 1000
, page 3
).
2
From your Edge device, select >
Sensors
>
Varia
>
Turn
Signal Setup
.
3
Select
Right
, and select a taillight to assign it as the right turn
signal.
When two taillights are paired, the Edge device assigns the
second taillight as the left turn signal automatically.
4
If necessary, select
Left
, and select the second taillight to
assign it as the left turn signal.
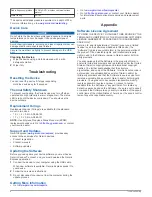
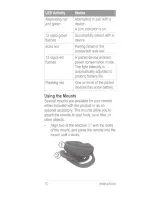
Signaling a Turn with Your Edge 1000
WARNING
The Varia device is not a substitute for other bike safety
measures, such as hand signals, deferring to posted signs and
conditions, and using good judgement.
Before you can signal a turn with your Edge device, you must
install two taillights (
Installing the Multi-Location Mount
, page 2
)
and assign turn signals to them (
Assigning Turn Signals
,
page 3
).
1
Go for a ride.
2
Tap the screen to view the timer overlay.
Device Settings
3
Summary of Contents for Varia
Page 1: ...Varia Bike Lights Owner s Manual August 2015 Printed in Taiwan 190 01906 00_0A...
Page 4: ......
Page 33: ......


