


3
Select the left or right turn signal.
NOTE:
You can select the same turn signal again to cancel
the turn signal.
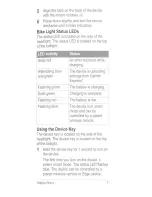
Light Network Settings
From your Edge device, select >
Sensors
>
Varia
>
Light
Network
, and select a paired light.
Enable
: Turns on the light and allows you to control the light
remotely with your Edge device. You can disable a light to
disconnect it from the light network.
Motion Activated
: Automatically turns on the light when the
Edge device is in motion.
Auto Deceleration
: Automatically adjusts the taillight intensity
and pattern when decelerating sharply.
NOTE:
This setting appears when a taillight is paired with the
device.
NOTE:
Taillight medium and flash modes are available on
the Varia TL 300 device only.
Light Mode
: Sets the light intensity and pattern mode, or turns
off the light.
NOTE:
This setting is available when the Individual
configuration setting is selected (
Configuration Settings
,
page 3
).
About
: Displays device, software, and battery information.
Remove
: Allows you to delete a paired light from the network.
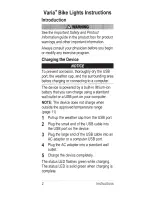
Checking the Battery Level
From your Edge device, select >
Sensors
>
Varia
>
Light
Network
.
The battery level for all paired lights appears.
Testing the Light Network
1
From your Edge device, select >
Sensors
>
Varia
>
Test
Lights
.
2
Select a light to test.
The light blinks when it is connected.
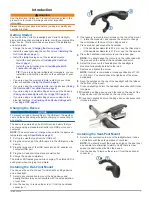
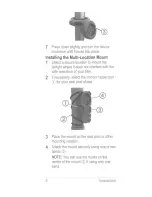
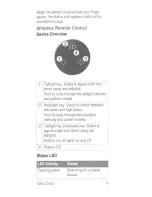
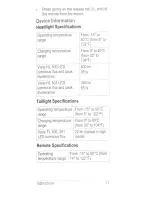
Wireless Remote Control
Device Overview
À
Taillight key. Select to signal a left turn when using two taillights.
Hold to cycle through the taillight intensity and pattern modes.
Á
Headlight key. Select to switch between low beam and high beam.
Hold to cycle through the headlight intensity and pattern modes.
Â
Taillight key and power key. Select to signal a right turn when using
two taillights.
Hold to turn all lights on and off.
Ã
Status LED.
Status LED
LED Activity
Status
Flashing green
Searching for a paired device.
Alternating red and
green
Attempting to pair with a device.
A turn indicator is on.
12 rapid green flashes
Successfully paired with a device.
Solid red
Pairing failed or the connection was lost.
12 rapid red flashes
A paired device entered power conservation
mode. The light intensity is automatically
adjusted to prolong battery life.
Flashing red
One or more of the paired devices has a low
battery.
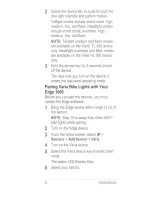
Pairing the Remote with Your Varia Device
The first time you connect the Varia remote to your Varia device,
you must pair the remote with your device.
1
Bring the remote within 1 m (3 ft.) of the device.
NOTE:
You must stay 10 m (33 ft.) away from other ANT+
sensors while pairing.
2
On the Varia device, hold the device key for 1 second to turn
it on.
3
Select the Varia device key to enter smart mode.
The status LED starts flashing blue.
4
On the Varia remote, hold two keys simultaneously until the
status LED starts alternating green and red, and release the
keys.
The remote searches for your Varia device. After the remote
pairs successfully, the status LED flashes green 12 times.
After the remote is paired, it connects to your device whenever
the device is in range and turned on.
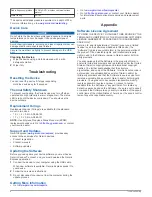
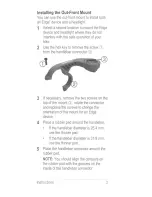
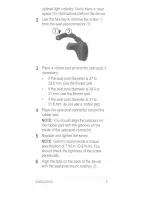
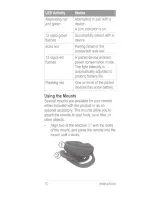
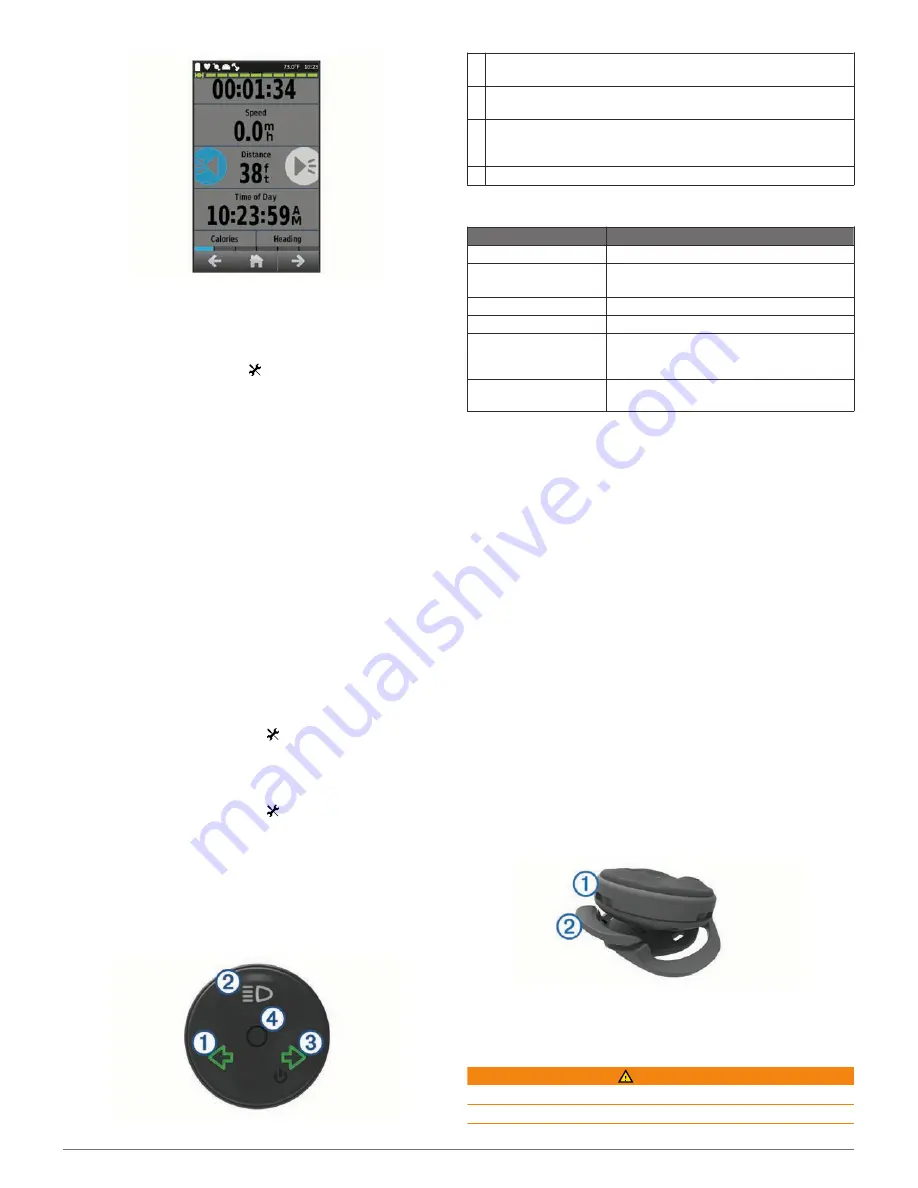
Using the Mounts
Several mounts are available for your remote, either included
with the product or as an optional accessory. The mounts allow
you to attach the remote to your body, your bike, or other
objects.
• Align two of the notches
À
with the sides of the mount, and
press the remote into the mount until it clicks.
• Press gently on the release tab
Á
, and lift the remote from
the mount.
Replacing the Battery
WARNING
Do not use a sharp object to remove batteries.
Keep the battery away from children.
4
Wireless Remote Control
Summary of Contents for Varia
Page 1: ...Varia Bike Lights Owner s Manual August 2015 Printed in Taiwan 190 01906 00_0A...
Page 4: ......
Page 33: ......


