


Never put batteries in mouth. If swallowed, contact your
physician or local poison control center.
Replaceable coin cell batteries may contain perchlorate
material. Special handling may apply. See
www.dtsc.ca.gov
/hazardouswaste/perchlorate
.
CAUTION
Contact your local waste disposal department to properly
recycle the batteries.
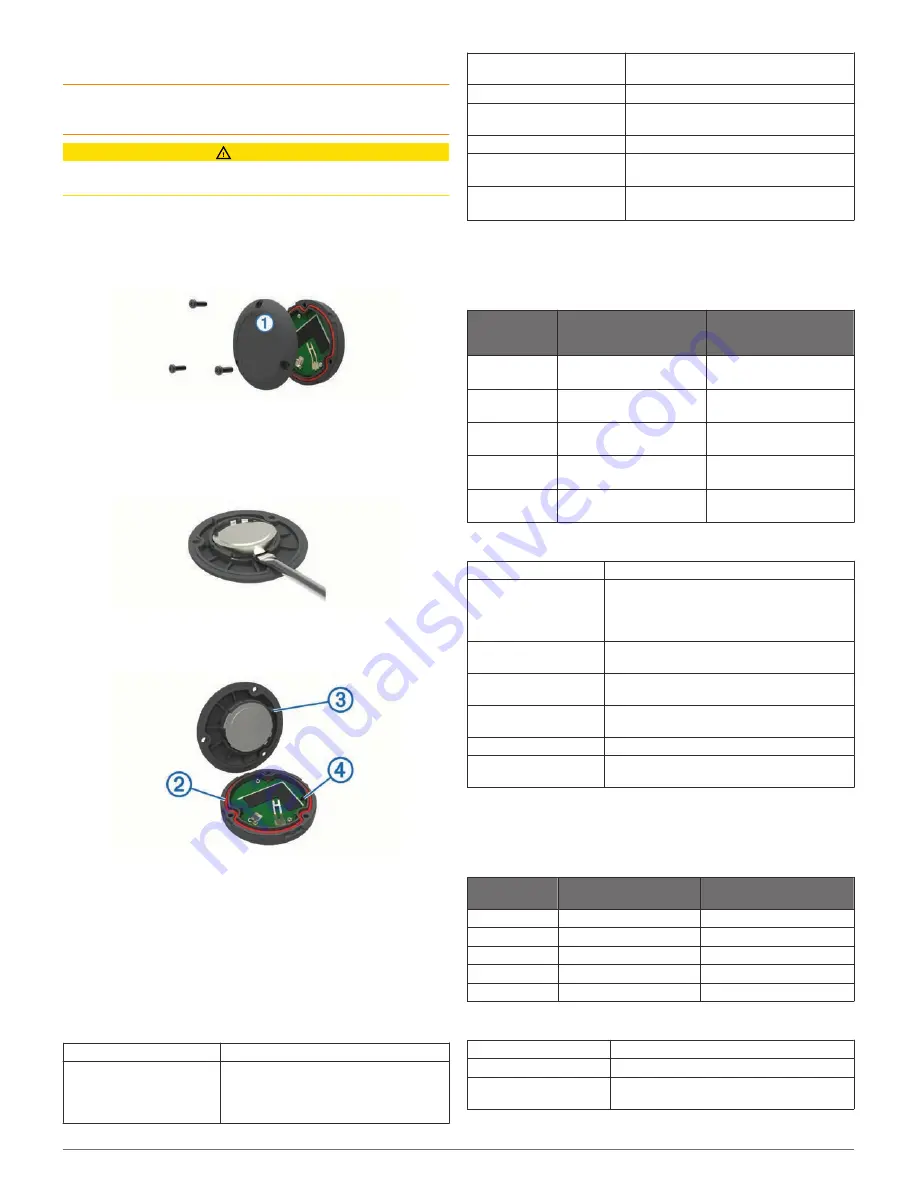
Before you can replace the battery, you must have a small
Phillips screwdriver, a small flat screwdriver, and a CR2032
lithium coin-cell battery.
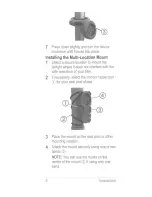
1
Using a Phillips screwdriver, remove the three screws from
the back plate
À
.
2
Remove the back plate from the remote.
3
Wrap the end of a small flat screwdriver with tape.
The tape protects the battery, battery compartment, and
contacts from damage.
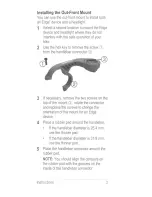
4
Carefully pry the battery from the back plate.
5
Install the new battery into the back plate with the positive
side facing down.
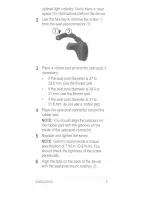
6
Verify the gasket
Á
is fully seated in the groove.
7
Replace the backplate, aligning the post
Â
with the gap in the
circuit board
Ã
.
8
Replace and tighten the three screws.
NOTE:
Do not overtighten.
Device Information
Specifications
Headlight Specifications
Battery type
Rechargeable, built-in lithium-ion battery
Battery life
Up to 2.5 hr. in high mode
Up to 5 hr. in flash mode
Flash mode is available on the Varia HL
500 only
Operating temperature
range
From -15° to 50°C (from 5° to 122°F)
Charging temperature range From 0º to 40ºC (from 32º to 104ºF)
Radio frequency/protocol
2.4 GHz ANT+ wireless communications
protocol
Water rating
IEC 60529 IPX7*
Varia HL 500 LED luminous
flux and peak illuminance
600 lm
95 lx
Varia HL 501 LED luminous
flux and peak illuminance
300 lm
65 lx
*The device withstands incidental exposure to water of up to 1 m
for up to 30 min. For more information, go to
www.garmin.com
/waterrating
.
Headlight Light Intensity Modes
Intensity
Mode
Varia HL 500 Illuminance
and Luminous Flux
Varia HL 501
Illuminance and
Luminous Flux
Overdrive
600 lm
95 lx
Not applicable
High
400 lm
70 lx
300 lm
65 lx
Medium
250 lm
50 lx
200 lm
50 lx
Low
150 lm
30 lx
150 lm
35 lx
Flashing
600 lm
95 lx
Not applicable
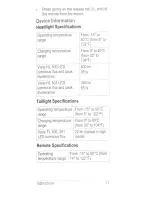
Taillight Specifications
Battery type
Rechargeable, built-in lithium-ion battery
Battery life
Up to 4 hr. in high mode
Up to 14 hr. in flash mode
Flash mode is available on the Varia TL 300
only
Operating temperature
range
From -15° to 50°C (from 5° to 122°F)
Charging temperature
range
From 0º to 40ºC (from 32º to 104ºF)
Radio frequency/
protocol
2.4 GHz ANT+ wireless communications
protocol
Water rating
IEC 60529 IPX7*
Varia TL 300, 301 LED
luminous flux
22 lm (typical in high mode)
*The device withstands incidental exposure to water of up to 1 m
for up to 30 min. For more information, go to
www.garmin.com
/waterrating
.
Taillight Light Intensity Modes
Intensity Mode Varia TL 300 Luminous
Flux
Varia TL 301 Luminous
Flux
High
22 lm
22 lm
Medium
14 lm
Not applicable
Low
7 lm
14 lm
Flashing
28 lm
Not applicable
Braking
35 lm
35 lm
Remote Specifications
Battery type
User-replaceable CR2032, 3 V
Battery life
Up to 1.5 yr. at 1 hr./day
Operating temperature
range
From -10° to 50°C (from 14° to 122°F)
Device Information
5
Summary of Contents for Varia
Page 1: ...Varia Bike Lights Owner s Manual August 2015 Printed in Taiwan 190 01906 00_0A...
Page 4: ......
Page 33: ......


