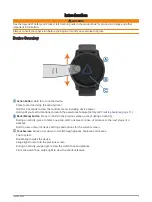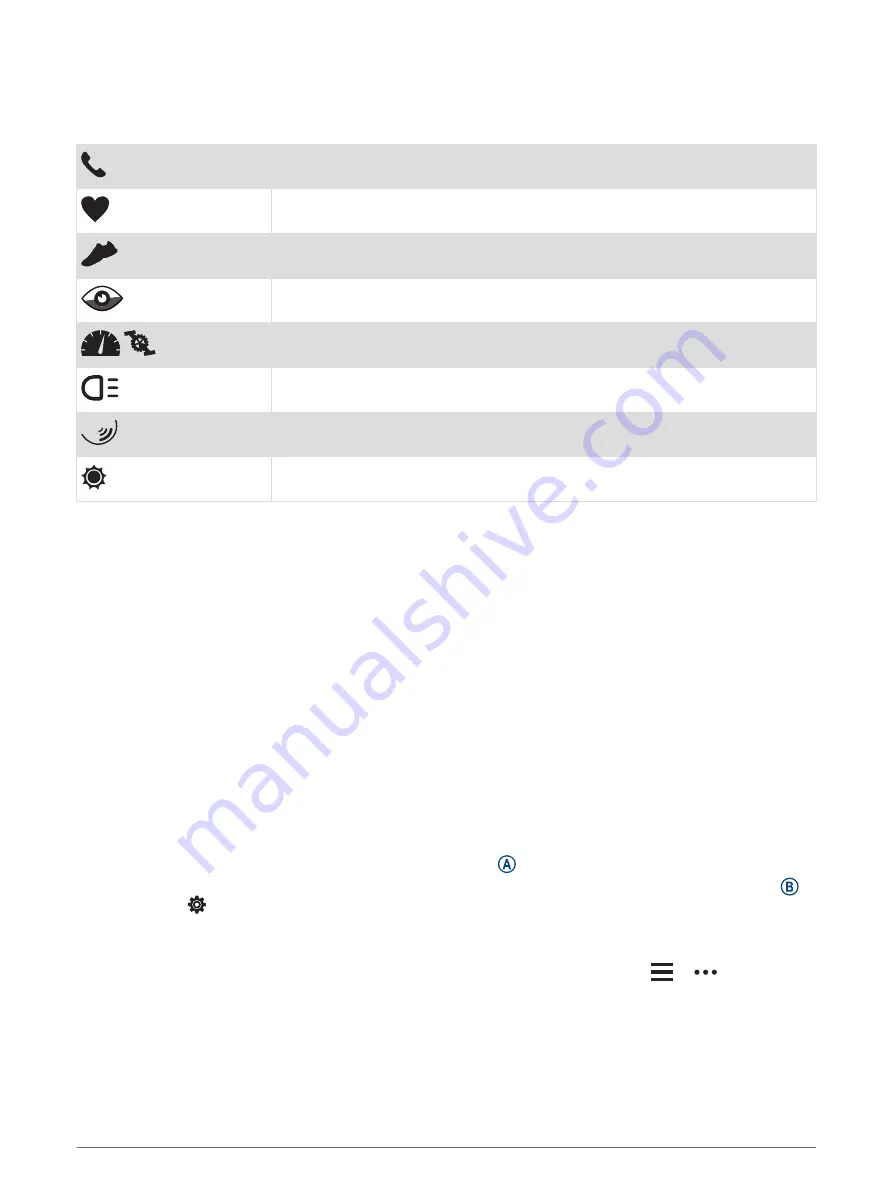
Icons
A flashing icon means the device is searching for a signal. A solid icon means the signal was found or the
sensor is connected. A slash through an icon means the feature is turned off.
Smartphone connection status
Heart rate monitor status
Foot pod status
LiveTrack status
Speed and cadence sensor status
Varia
™
bike light status
Varia bike radar status
tempe
™
sensor status
Setting Up Your Watch
To take full advantage of the Venu 2 series features, complete these tasks.
• Pair the device with your smartphone using the Garmin Connect
™
app (
Pairing Your Smartphone, page 3
).
• Set up Wi‑Fi
®
networks (
Connecting to a Wi‑Fi Network, page 7
).
• Set up music (
).
• Set up your Garmin Pay
™
wallet (
Setting Up Your Garmin Pay Wallet, page 9
).
• Set up safety features (
Safety and Tracking Features, page 11
).
Smart Features
Pairing Your Smartphone
To set up the Venu 2 series device, it must be paired directly through the Garmin Connect app, instead of from
the Bluetooth
®
settings on your smartphone.
1 From the app store on your smartphone, install and open the Garmin Connect app.
2 Select an option to enable pairing mode on your device:
• If this is the first time you are setting up your device, hold to turn on the device.
• If you previously skipped the pairing process or paired your device with a different smartphone, hold ,
and select > Connectivity > Pair Phone to manually enter pairing mode.
3 Select an option to add your device to your Garmin Connect account:
• If this is the first device you have paired with the Garmin Connect app, follow the on-screen instructions.
• If you have already paired another device with the Garmin Connect app, from the
or
menu, select
Garmin Devices > Add Device, and follow the on-screen instructions.
Smart Features
3


