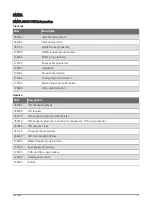
Units Settings
You can set the unit of measure used for values shown on the radio.
Select MENU > SYSTEM > UNITS.
SPEED: Sets the unit of measure shown for speed-related fields, such as speed-over-ground.
TIME > FORMAT: Sets the time format.
HEADING: Sets the radio to show all heading calculations, such as Course Over Ground (COG), using true or
magnetic north.
NOTE: If the radio is configured for NMEA 2000 communication, the heading unit is set to AUTO, and shows
heading data based on the information provided over the network. This setting cannot be changed.
Configuring the Time Offset
You can show the local time rather than Universal Coordinated Time (UTC). When you adjust for local time, LOC
appears after the time on the home screen.
NOTE: When you make a DSC call, the time is sent in UTC format.
1 Select MENU > SYSTEM > UNITS > TIME > OFFSET.
2 Turn the SELECT dial to adjust the time offset from UTC.
3 Select OK.
Selecting the Frequency Band
You can switch between the USA, International, or Canadian frequency bands (
).
NOTE: Not all frequency bands are available on all device models.
1 Select MENU > CHANNEL > FREQUENCY BAND.
2 Select a frequency band.
Changing a Channel Name
Channel names appear on the home screen using nine characters. If a channel name is longer than nine
characters, the full name scrolls across the top of the screen, then switches to the short name. You can change
the name of a channel to reflect a local meaning.
1 Select MENU > CHANNEL > NAME.
2 Turn the SELECT dial to select a channel, and select OK.
3 Change the name of the channel (
).
4 Select ACCEPT.
Restoring Factory Settings
You can restore the radio to the default factory settings. When you restore the radio to factory settings, all
system changes and customizations are lost. Restoring factory settings deletes the call logs, but retains group
entries, directory entries, the MMSI number, and the ATIS ID.
1 Select MENU > SYSTEM > SYSTEM INFO > RESET.
2 Select YES to confirm the reset.
24
System Settings

