
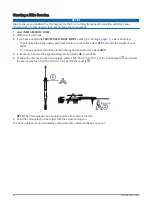

Starting a Rifle Session
NOTICE
Always ensure you position the chronograph so that it is not directly exposed to ejecting cartridge cases,
muzzle blast, or other hazards that may damage the chronograph.
1 Select NEW SESSION > RIFLE.
2 Select a velocity range.
3 If you have enabled the PROJECTILE WEIGHT ENTRY setting (
), select an option:
• To calculate the kinetic energy and power factor of your bullet, select YES, and enter the weight of your
bullet.
• To continue without calculating kinetic energy and power factor, select SKIP.
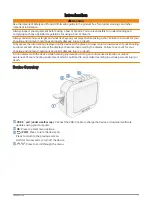
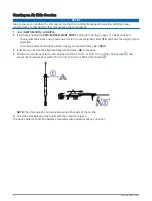
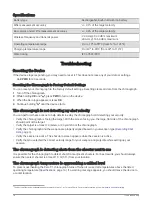
4 If necessary, observe the alignment diagram and press OK to continue.
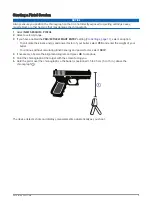
5 Position the rifle next to the chronograph, within 15 to 35 cm (5 to 15 in.) of the chronograph , and ensure
the chronograph is 15 to 35 cm (5 to 15 in.) behind the muzzle .
NOTE: The chronograph can be positioned on either side of the rifle.
6 Point the chronograph at the target with the screen facing you.
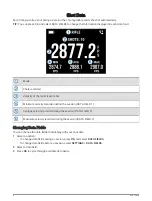
The device detects shots and displays measurements automatically as you shoot.
4
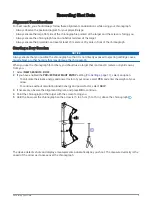
Recording Shot Data