
5
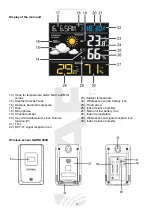
Switching between wireless sensor channels
If there are multiple wireless sensors paired with the main unit, press the
CHANNEL
button on the main unit
to display the measured temperature and relative humidity readings of each wireless sensor. For automatic
switching of channels to which the wireless sensors are registered, press the button repeatedly until the
display shows icon
. The channels will change every 5 seconds. To terminate the automatic switching,
press the
CH
button again.
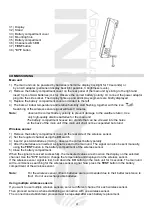
Placement
Placement of the wireless sensor
Place the wireless sensor away from direct sunlight not to compromise the measurement. Placement
outdoors, at the northern wall is recommended. Obstacles such as walls, concrete, metal structures and
large objects reduce the signal range. Position the wireless sensor vertically for optimum signal
transmission.
The signal range may be affected by obstacles (walls, trees) and other electrical devices (TVs, monitors,
etc.).
The wireless sensor can be suspended using the mounting hole or the hinged stand on the bottom of the
wireless sensor.
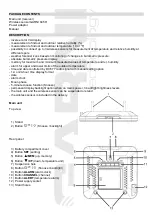
Placement of the main unit
Select the location of the main unit that is free from direct sunlight. Test the connection to the wireless
sensor
before final installation. If there is a problem with the signal reception, select another location. There is a
mounting hole for suspension on the rear of the main unit. The main unit can be also placed on a flat
surface using the two stands that are stored in the battery compartment and can be screwed into the two
holes on the back of the main unit.
SETUP OF THE WEATHER STATION
To enter the settings mode press and hold the
SET
button in the main screen mode for
3 seconds. For settings, use the
▲
/MEM
and
▼
/CF
buttons. To save, press the
SET
button once.
1) Press the
SET
button and hold for 3 seconds. Hour will flash. Use the
▲
/MEM
or
▼
/CF
button
to set the hour and confirm with
SET
2) Proceed further to set minutes, year, data display format D-M (day-month), or M-D
(month-day), month, day, absolute barometric pressure display units (hPa/mb or mmHg),
day name abbreviation language (GER, ENG, FRE, ITA, SPA), time format (12 Hr or 24 Hr), enabling
(ON), or disabling (OFF) DCF-77 signal reception, activation (ON), or deactivation (OFF) of the beep (BI)
on button press, time zone (ZONE, from -12 to +12 hours, for the Czech and Slovak Republic leave 00),
and cease the setting by pressing
SET
3) After setting is done, you can change the time display in 12- or 24-hour format also by briefly pressing
the
SET
button.
Note:
Hold the
▲
/MEM button or
▼
/CF
button when setting the value to increase or decrease
the value faster. If no button is pressed for 20 seconds, the last set value is saved and the
setting mode exits.
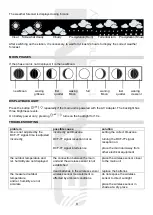
Day name abbreviations
Monday Tuesday Wednesday Thursday Friday Saturday Sunday
GER
MON
DIE
MIT
DON
FRE
SAM
SON
ENG
MON
TUE
WED
THU
FRI
SAT
SUN
FRE
LUN
MAR
MER
JEU
VEN
SAM
DIM
ITA
LUN
MAR
MER
GIO
VEN
SAB
DOM
SPA
LUN
MAR
MIE
JUE
VIE
SAB
DOM


