ANITA ©
MP01400EN_160801
9
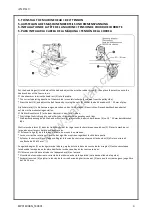
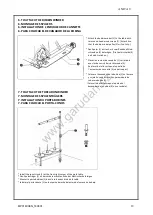
5. TO INSTALL THE MACHINE HEAD • BELT TENSION
5. AUFSTELLUNG DES MASCHINENOBERTEILS UND RIEMENSPANNUNG
5. INSTALLATION DE LA TÊTE DE LA MACHINE • TENSION DE COURROIE CORRECTE
5. PARA INSTALAR LA CABEZA DE LA MÁQUINA • TENSIÓN DE LA CORREA
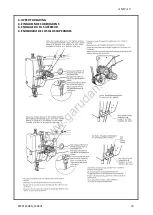
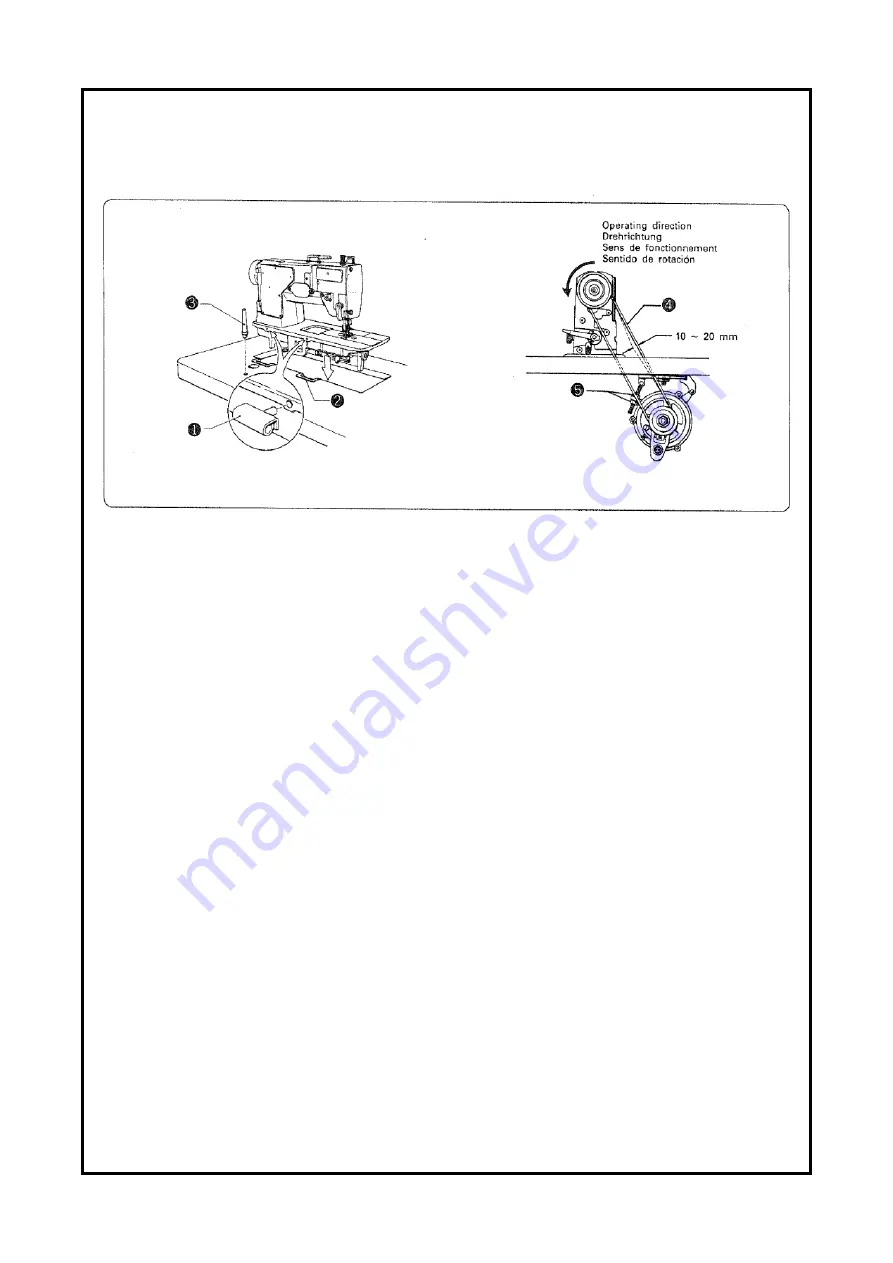
Put the head hinges (1) into holes of the bed and adjust them to the rubber hinge (2), then place the machine onto the
head cushions at the four corners.
© Use a hammer to drive the head rest (3) into the table.
* The correct operating direction of the machine is counterclockwise (as viewed from the pulley side).
* Press the belt (4), and adjust the belt tension by turning the nuts (5) so that the belt has about 10 ~ 20 mm of play.
Die Scharniere (1) in die Aussparungen einsetzen und auf die Auflagen (2) ausrichten. Danach das Machinenoberteil
auf die vier Gummiunterlagen stellen.
© Die Machinenstütze (3) mit einem Hammer in den Tisch treiben.
* Die richtige Drehrichtung ist von der Seite der Riemenscheibe gesehen nach links.
* Die Riemenspannung durch Drehen der Muttern (5) so einstellen, daβ sich der Riemen (4) ca. 10 ~ 20 mm durchdrücken
läβt.
Mettre les charnières (1) dans les trous du socle et les régler avec la charnière en caoutchouc (2). Placer la machine sur
les quatre amortisseurs de tête aux quatre coins.
© Enfoncer la tige (3) de la tête dans la table, au moyen d´un marteau.
* Le sens correct de rotation est inverse des aiguilles montre en regardant le côté de la poulie.
* Enfoncer la courroie (4) avec le pouce. Régler la tension de courroie en tournant les boulons (5) afin la courroie ait
une flèche de 10 à 20 mm.
Ponga las bisagras (1) en los agujeros de la base y ajuste éstas a la base de caucho de las bisagras (2) entonces coloque
la cabeza de la máquina en las almohadillas de la cabez que hay en las cuatro esquinas.
©Utilizar un martillo para introducir el apoyacabeza (3) en la mesa.
* El sentido de funcionamiento correcto de la máěuina es hacia la izquierda (vista desde el lado de la polea).
* Empujar la correa (4) y ajustar la tensión de la rorrea haciendo girar las tuercas (5) para que la correa tenga un juego libre
de 10 a 20 mm.
www.garudan.cz
Summary of Contents for GF-207-x47 Series
Page 44: ...ANITA MP01400CZ_160801 4 1 MACHINE BODY w w w g a r u d a n c z...
Page 46: ...ANITA MP01400CZ_160801 6 2 UPPER SHAFT MECHANISM w w w g a r u d a n c z...
Page 48: ...ANITA MP01400CZ_160801 8 3 NEEDLE BAR ROCKING MECHANISM w w w g a r u d a n c z...
Page 50: ...ANITA MP01400CZ_160801 10 4 PRESSER FOOT MECHANISM w w w g a r u d a n c z...
Page 52: ...ANITA MP01400CZ_160801 12 5 FEED MECHANISM w w w g a r u d a n c z...
Page 54: ...ANITA MP01400CZ_160801 14 6 FEED SHAFT MECHANISM w w w g a r u d a n c z...
Page 58: ...ANITA MP01400CZ_160801 18 8 LOWER SHAFT MECHANISM w w w g a r u d a n c z...
Page 62: ...ANITA MP01400CZ_160801 22 10 LUBRICATION 1 3 w w w g a r u d a n c z...
Page 64: ...ANITA MP01400CZ_160801 24 10 LUBRICATION 2 3 w w w g a r u d a n c z...
Page 66: ...ANITA MP01400CZ_160801 26 10 LUBRICATION 3 3 w w w g a r u d a n c z...
Page 68: ...ANITA MP01400CZ_160801 28 11 THREADING MECHANISM w w w g a r u d a n c z...
Page 82: ...ANITA MP01400CZ_160801 42 17 GAUGE PARTS w w w g a r u d a n c z...
Page 84: ...ANITA MP01400CZ_160801 44 18 ACCESSORIES 1 2 w w w g a r u d a n c z...
Page 86: ...ANITA MP01400CZ_160801 46 18 ACCESSORIES 2 2 w w w g a r u d a n c z...
Page 88: ...ANITA MP01400CZ_160801 48 19 GAUGE PARTS LIST w w w g a r u d a n c z...
Page 89: ...ANITA MP01400CZ_160801 49 w w w g a r u d a n c z...


