ANITA ©
MP00006EN_181206
43
11.
SIMULATION OF PATTERN
After creating new pattern it is recommended to check the whole route of the sewing without the
needle to be sure that there will be no clash between needle, presser foot and feed plate. Simulation
is activated by button D1, which can be found either on the screen for sewing or on the screen for
creating pattern. If the machine is in service mode, it is possible to modify position of individual
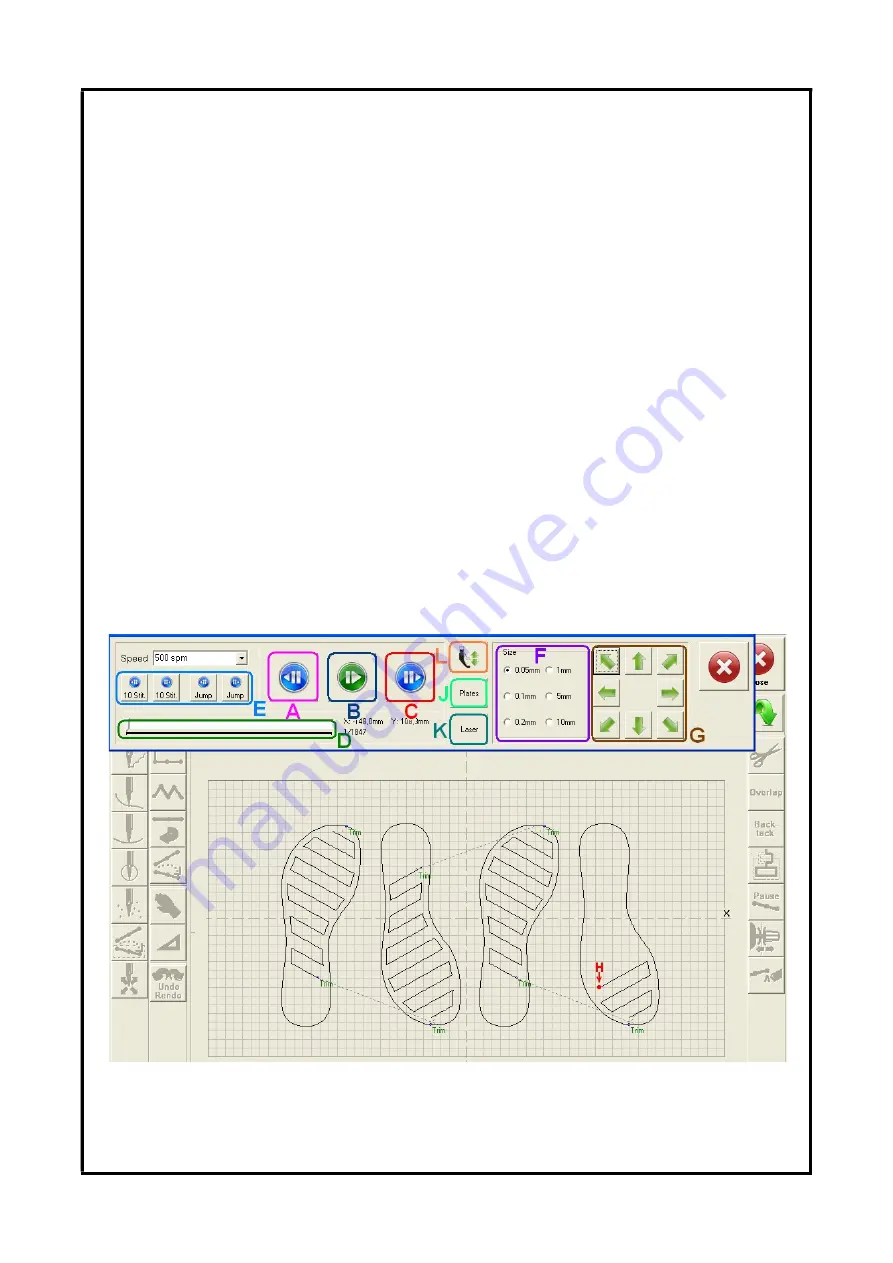
stitches by direction arrows. Window for simulation of pattern is on the picture18 and enables
operator to perform following functions:
A
– Previous stitch – moves position of needle to previous stitch
B
– Simulation of sewing – simulates sewing operation stitch by stitch according to predefined
speed
C
– Next stitch – moves position of needle to following stitch
D
– Measuring of sewing operation – indicates current position of simulation within the
whole
pattern. X/Y coordinates and number of current stitch are displayed on the right side
E
– Jumping – enables operator to jump by 10 stitches forward to next JUMP or backwards to
previous JUMP (JUMP is section of pattern without sewing)
F
– Size of step for modification of stitch position
G
– Direction arrows for modification of individual stitches
H
– Last simulated stitch – current stitch is marked in bold and red point at the end
J
– Plates – change position of feed plates
K
– Laser – used for activation/deactivation of laser pointer (only for machines equipped with this
option)
L
– Presser foot – Change position of presser foot
Picture 22: Simulation of pattern
www.garudan.cz
Summary of Contents for GPS/G-10060
Page 69: ......


