ANITA ©
MP00006EN_181206
39
10.5
Creating pattern in routing mode:
This mode is mostly used for patterns where we have template and know in advance exact sewing
route. By the help of arrows we create a shape of sewing, gradually saving points of the pattern.
Firstly, we choose type of sewing section by buttons B1 to B5 (line, curve, etc.), type of stitch by C1 to
C4 (straight, zigzag etc.). By the button F3 we select mode of creating pattern by routing. In case the
pattern is still empty, machine will move to the middle of sewing area (position 0;0). If any data have
already been entered, machine will move to position of last stitch. In case we want to change type of
sewing section or type of stitch it is necessary to close the window with arrows by the button
Close
,
select required type of sewing and call out arrows again by the button F3.
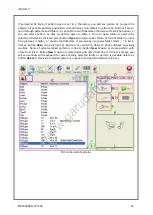
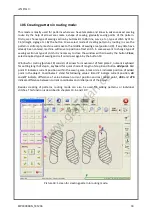
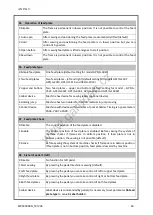
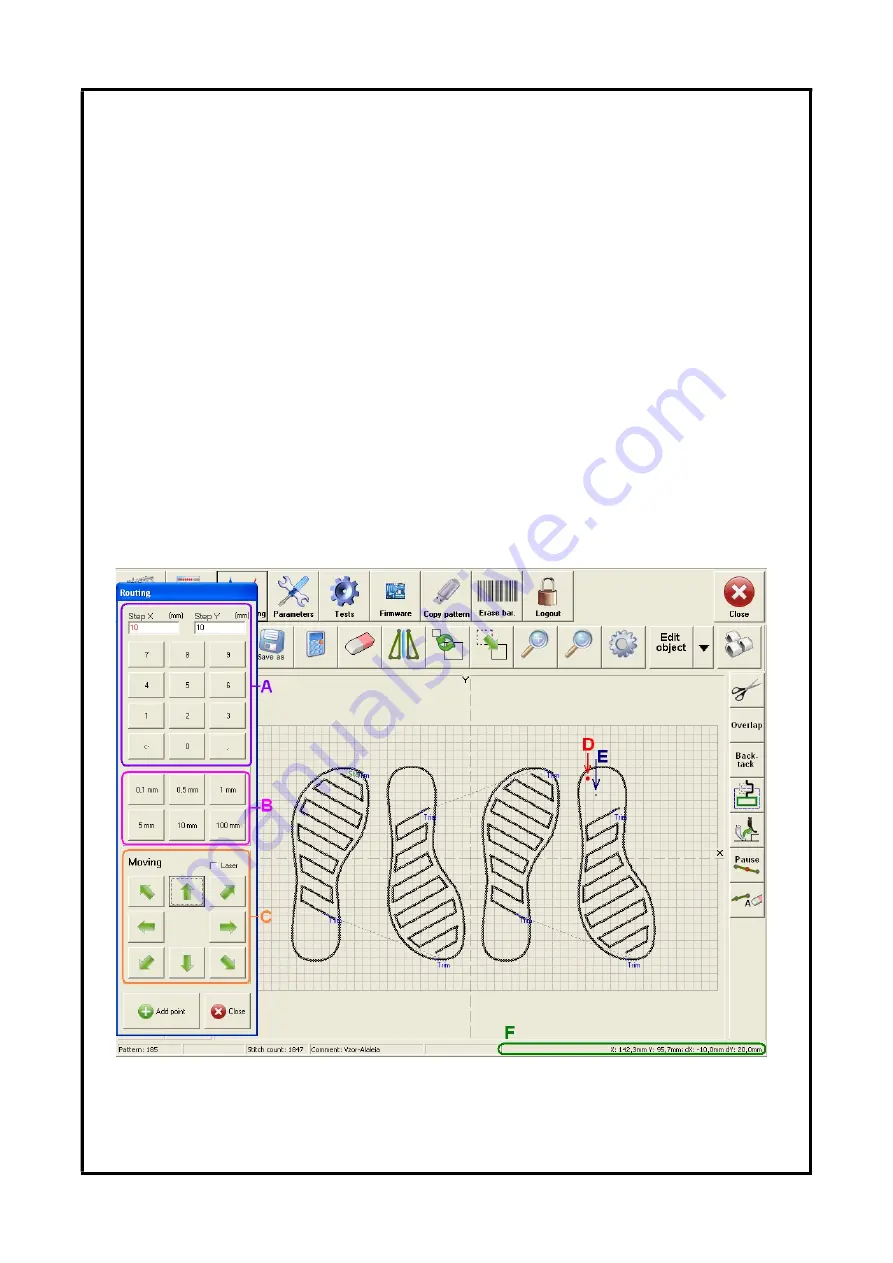
Window for routing (picture 18) consists of arrows for movement of feed plate C, numeric keyboard
for setting length of step A, keyboard for quick choice of length of step B and button
Add point
. Red
point D indicates current position within the sewing area, black circle E indicates position of added
point in the object. Coordinates F stand for following values:
X
and
Y
indicate current position,
dX
and
dY
indicate difference of value between current position and last added point,
dX0
and
dY0
indicate difference between current coordinates and initial point of the object.
Besides creating of patterns, routing mode can also be used for editing patterns or individual
stitches. This function is described in chapters 10.6. and 10.7.
Picture 18: Screen for creating pattern in routing mode.
www.garudan.cz
Summary of Contents for GPS/G-1507
Page 69: ......

