ANITA ©
MP00006EN_181206
41
10.7
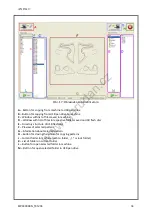
Editing of stitches in routing mode:
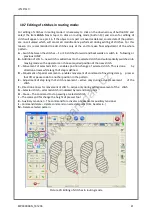
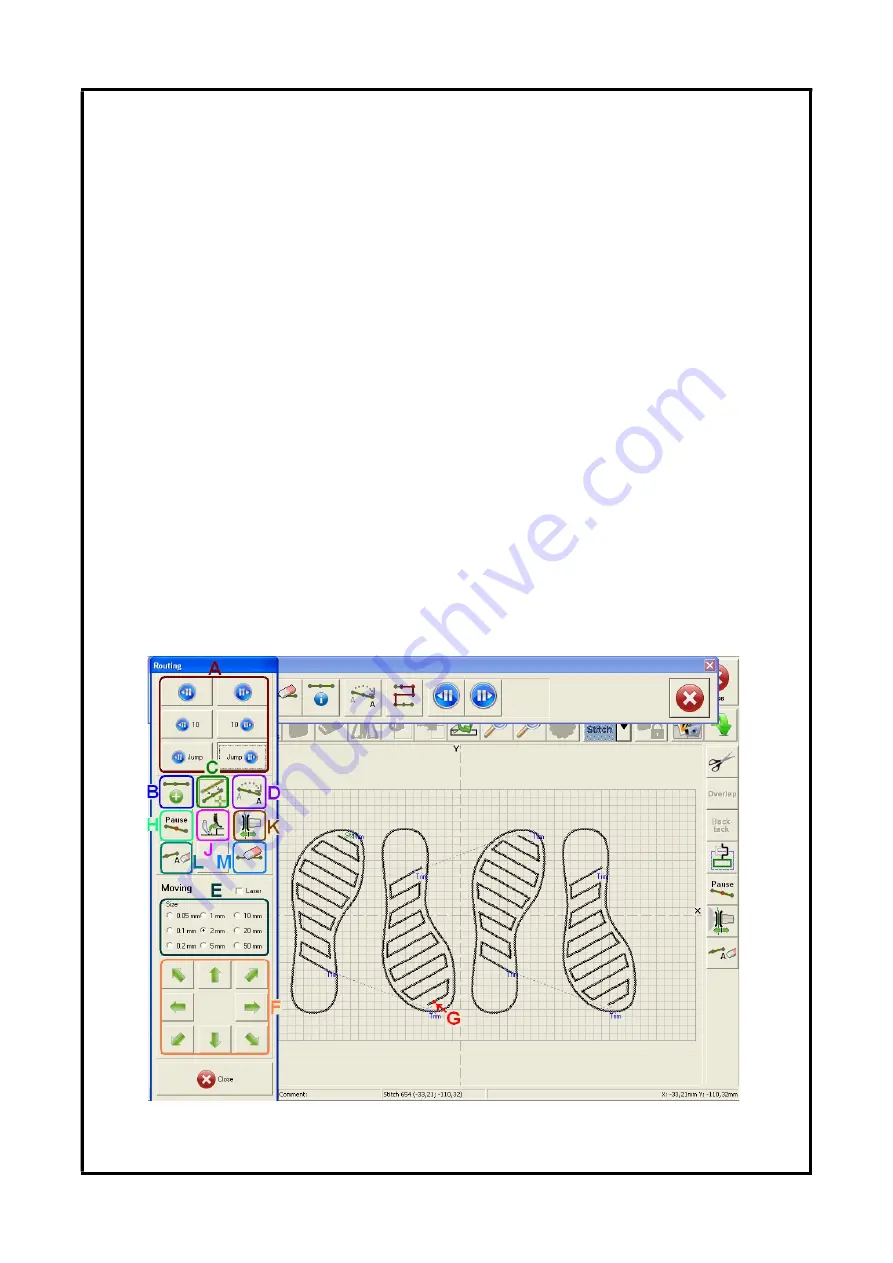
For editing of stitches in routing mode it is necessary to click on the down arrow of button D12 and
select the item
Stitch
. Next step is to click on routing mode (button F3) and screen for editing of
stitch will appear – see pic. 16. If the object or its part is moved or deleted, source data of the pattern
are re-calculated which will cancel all modifications performed during editing of stitches. For this
reason it is recommended to edit stitches only at the end to make final adjustment of the whole
pattern.
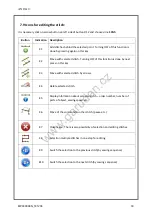
A
– Switch between the stitches – 1 or 10 stitches forward and backwards or switch to
following or
previous JUMP
B
– Addition of stitch – new stitch is added next to the selected stitch and automatically
switches into
moving mode so the operator can choose required position of the new stitch.
C
– Movement of selected stitch – enables position change of selected stitch. This is done
by
direction arrows while length of step is defined.
D –
Movement of special command – enables movement of command of inverting clamp,
presser
foot lift or pause code to another position in the pattern.
E
– Adjustment of step length of stitch movement – active only during actual movement of the
stitch
F
– Direction arrows for movement of stitch – active only during actual movement of the stitch
G
– Selected stitch – selected stitch is indicated by red and bold point
H
– Pause – The command to stop sewing at selected stitch
J
– The command for change the height of presser foot
K
– Auxiliary tensioner – The command for activates or deactivates auxiliary tensioner
L
– Command delete – delete commands on selected point (trim, backtack…)
M
– Delete selected pattern
Picture 20: Editing of stitches in routing mode
www.garudan.cz
Summary of Contents for GPS/G-1507
Page 69: ......

