


© ANITA
MP02700EN_200408
GZ-5527 series
18
D10.
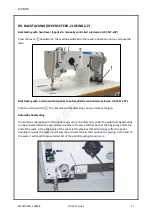
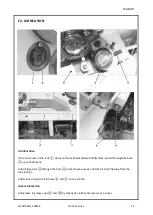
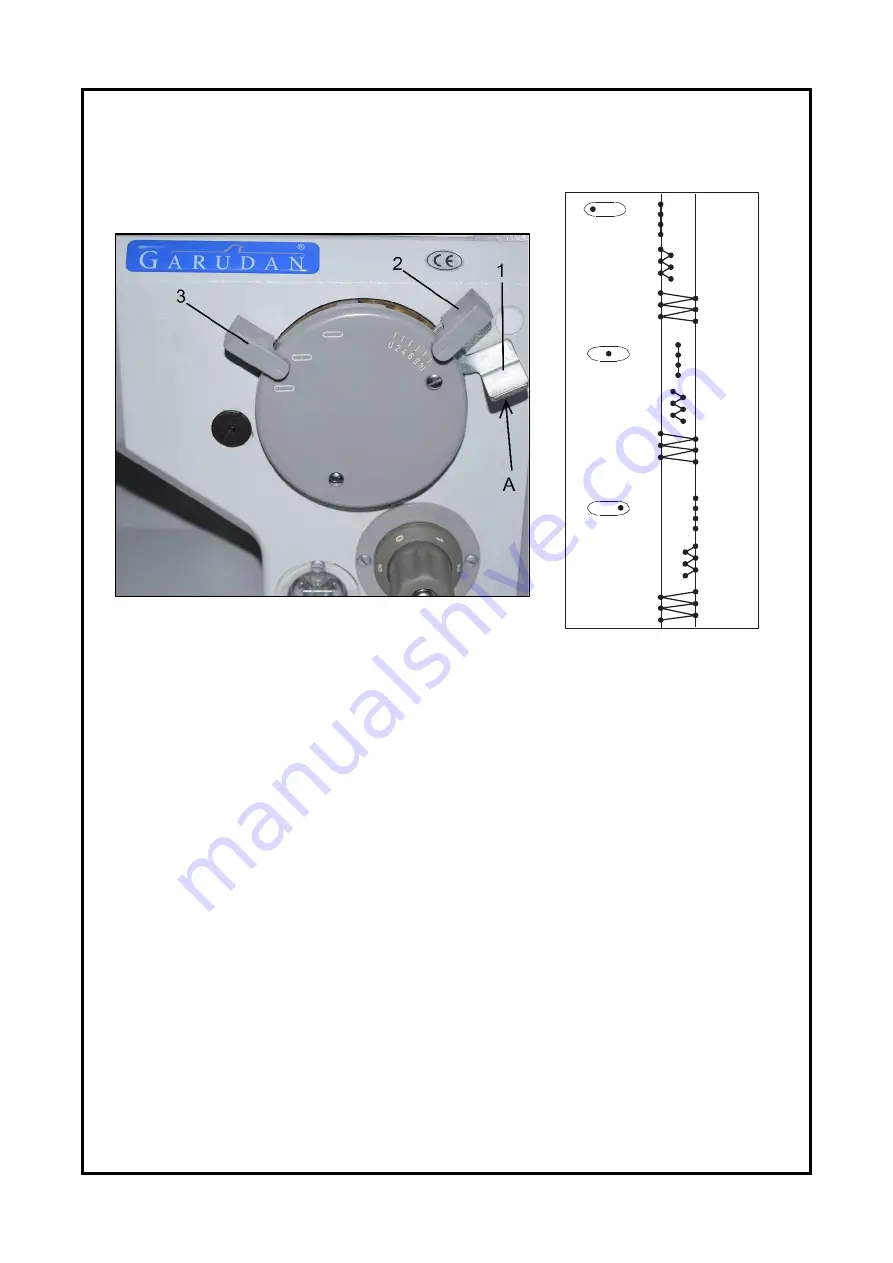
SETTING OF ZIG-ZAG STITCH WIDTH (THROW) AND POSITION
Setting of zig-zag stitch width
Press the lever
①
in the arrow direction
Ⓐ
until it strikes the lever
②
- the lever arrest is released
②
. Grip both levers at the same time and set the zig-zag stitch width by turning the lever
②
against
the selected number indicating the stitch width. Arrest the lever
②
position by turning the lever
①
against the arrow direction
Ⓐ
.
Setting of zig-zag stitch position
Press the lever
①
in the arrow direction
Ⓐ
until it strikes the lever
②
. The lever arrest is released
③
. Make sure that the lever setting does not change at the arrest switching off
②
.
Press the lever
③
and turn it at the same time up to the stop (inside the machine) against the
respective symbol indicating the zig-zag stitch position. Only the middle position of the lever is
arrested with a lock. After the lever
③
setting, carry out arresting with the lever
①
.
In picture
Ⓒ
there are examples of setting the zig-zag stitch width and position from which it is
visible that the zig-zag stitch width does not change at the position change.
www.garudan.cz


