9ENG8008 GFM436 User Manual
GFM436 Operation- 27
7 GFM436 Operation
7.1 Starting Up
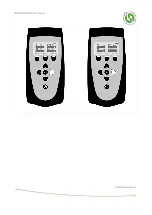
Press the Power Key to turn the instrument on. When turned on the instrument will take a few seconds to boot up.
During this time a ‘loading’ banner will be displayed. After a few seconds, the instrument will show the display
below:
After booting up the instrument commences a warm-up period. This is to allow all the sensors to initialise. During
this period the letters ‘WRM’ appear in the top right-hand corner of the display as shown. Please wait until WRM
disappears before proceeding.
The screen shows the instrument type, its recalibration date, the battery level, and the serial number. If you ever
need to contact the manufacturer for assistance with your instrument, please quote the serial number.
IMPORTANT:
If the instrument has been stored in a cool place, or hasn’t ran a sample for at least a week,
then allow the pump to run for at least 10 minutes before trying to take a sample. It is advised to still be
wary of readings until the instrument is in a routine of being turned on and ran regularly.
Summary of Contents for GFM 436
Page 1: ...9ENG8008 GFM436 User Manual Exported on 02 02 2024...
Page 22: ...9ENG8008 GFM436 User Manual GFM436 Product Specification 22...
Page 24: ...9ENG8008 GFM436 User Manual GFM436 Product Specification 24 6 7 GFM436 Connections...
Page 30: ...9ENG8008 GFM436 User Manual GFM436 Operation 30...
Page 56: ...9ENG8008 GFM436 User Manual Storing Data 56...
Page 58: ...9ENG8008 GFM436 User Manual Storing Data 58...
Page 73: ...9ENG8008 GFM436 User Manual User Calibration 73...
Page 96: ...9ENG8008 GFM436 User Manual Appendix F ATEX UKEX and IECEx Certificate 96...
Page 97: ...9ENG8008 GFM436 User Manual Appendix F ATEX UKEX and IECEx Certificate 97...


