background image

-29

-

Brake fluid

Inspect the brake fluid level and change it periodically. The brake
fluid should also be changed if it becomes contaminated with dirt or
water

.

Liquid recommended

Use D.O.T  3 or D.O.T  4.

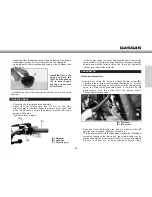
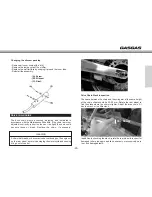
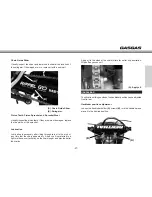
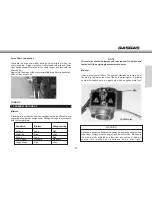
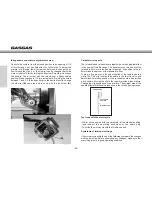
Brake fluid level inspection

The front 

(A) 

and rear 

(B)

 reservoirs must be kept more than half

full with brake fluid. If the brake fluid is insufficient, add brake fluid.

CAUTION

Do not spill brake fluid onto any painted surface. Do not use fluid
from a container that has been left open or that has been unsealed
for a long time. Check for fluid leakage around the fittings. Check
for brake hose damage.

WARNING

Do not mix different types of fluid. Change the brake fluid in the
reservoirs completely if the same type of brake fluid is not available.

Brake wear inspection

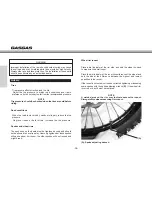
If the thickness of either pad, front and rear, is less than 1 mm,
replace both pads as a set. Pad replacement should be carried out
only by an authorized GAS GAS dealer.

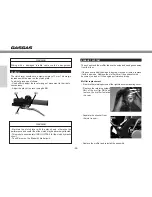
STEERING

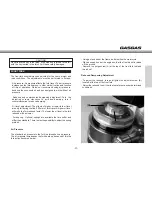
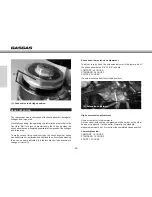
The steering should always be kept adjusted so that the handlebar
will turn freely but without free play.

Summary of Contents for EC 125 Racing 2013

Page 1: ......

Page 2: ......

Page 3: ...n in this demanding discipline as well as the many great successes achieved thanks to great trial riders who have contributed with their expertise to the basic data that have allowed us to create moto...

Page 4: ...nal injury or even death CAUTION This symbol identifies instructions or procedures which if not followed strictly could result in damage to or destruction of equipment NOTE This note symbol indicates...

Page 5: ...ition 17 Cooling System 17 Spark Plug 20 Transmission 20 Air Cleaner 22 Throttle Cable 23 Carburetor 23 Clutch 24 Exhaust System 24 Drive Chain Guide 25 Handlebar 27 Brakes 28 Steering 29 Steering blo...

Page 6: ...n system Mixture 100 Synthetic Oil 50 1 2 Mineral Oil Only USA 32 1 3 Starting system Starting lever Ignition system CDI system Ignition timing 1 mm BTDC TRANSMISSION Transmission type 6 speed Clutch...

Page 7: ...le multi adjustable shock Suspension stroke Front 298 mm Rear 298 mm Front fork oil SAE 5 7 5 Front fork oil level 110 mm compressed without spring BRAKES Type Front Rear Disc brake Effective disc dia...

Page 8: ...fluid reservoir 7 Throttle grip 8 Front brake lever 9 Steering lights horn and headlamp controls 10 Burglar by locking direction 1 Clutch lever 2 Starter lever 3 Clutch fluid reservoir 4 Multifunctio...

Page 9: ...ne cock 17 Shift pedal 18 Muffler 19 Seat 20 Gas reservoir 21 Chain guide 22 Chain 23 Suspension linkage and swingarm 24 Rear brake pedal 25 Kick start pedal 26 Exhaust 27 CDI switch 28 Front axe pull...

Page 10: ...cure moreover it also returns the side stand to its original position EC A Side stand B Double spring NOTE Do not start the engine or ride the motorcycle when the side stand is down FUEL The GAS GAS E...

Page 11: ...LE SYNTHETIC NOTE If the recommended oil is not available use only oil designed for racing with 2 cycle engines Gasoline and engine oil mixing proportions Synthetic oil 100 gasoline 50 engine oil 1 2...

Page 12: ...Turn the gasoline cock A clockwise to the ON position SERIAL NUMBER A It is stamped on the steering pipe It indicates the frame number registered for this motorcycle HOMOLOGATION PLATE B This motorcy...

Page 13: ...o ensure a positive shifting Careless incomplete shifts can cause the transmission to jump out of gear and cause engine damage A Gearshift pedal 13 NOTE When the engine is already warm or on hot days...

Page 14: ...ompletely Check and adjust 11 After the break in procedure has been properly carried out the motorcycle is ready for regular operation CAUTION However avoid accelerating recklessly that can lead to en...

Page 15: ...e fluid level Brake fluid Brake pump piston dust cover Check Inspect Change Replace Apply grease Lubricate Adjust At each fill up 3 fill ups 1 fill up 3 fill ups 3 fill ups 1 fill up 3 fill ups 10 fil...

Page 16: ...t General lubrication Steering bearing Wheel bearing Swingarm and linkages Rear shock absorber oil MANTENANCE SCHEDULE Check Inspect Change Replace Apply grease Lubricate Adjust 1 fill up 1 fill up 5...

Page 17: ...c flywheel cover Test ride the motorcycle and readjust the engine tune up if necessary COOLING SYSTEM Radiator Hoses Check the radiator hoses for cuts or deterioration and the connections for loosenes...

Page 18: ...d reduce the cooling system efficiency If the lowest ambient temperature encountered falls below the freezing point of water protect the cooling system Use a permanent type of antifreeze in the coolin...

Page 19: ...ash off immediately any coolant spilled on the chassis engine or wheels WARNING To prevent severe scalding do not remove the radiator cap or try to change liquid when the engine is still hot Wait unti...

Page 20: ...K BR9EG The spark plug should be removed periodically to check its gap If the plug is oily or has carbon deposits clean it with a sandblaster After removing the abrasive particles the spark plug must...

Page 21: ...cles Tighten the oil drain screw with its O ring to 20 Nm Remove the oil filler opening plug C and pour 900 cc of new transmission 750 cc for model 125cc Check the oil level after kicking the kick sta...

Page 22: ...intake increasing fuel consumption reducing engine power and causing spark plug fouling WARNING A clogged air cleaner may allow dirt and dust to enter the carburetor and stick the throttle open This c...

Page 23: ...hten lightly the idle screw Open and close the throttle a few times to make sure the idle speed does not change Readjust if necessary With the engine idling turn the handlebar to each side If handleba...

Page 24: ...the performance and useful life of the clutch may be adversely affected This model uses mineral oil GRO ULTRA 5 for the clutch hydraulic circuit Tank C must not be filled with brake liquid EXHAUST SY...

Page 25: ...nging the silencer packing Remove all cover rivets with a drill Remove the inside core of the muffler Replace the muffler fibre by wraping it around the inner tube Reinstall the assembly A Screw B Sil...

Page 26: ...t position and readjust if necessary WARNING If the axle nut is not securely tightened an unsafe riding condition may result Drive chain chain guide chain slider and rear sprocket teeth When the chain...

Page 27: ...ion is necessary after riding through rain or in the mud or any time that the chain appears dry A heavy oil is preferred to a lighter ol because it will stay on the chain longer and provide better lub...

Page 28: ...ar is installed correctly there will be an even gap at the front and rear after tightening A B A A Brake pedal B 10 mm free play Tighten the bolts front first and then the rear to 25 Nm of torque BRAK...

Page 29: ...e Do not use fluid from a container that has been left open or that has been unsealed for a long time Check for fluid leakage around the fittings Check for brake hose damage WARNING Do not mix differe...

Page 30: ...ve the handlebar A by loosening the handlebar holder screws and removing the upper holders Loosen the steering stem nut B Loosen the screws of the suspension top bridge C and remove it Turn the steeri...

Page 31: ...ts the fork travel The air pressure increases as the fork heats up in other words it varies as a function of time of operation We do not recommend using air pressure because the suspension has been de...

Page 32: ...el adjustment Place a stand under the motorcycle engine to keep it in a straight and stable position Remove the handlebar screws and remove the handlebar Remove the suspension caps from the tubes Comp...

Page 33: ...e front tire does not rub against the fender when the fork tubes are compressed fully Make this adjustment to a minimum of 5 mm CAUTION The suspension tubes both right and left must be adjusted evenly...

Page 34: ...completely closed position Low compression COMFORT 18 CLICKS STANDARD 15 CLICKS SPORT 12 CLICKS A Extension adjustment A 1 Suspension top bridge position REAR SUSPENSION The rear suspension is compose...

Page 35: ...according to the rider s weight and the road conditions Using the harder spring The rebound is quicker Using the softer spring The rebound is slower NOTE Refer to the suspension adjustments on page 45...

Page 36: ...g may cause the spring and any of its related parts to be ejected at high velocity Always wear eye and face protection The installation of these parts should be performed by an authorized dealer WHEEL...

Page 37: ...minutes Check the brakes before operating the motorcycle WARNING Never wax or lubricate the brake disc Loss of braking and an accident could result Clean the disc with trichloroethylene or acetone CL...

Page 38: ...ts 23 Suspension top bridge bolts 24 Steering stem nut 9 Trailing plate bolts 10 Spokes 11 Front axle bolt 12 Brake hose screw 13 Radiator bracket bolts 14 Engine holder bolts and nuts 15 Gearshift pe...

Page 39: ...ering stem nut Torque rod bolt Rear linkage bolt Nm 25 10 36 51 6 15 98 98 9 26 39 29 1 5 4 81 81 E N G I N E PART NAME Cylinder head screws Cylinder nut Engine drain plug Kick start pedal bolt Kick s...

Page 40: ...rease periodically or whenever the vehicle has been operated under wet or rainy conditions and especially after using high water pressure Before lubricating each part remove any rusty spots with rust...

Page 41: ...any appliance with a pilot light A Condition Mixture Change setting Cold air Lean Rich Warm air Rich Lean Dry air Lean Rich Low altitude Standard Standard High altitude Rich Lean A Main jet A Drive Ch...

Page 42: ...out of the jet needle hole since the needle is tapered its position in the jet determines the amount of fuel allowed to flow There are five grooves in the upper section of the needle where a circlip f...

Page 43: ...ges 1 Find the correction factor to adjust the carburetor Example 1000 meters altitude with an air temperature of 35 C The correction factor is 0 94 2 Using the correction factor select the correct sl...

Page 44: ...U R A C F FACTOR DE CORRECCI N ALTITUD NEEDLE POSITION AIR SCREW OPENING CORRECTION FACTOR NEEDLE POSITION AIR SCREW OPENING 1 06 or HIGHER LOWER CLIP 1 POSITION TIGHTEN 1 TURN 1 06 1 02 SAME TIGHTEN...

Page 45: ...to ride consistently and recognizing the effects of his input such things as changes in rider position and increasing fatigue may lead to incorrect judgments about necessary setting adjustments When t...

Page 46: ...essively when slowing down or applying brakes 1 Fork oil level is low 2 Springs are too soft 3 Oil too light 4 Degraded fork oil 5 Incorrect rebound or compression Symptoms of the rear shock absorber...

Page 47: ...dal firmly If the motorcycle maintains its level attitude as the suspension is compressed the spring rates are well balanced Sit astride the motorcycle and take a riding posture Next check to see that...

Page 48: ...damping or use a harder spring NOTE After any adjustment check front and rear compatibility Adjustments that depend on the conditions of the jounce stops rear shock absorber Suspension jounce stops a...

Page 49: ...Refer to the sparts parts catalogue FINAL RECOMMENDATIONS PREVENTIVE ADVICE Before you ride the motorcycle take all the time you may require to check your motorcycle carry out the periodical upkeep an...

Page 50: ...ponents are identified with a determined and registered mark Each one of the homologation components must form part of the vehicle and in case of loss breakage or malfunction it is recommended that th...

Page 51: ...petition 1 Clean the air cleaner element 2 Adjust drive chain slack 3 Tighten rear sprocket nuts 4 Tighten all spokes 5 Check the tires air pressure 6 Tighten front and rear axle nuts 7 Tighten swinga...

Page 52: ...d metal surfaces with a coat of oil to prevent rust do not apply oil to the brakes and rubber parts Cover the exhaust pipe with a plastic bag to prevent corrosion Place the motorcycle in such a positi...

Page 53: ...me total operation time environmental temperature engine temperature battery voltage time and maintenance NOTE Engine temperature and voltage sensor is optional and is not available in GAS GAS WARNING...

Page 54: ...ameter Move to the next digit of the current parameter TEMPORAL DATA RESET Resets temporal data MS TT DST y RT TRIP ADJUST Enter exit the trip adjustment mode Change distance value RESET AND CHANGE OF...

Page 55: ...55 Operating temperatura 0 C to 60 C 32 F to 140 F Storage temperature 20 C to 80 C 4 F to 176 F Battery 3V CR2032 About 1 year life SPECIFICATIONS...

Page 56: ...the wheel circumference section for more information Change the blinking digit with the left button Change to next digit using the button To confirm press the button To switch between 12h and 24h form...

Page 57: ...turn on The warning will be disabled if the value is 0 Change the blinking digit with the left button Change to next digit usingthe buttonn To confirm press the buttonn When programmed kilometers or...

Page 58: ...e marks of the ground and convert to millimeters Use this number as a measure of the wheel circumference For greater precision the driver or an equivalent weight must remain at the motorcycle during t...

Page 59: ...clock on the display The device will automatically exit this mode when it receives any sensor data or when you press any button 59 The following information is displayed Maximum speed MS Odometer ODO...

Page 60: ...Main jet set too high Replace the rotor Drain the fuel tank and fill up with new fuel Clean the fuel system and verify its operation Clean or replace the air cleaner Verify its operation Verify if the...

Page 61: ...worn steering bearings Bent steering stem Go to a specialized workshop Replace the shift fork Go to a specialized workshop Replace the gearshift lever Adjust or replace the selector position spring Re...

Page 62: ...t Abnormal motorcycle noises Handlebar vibration Pour excess oil until reaching the correct oil level Drain fork oil and fill with correct fork oil viscosity Replace the front fork Go to a specialized...

Page 63: ...ering bracket and steering stem locknut to the correct torque values Tighten steering bracket and steering stem locknut to the correct torque values Replace the chassis Go to a specialized workshop Ad...

Page 64: ...s that become apparent within the period established in the Law decree 23 2003 on the 10th of July covering Warranties on Consumer Goods Sold from the time of delivery and in accordance with the Direc...

Page 65: ...specifications set out in the User s Manual e The vehicle has been altered or modified in any way or fitted with components other than those expressly authorised by GG as accepted components of the v...

Page 66: ...claim under Warranty or to arrange an inspection of the defect by an expert from GG Any additional obligations arising out of guarantees on parts replaced free of charge or any other service rendered...

Page 67: ......

Reviews: