-9-
4. Before starting production, if it has not been calibrated previously, the thickness of the patty must
be calibrated. To do so, follow these steps:
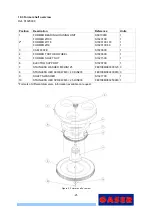
4.1. Pull on the latch (Pos. 8, external weight control overview) to expose the calibration gears
(Pos. 1, external weight control overview).
Image 2, Calibration 1
4.2. Turn the plate (Pos. 1, external weight control overview) clockwise to increase the
thickness and anti-clockwise to reduce it. Each turn of the plate changes the thickness of
the patty by 1 mm.
It is vital that when you perform the calibration of the thickness of the patties, the
calibration gear makes full turns, so that the mark on the gear lines up with the arrow on
the protection.
Image 3, Gear position
5. To start producti
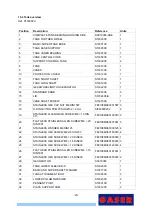
on, first fill the machine’s tank (Pos. 8, tank overview) with the mixture you wish to
use.
6. Next, start the machine up using the main switch (Pos. 3, electrical cabinet overview). Once the
machine is ON, press the green “START” button (Pos. 15, overview) and make 2 or 3 patties in
manual mode (Pos. 4, electrical cabinet overview) to check that the weight is correct. If the weight
of the product has to be modified with meat in the machine, it is vital that all of the plate holes

