background image

19

18

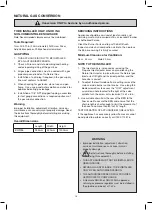
NATURAL GAS CONVERSION

TO BE INSTALLED ONLY ON OR IN A  

NON-COMBUSTIBLE ENCLOSURE

Note: Recommended clearances must be maintained.

Tools Required: 

7mm Drill, Thin (2.5mm diameter) flat Screw Driver, 
Adjustable spanner, Phillips head screw driver.

GAS PIPING 

1.   THIS APPLIANCE IS ONLY TO BE INSTALLED 

BY AN AUTHORISED PERSON.

2.   Check with local and state plumbing and heating 

codes regarding sizing of the gas lines.

3.   All gas pipe connections must be sealed with a gas 

pipe compound resistant to Natural Gas.

4.   Installation of a drip leg if required in the gas supply 

line must conform to AS5601.

5.   When checking for gas leaks, do not use an open 

flame.  Use a soap and water solution and check for 
bubbles indicating gas leakage.

6.   Installation of 1/8” NPT plugged tapping, accessible 

for test gauge connections, is required upstream of 
the gas supply connection.

Warning 

Improper installation, adjustment, alteration, service or 
maintenance can cause injury or property damage. Read 
the instructions thoroughly before installing or servicing 
this equipment.

Overall Dimensions

Length

Width

Height

BQ2026

995mm

550mm

1200mm

SERVICING INSTRUCTIONS

Appliances should be serviced at least annually and 
servicing must only be carried out by a Licensed Plumber 
or Authorised Person.
Clean the Burner Ports and top with a Soft Brush. 
Inspect and clean all combustion air inlets, then replace 
the Burner ensuring it is firmly secured.

Minimum Clearance for Ventilation:

Rear   50 mm         Side  50 mm

NOTE TO THE INSTALLER

1.  The injector size is increased by removing the 

Propane Injector (outer brass cap) and leaving the 
Natural Gas Injector in place. Ensure the Natural gas 
Injector is still tight and in correct position; and the 
hole size is correct.  

2.   To adjust the low/turndown flame setting remove the 

main and side burner control knobs.  Use a long thin 
blade screwdriver to access the “LOW” adjustment 
screw down hole located to the right of the valve 
spindle, turn the screw anti-clockwise 1/4 of a turn.

3.  Use suitable chain from the rear of the BBQ to the 

floor or wall to secure the BBQ and ensure that the 
chain length is short enough to limit the movement of 
the hose to no more than 80%of its’ length.

TEST OPERATION OF APPLIANCE BEFORE LEAVING.
If the appliance has excessively yellow flames or cannot 
be adjusted to perform correctly call 1300 174 876.


WARNING

•  Improper installation, adjustment, alteration,  

service or maintenance can cause injury or 
property damage.

•  Read the instructions thoroughly before installing 

or servicing this equipment.

•  THIS APPLIANCE MUST NOT BE INSTALLED OR 

USED INDOORS.

•  NATURAL GAS APPLIANCE. TO BE INSTALLED 

ONLY BY AN AUTHORISED PERSON.

•  THE AUTHORISED PERSON WILL PROVIDE A 

CERTIFICATE OF COMPLIANCE.

•  A Gasmate NGC30 or NGC40 AGA approved 

natural gas pressure regulator must be installed in 
the pipeline and be set at 1 kPa.

Conversion ONLY to be done by an authorised person.

Summary of Contents for Avenir BQ2026KIT

Page 1: ...warming rack Stainless steel tubular burners lit by electronic ignition Complete with hose and regulator Total cooking area mm 960W x 460D Approved to Australian and New Zealand Standards Important R...

Page 2: ...gas and contact the supplier immediately Always ensure the barbecue is kept away from flammable materials and the gas cylinder clear of any heat source When changing over from an empty gas cylinder t...

Page 3: ...cue with hood closed or before checking to ensure the burner tubes are fully seated over gas valve orifices Never lean over cooking surface when lighting Never alter or modify the regulator or gas sup...

Page 4: ...andard Phillips head screw driver or cordless drill and bits and Adjustable spanner open ended shifter or spanners Check Barbecue for any Damage Inspect barbecue parts as you proceed Contact your supp...

Page 5: ...door assembly 1 11 Right door assembly 1 12 Door handle 2 No Description QTY 13 Fat tray bracket 2 14 Fat tray 1 15 Fat tray front fascia 1 16 Flame tamer 4 17 Cooking grill 2 18 Hotplate 1 19 Warmin...

Page 6: ...spring washers E to attach 2x swivel castors 3 and 2x locking swivel castors 4 to the base panel 2 STEP 2 Use 4x M6x12mm screw B to attach cabinet left side panel 5 and cabinet right side panel 6 to t...

Page 7: ...7 ASSEMBLY INSTRUCTIONS STEP 3 Use 5x M6x12mm screws B to attach cabinet back panel 8 Note DO NOT tighten the screws of this step now STEP 4 Use 4x M6x12mm screws B to attach cabinet horizontal shelf...

Page 8: ...Use 4x M6x12mm screws B to attach the door handle 12 to door 10 11 STEP 6 Attach doors 10 11 to completed cabinet by inserting the bottom door locator into holes then pressing down on the top locator...

Page 9: ...ch the flat tray bracket 13 to main cabinet STEP 8 Attach hose and gas regulator assembly 23 to firebox assembly 1 Use 4x M6x12mm screws B to attach firebox to the cabinet making sure that the locator...

Page 10: ...10 10 ASSEMBLY INSTRUCTIONS STEP 9 Use 3x M5x12mm screws C to attach the flat tray front fascia 15 to the flat tray 14 STEP 10 Insert 4x flame tamers 16...

Page 11: ...11 11 STEP 11 Insert 2x cooking grills 17 and 1x hotplate 18 into firebox STEP 12 Insert warming rack 19...

Page 12: ...sition 9kg propane gas cylinder into the BBQ trolley and screw in the BBQ gas regulator Step 12 Attach the regulator to your gas cylinder Step 14 Use a solution of soapy water dishwashing liquid and w...

Page 13: ...connection is leaking bubbles will start to grow in the soapy solution If this happens shut off the gas supply at the cylinder ent then Step 15c The connection is gas tight when no bubbles grow aroun...

Page 14: ...onnect hose at the cylinder only DO NOT disconnect hose from appliance Regulator Safety Feature All QCC regulators the part that attaches to the gas cylinder to regulate the flow of gas have a safety...

Page 15: ...Control knob is closed Turn knob to high when lighting Electronic igniter is faulty Use a long barbecue match Food is not cooking or is taking too long Burner has gone out Check that the gas bottle i...

Page 16: ...ry lean cuts such as fish These temperatures vary with outside temperature and the amount of wind When using the temperature gauge in the hood of your barbecue please note that it measures air tempera...

Page 17: ...on and cleaning of the burner tubes is necessary Cleaning the Cooking Surface After cooking turn burner control to OFF and let barbecue cool before attempting to clean your grill plates Before first u...

Page 18: ...stion air inlets then replace the Burner ensuring it is firmly secured Minimum Clearance for Ventilation Rear 50 mm Side 50 mm NOTE TO THE INSTALLER 1 The injector size is increased by removing the Pr...

Page 19: ...C REPRESENTATIONS OF OUTDOOR AREAS The following figures are diagrammatic representations of outdoor areas Rectangular areas have been used in these figures the same principles apply to any other shap...

Page 20: ...call Customer Service Australia Only 1300 174 876 Hours of operation Monday to Friday 8am 5pm EST Do not return to place of purchase Keep your purchase receipt this will be required to make any claim...

Reviews: