


TEST FIRING HEATER
Test fire heater, following the lighting instructions on heater post. Leak test all gas connections with soapy water. Soap
bubbles indicate gas leakage.
DO NOT use a match to test for gas leaks.
WARNING: White smoke may appear around the radiant head during the first minute of the initial firing.
TROUBLE SHOOTING
Problem
Possible Causes
Solution
Main burner
won’t light
No gas
Replace cylinder
Low gas pressure
Replace cylinder
Blockage in orifice
Remove blockage
Manual valve not in ‘LOW’ or ‘HIGH’ position
Position to ‘HIGH’
Exposure to rain
Remove emitter and clean burner ports
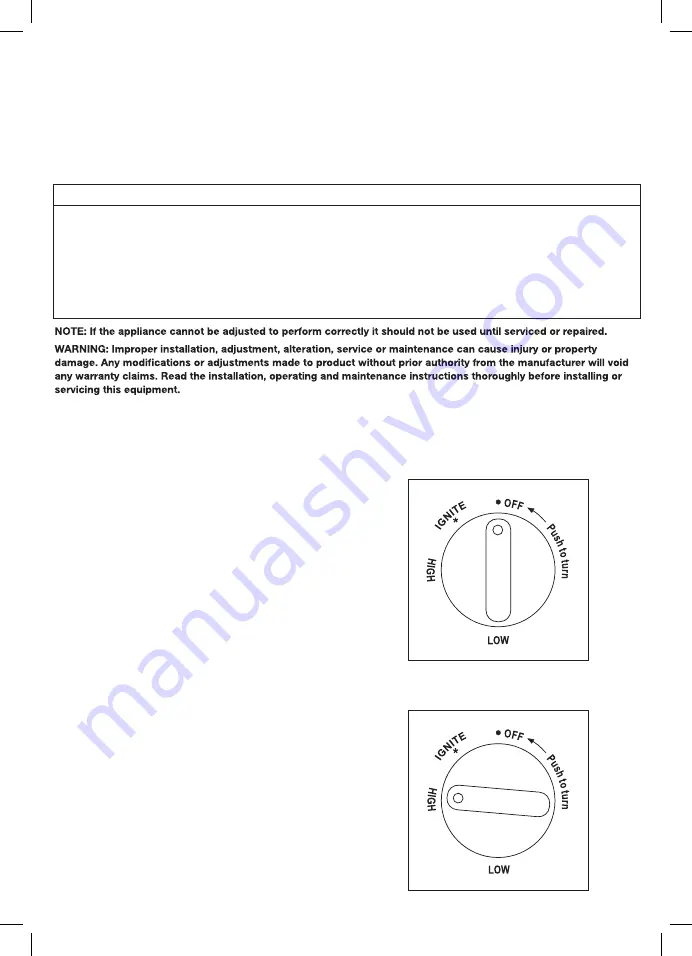
LIGHTING INSTRUCTIONS
WARNING: White smoke may appear around the radiant
head during the first minutes of the initial firing.
1. Ensure that the control knob is off. Slowly open the
gas cylinder valve.
2. Push in control knob and turn anti-clockwise to ‘HIGH’
3. Check for flame at the burner. If burner does not light
immediately turn control knob to ‘OFF’ position and
try again from the start. Allow 30 seconds between
ignition attempts for gas to dissipate. Several attempts
may be necessary.
Failure to follow this lighting procedure may result
in flame roll out beyond the emitter grid.
4. With the burner alight keep control knob depressed for
15 seconds.
5. For minimum heat push in and turn the control knob to
‘LOW’.
6. To turn heater off, turn the control knob to ‘OFF’.
7


