Liquid Equipped Air Seeder
Page
98
11/15
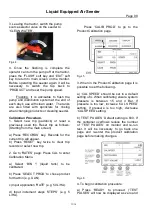
3. Leaving the tractor, switch the pump
source selector valve on the seeder to
‘CLEAN WATER’.
Fig.L4
4. Once the flushing is complete the
operator can turn the pump off at the tractor,
press the ‘FLUSH’ soft key and ‘EXIT’ soft
key to return to main screen on the monitor.
Before operating the seeder again it will be
necessary to switch the tap back to
‘PRODUCT’ and reset the pump speed.
Flushing. It is advisable to flush the
pump and distribution system at the end of
each day’s use with clean water. The tanks
are also fitted with sprinklers for rinsing
when changing products or cleaning seeder.
Calibration Procedure.
1. Select new trip (paddock) or reset a
previously used trip. Reset trip as follows:
(Starting from the main screen)
a) Press ‘RECORDS’ key. Records for the
current trip will appear.
b) Press
‘RESET’ key twice to clear trip
records or select new trip.
2
. Go to ‘RATES’ page: Press CAL to enter
Calibration Menu.
a) Select ‘BIN 1’ (liquid tank) to be
calibrated.
b) Press
‘SELECT PROD’ to chose product
for that bin (e.g. UAN).
c) Input applica
tion ‘RATE’ (e.g. 50 L/HA).
d) Input increment steps ‘STEPS’ (e.g. 5
L/HA).
Press
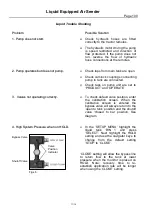
‘CALIB PROD’ to go to the
Product Calibration page.
Fig.L5
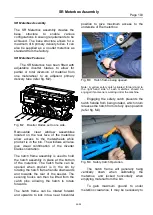
3. When in the Product Calibration page it is
possible to set the following:-
a) ‘CAL SPEED’ should be set to a default
setting of 4. When calibrating ensure system
pressure is between 1.5 and 4 Bar. If
pressure is too low, increase ‘CAL SPEED’
setting. If pressure is too high, decrease
‘CAL SPEED’ setting.
b) ‘TEST PULSES’ Default setting is 600. If
the container overflows reduce the number
of ‘TEST PULSES’ on monitor and re-run
test. It will be necessary to go back one
page and re-enter the product calibration
page before making changes.
Fig.L6
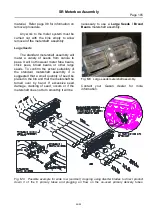
4. To begin calibration procedure:
a) Press
‘READY’ to proceed. (‘TEST
PULSES’ will now be displayed as zero and
Page
2


