CartManager XD Field Technician Guide
Page
25
Mechanical Procedures
Replacing the Strobe Light Bulb
You will need:
•
A replacement strobe light bulb, part #E500238-02.
•
A pair of pliers or vice grips and Phillips P2 screwdriver.
1. Remove four screws from protective cage and remove protective cage.
2. Grasp the orange strobe light cover with your hand and twist counter clockwise to remove it from the strobe
housing.
3. Grasp the plastic housing on the old bulb just above the two small wings that stick out on either side. Pull firmly
to remove the casing from the base.
4. Press the new bulb firmly into the bulb base, taking care not to bend the metal contacts. Make sure to align the
rounded corners on the bulb socket with the rounded corners in the bulb base.
5. Screw the strobe cover back on to the strobe housing.
6. Replace protective cage.
7. Turn key switch on and confirm that the new strobe is working.
Replacing the Rear Swivel Wheel
You will need:
•
One wheel assembly, foam filled: part #A500128-03.
•
A car jack, ball jack, pallet jack, or similar type of device capable of lifting at least 750 pounds.
•
Four wheel chocks.
•
Several sturdy wood blocks.
•
A 9/16 inch (15 mm) socket and driver, and a medium crescent wrench or 9/16 inch box end wrench.
1. Park the CartManager XD in a dry, flat area.
2. Push the manual brake all the way in.
3. Wedge chocks in front and behind both of the drive wheels.
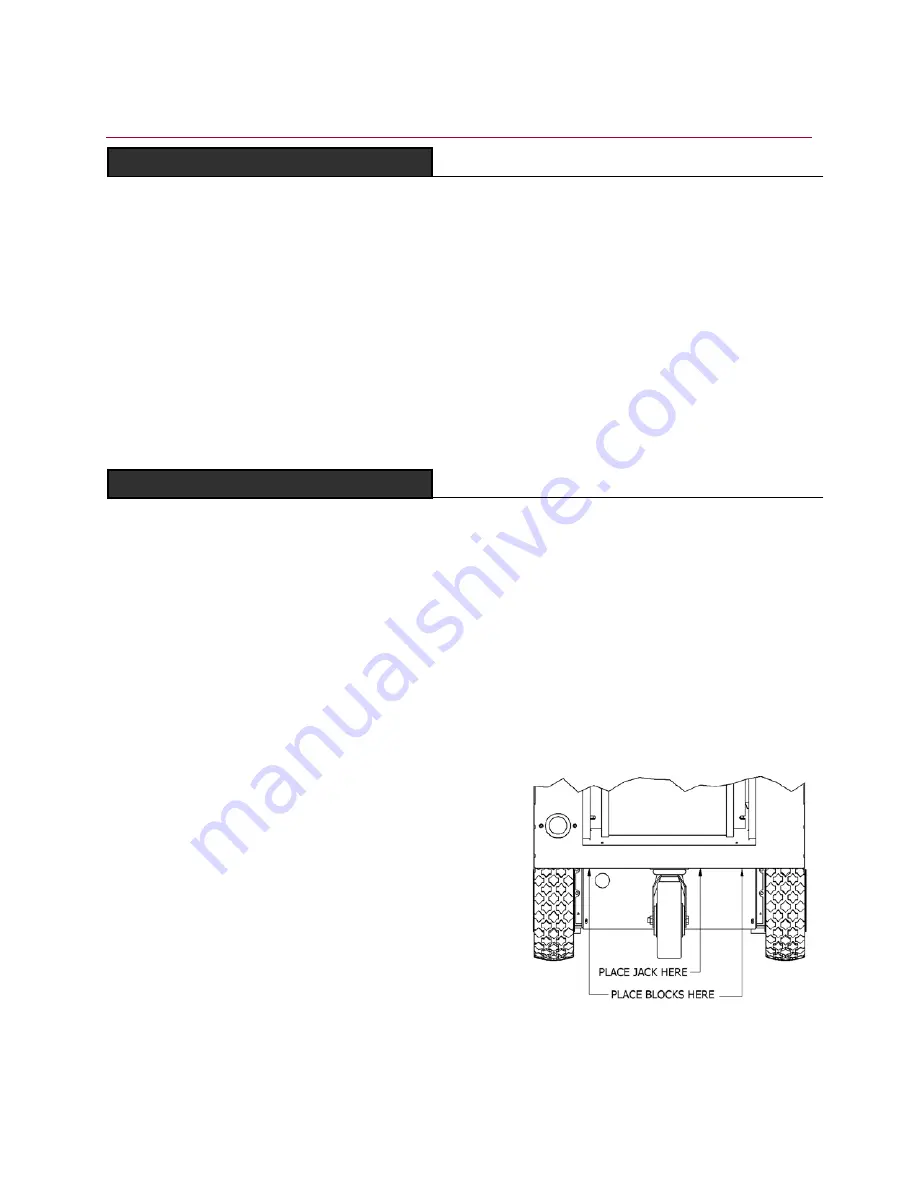
4. Place the car jack or one tongue of the pallet jack on the metal frame at the back of the CartManager XD, just to
the side of the square metal plate that supports the swivel wheel, as shown in the figure at right.
5. Raise the CartManager XD so that the swivel wheel is
approximately1 inch off the ground.
6. Wedge the wood blocks under both corners of the bar that
supports the swivel wheel plate. Make sure the blocks are the
same height on both sides.
7. Lower the CartManager XD onto the blocks and remove the
jack.
8. Remove the four bolts from the swivel wheel base plate. Save
the bolts.
9. Attach the new swivel wheel assembly. Tighten the nuts
securely.
10. Place the jack, remove the wood blocks and lower the
CartManager XD back down.
Summary of Contents for CartManager HD
Page 7: ...CartManager XD Field Technician Guide Page 4 CartManager XD Side Front View...
Page 20: ...CartManager XD Field Technician Guide Page 17 Batteries and Chargers...
Page 27: ...CartManager XD Field Technician Guide Page 24 Error Code Label Sheet on XDW...
Page 31: ...CartManager XD Field Technician Guide Page 28 Wiring Diagram XDWi...
Page 32: ...CartManager XD Field Technician Guide Page 29 XDW...
Page 40: ...Addendum...


