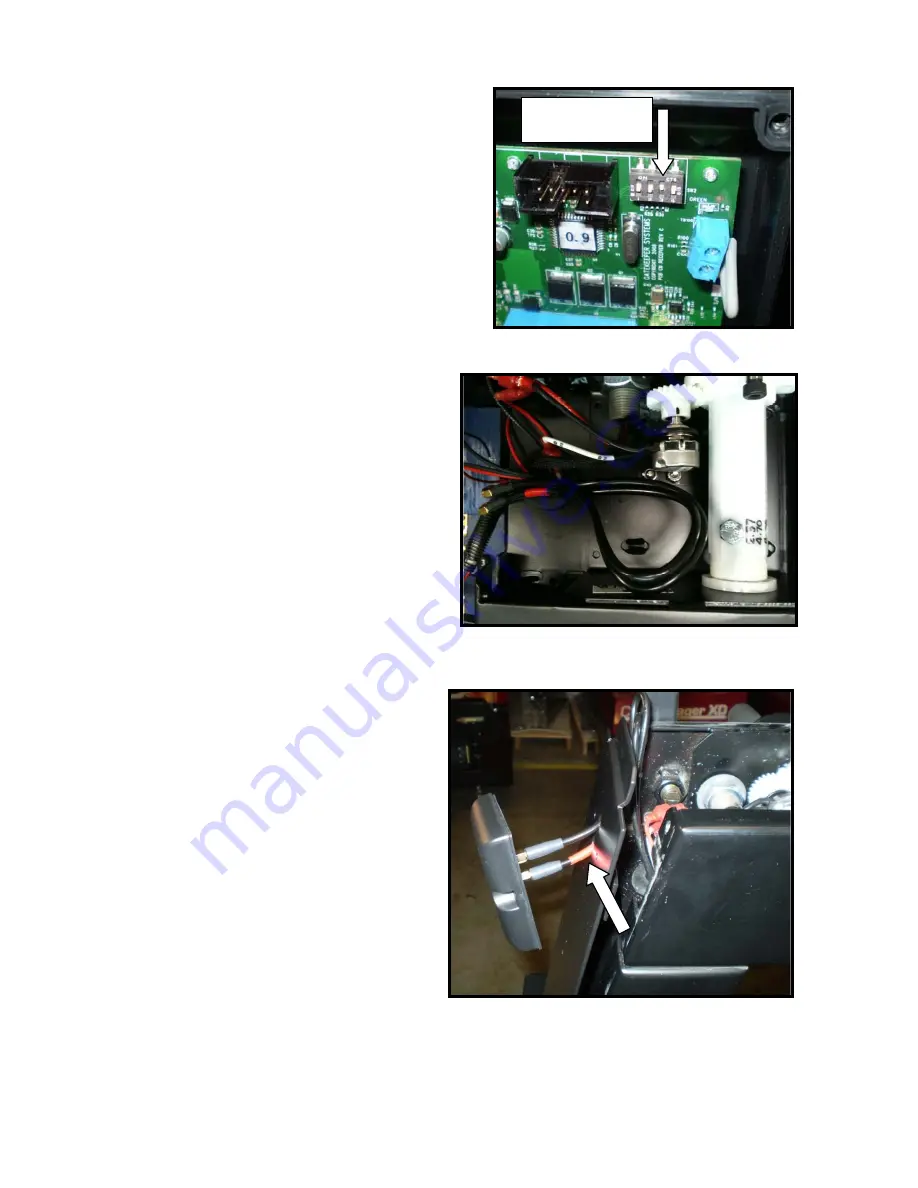
7. Connect the second coaxial cable to the free coaxial
connection on the receiver. The cable goes through the
grip and grip hole then to the coaxial connection. Start
tightening it first by hand, then use the 5/16" wrench.
Tighten all the cable grips. Look at the top right side of
the PC board and make sure the dip switches 1, 2, and 4
are off and 3 is on.
8. Put the receiver cover back and screw it down.
Feed the second coaxial cable up through the hole
on the top of the arm weldment. You should have
about 8" of both coaxial cables coming out of the
hole on the top of the arm weldment. At about 4"
from the hole, bend both cables and tie them
together to relieve pressure on the connections to
the flat antenna.
9. Your new style lower arm cover has two holes on
it. Pass both coaxial cables through. The cable
with red ID tape goes through the bottom hole.
Hold the flat antenna so that the coaxial
connection on the back of it stays vertical.
Connect the coaxial cable using the 5/16"
wrench. DO NOT over tighten. Again, the coaxial
cable with the red ID tape goes to the bottom
connection on the flat antenna. Be sure that you
have connected the cables before mounting.
Dip switch 3 needs
to be flipped on.
Summary of Contents for CartManager HD
Page 7: ...CartManager XD Field Technician Guide Page 4 CartManager XD Side Front View...
Page 20: ...CartManager XD Field Technician Guide Page 17 Batteries and Chargers...
Page 27: ...CartManager XD Field Technician Guide Page 24 Error Code Label Sheet on XDW...
Page 31: ...CartManager XD Field Technician Guide Page 28 Wiring Diagram XDWi...
Page 32: ...CartManager XD Field Technician Guide Page 29 XDW...
Page 40: ...Addendum...


