User’s Guide 19
External Floppy Drive
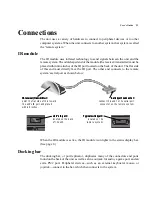
The system accepts an optional external floppy disk drive. This drive connects to the
floppy/parallel port on the back of the unit as shown below. (It also connects to the
floppy/parallel port on the docking bar. See page 24.) This connection requires a
floppy drive cable:
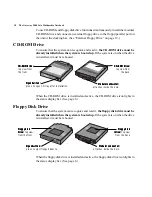
When the floppy disk drive is installed and active, the floppy disk drive LED lights on
the external floppy disk drive. (External drives do not affect status display bar icons.)
Hard Disk Drive
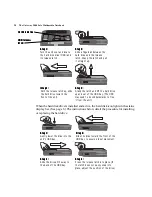
The system’s hard disk drive (HDD) may be removed from the unit for replacement
or for switching between different hard drives.
The instructions on the following page detail the procedure for removing and
replacing the hard disk drive:
Step 1:
Step 1:
Step 1:
Step 1:
Step 1:
connect the cable’s parallel connector
to the unit’s (or the docking bar’s)
floppy/parallel port.
Step 2:
Step 2:
Step 2:
Step 2:
Step 2:
connect the cable’s other connec-
tor to the floppy drive’s connector
(not shown).
Hard disk drive:
Hard disk drive:
Hard disk drive:
Hard disk drive:
Hard disk drive:
HDD release latch:
HDD release latch:
HDD release latch:
HDD release latch:
HDD release latch:
Summary of Contents for 2000 Solo
Page 1: ...USER S GUIDE...
Page 4: ...The Gateway 2000 SOLO Multimedia Notebook User s Guide...
Page 37: ...SYSMAN017AAUS 8 95...

