www.gateway.com
129
3
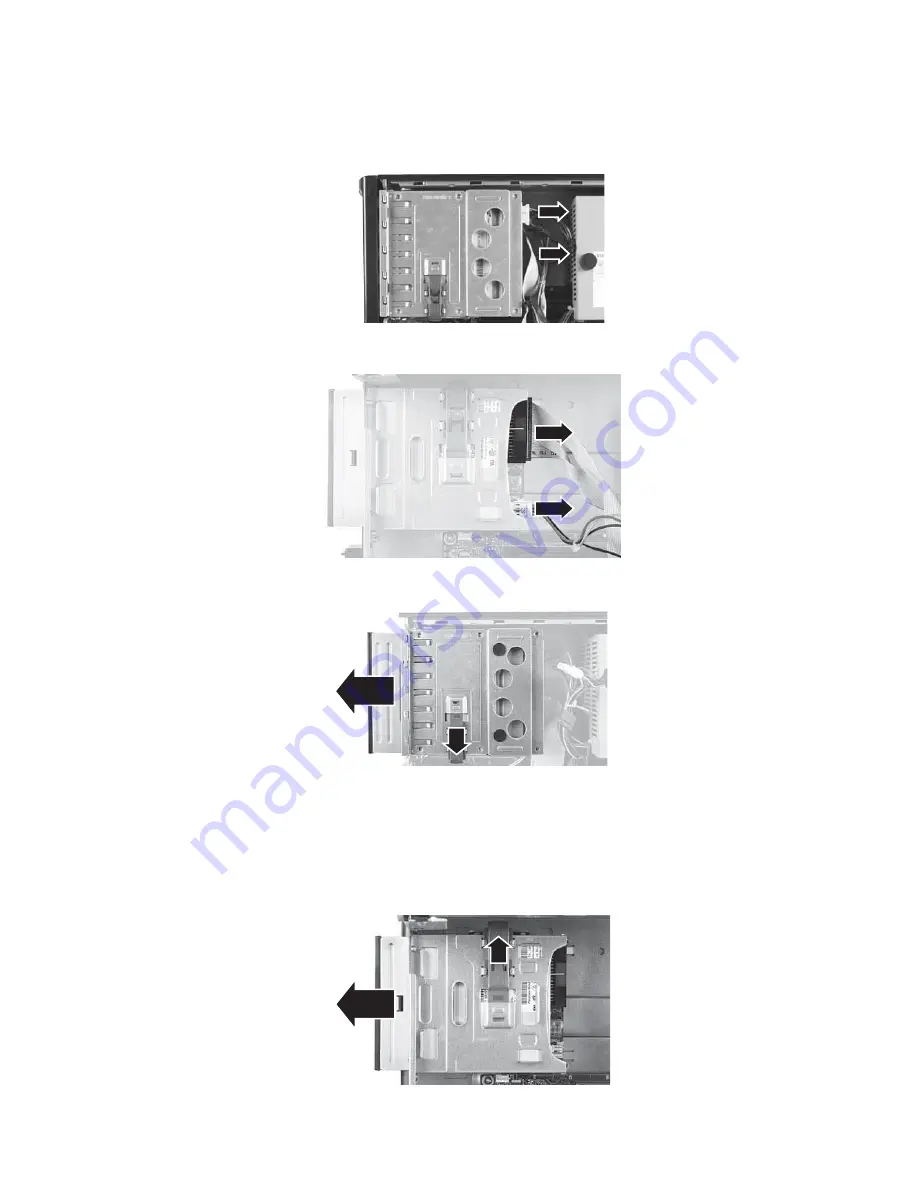
Disconnect the component cables, noting their locations and orientation. You will reconnect
the cables after you install the new component. (DVD drive shown.)
5.25-inch component
- OR -
3.5-inch component
4
If you are removing a 5.25-inch component, pull the release latch down to the Unlock
position on the 5.25-inch bay, then slide the component forward and out of the bay.
5
If you are only replacing a 5.25-inch component, note any jumper settings on the old drive
and set the jumper on the new drive to be the same, then go to
.
- OR -
If you are replacing a 3.5-inch component, lift the 5.25-inch component bay out of the
chassis to remove it.
6
Push up on the release latch on the 3.5-inch component bay to move it to the Unlock
position, then slide the component forward and out of the bay.
Summary of Contents for 3-Bay mBTX Pro
Page 1: ...3 Bay mBTX Pro USERGUIDE...
Page 2: ......
Page 28: ...CHAPTER 2 Setting Up and Getting Started 20...
Page 102: ...CHAPTER 9 Networking Your Computer 96...
Page 103: ...CHAPTER10 97 Protecting your computer Hardware security Data security Security updates...
Page 126: ...CHAPTER 11 Maintaining Your Computer 120...
Page 151: ...CHAPTER13 145 Troubleshooting Safety guidelines First steps Troubleshooting Telephone support...
Page 168: ...CHAPTER 13 Troubleshooting 162...
Page 182: ...Contents 176...
Page 183: ......


