www.gateway.com
143
22
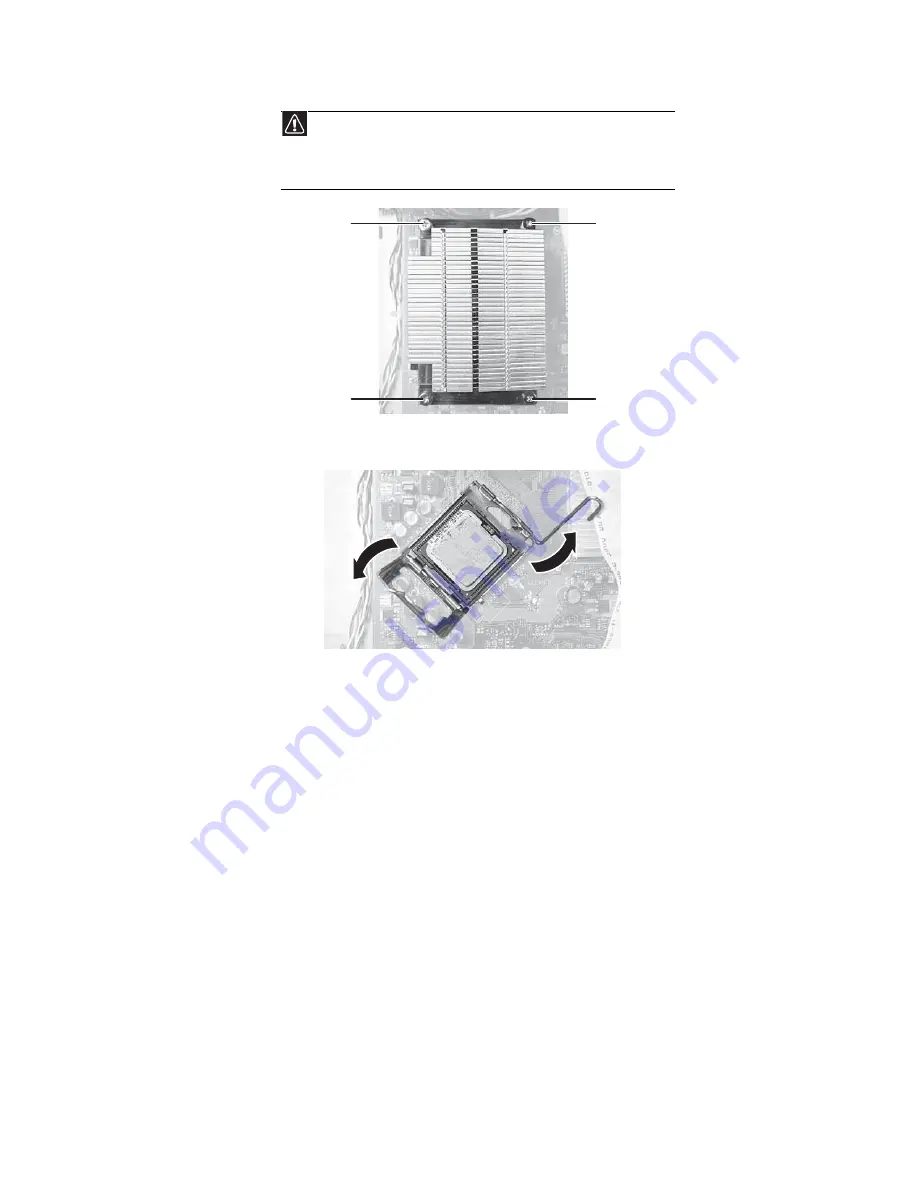
Release the processor from the old system board by pushing down on the lever and then
lifting the lever completely up.
23
Remove the processor from the old system board.
24
Install the processor onto the new system board making sure that Pin 1 on the processor
(indicated by the silk-screened arrow on the corner of the processor) aligns with Pin 1 on
the processor socket (indicated by the absence of a pin hole in the processor socket), then
return the lever to its locked position.
25
Place the heat sink on the processor, making sure the Thermal Interface Material (TIM) is
aligned between the heat sink and the processor, then tighten the screws that secure the
heat sink to the system board.
26
Reinstall the power supply into the case using the four screws you removed previously.
27
Connect the power and data cables using your notes from
.
28
Connect the fan cable to the system board, then reinstall the fan.
29
Replace the 5.25-inch component bay into the chassis.
Caution
The heat sink has Thermal Interface Material (TIM) on the bottom. Be careful
not to damage this material when you remove the heat sink from the processor.
If removing the heat sink also pulls the processor out of the processor socket, the
processor could be damaged. Check the pins on the processor to make sure they
are not bent or damaged.
Screw
Screw
Screw
Screw
Summary of Contents for 3-Bay mBTX Pro
Page 1: ...3 Bay mBTX Pro USERGUIDE...
Page 2: ......
Page 28: ...CHAPTER 2 Setting Up and Getting Started 20...
Page 102: ...CHAPTER 9 Networking Your Computer 96...
Page 103: ...CHAPTER10 97 Protecting your computer Hardware security Data security Security updates...
Page 126: ...CHAPTER 11 Maintaining Your Computer 120...
Page 151: ...CHAPTER13 145 Troubleshooting Safety guidelines First steps Troubleshooting Telephone support...
Page 168: ...CHAPTER 13 Troubleshooting 162...
Page 182: ...Contents 176...
Page 183: ......


