background image

211

Tutoring and training

www.gateway.com

Training

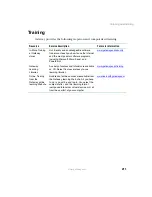
Gateway provides the following in-person and computerized training:

Resource

Service description

For more information

In-Store Training 
at Gateway 
stores

Our friendly and knowledgeable software 
trainers can teach you how to use the Internet 
and the most popular software programs, 
including Microsoft Word, Excel, and 
PowerPoint.

www.gateway.com/country

Gateway 
Learning 
Libraries

A variety of courses and tutorials are available 
on CD. Select from several easy-to-use 
learning libraries.

www.gateway.com/training

Online Training 
from the 
Gateway online 
learning Web site

Hundreds of online courses are available from 
the Gateway learning Web site. All you have 
to do is go online and log in. You select the 
subject matter, and the learning format 
(self-paced tutorials or virtual classrooms), all 
from the comfort of your computer.

www.learnwithgateway.com

Summary of Contents for 310 AAFES

Page 1: ...Your Gateway Computer Customizing Troubleshooting user sguide...

Page 2: ......

Page 3: ...ter accessories 15 Sitting at your computer 16 Avoiding discomfort and injury from repetitive strain 16 Protecting from power source problems 17 Starting your computer 18 Turning off your computer 18...

Page 4: ...out the Internet 58 Setting up an Internet account 59 Accessing your Internet account 60 Using the World Wide Web 61 Connecting to a Web site 62 Downloading files 63 Using e mail 64 Sending e mail 64...

Page 5: ...he power scheme 116 Changing advanced power settings 117 Activating and using Hibernate mode 118 Setting up an uninterruptible power supply 120 8 Moving from Your Old Computer 123 Using the Windows XP...

Page 6: ...11 Upgrading Your Computer 159 Selecting a place to work 160 Gathering the tools you need 160 Preventing static electricity discharge 161 Opening the case 162 Removing the side panel 162 Removing the...

Page 7: ...ard 196 Memory 196 Modem 197 Monitor 201 Mouse 203 Power 203 Printer 204 Sound 205 Using the BIOS Setup utility 206 Telephone support 208 Before calling Gateway Technical Support 208 Telephone support...

Page 8: ...vi...

Page 9: ...ateway computer Read this chapter to learn How to identify the features of your computer How to locate your computer s model and serial number How to locate the Microsoft Certificate of Authenticity H...

Page 10: ...eway com Front Your computer may contain any of the following components 3 5 inch drive bay covers DVD CD drive optional CD DVD eject button Reset button USB ports Power button Power indicator Hard dr...

Page 11: ...into this jack This jack is color coded lime green Microphone jack Plug a microphone into this jack This jack is color coded red or pink CD DVD eject button Press this button to open the CD or DVD dr...

Page 12: ...l port USB ports PS 2 keyboard port PS 2 mouse port Voltage switch Power connector Audio input Line in jack Microphone jack Headphone analog speakers Line out 1 jack USB ports Ethernet network jack Ca...

Page 13: ...USB Universal Serial Bus devices such as a USB Iomega Zip drive printer scanner camera keyboard or mouse into these ports For more information see Installing a printer scanner or other peripheral devi...

Page 14: ...a device such as a DSL or cable modem for a broadband Internet connection into this jack For more information see Learning about the Internet on page 58 Audio input Line in jack Plug an external audi...

Page 15: ...nt or back of your computer case Printed on the customer invoice that came with your computer The invoice also contains your customer ID number Displayed in HelpSpot Click Start Help and Support then...

Page 16: ...Computer Info link in HelpSpot or visit Gateway s eSupport page at support gateway com The eSupport page also has links to additional Gateway documentation and detailed specifications Click Start Hel...

Page 17: ...9 Finding your specifications www gateway com You can also find out more about your computer at the Gateway eSupport site Visit support gateway com For more information see Using eSupport on page 32...

Page 18: ...d edit on your computer A digital video camera lets you take movies that you can view and edit on your computer A scanner copies an image such as a graphic or document then stores the copy in a file Y...

Page 19: ...more of data If you want to increase your internal storage space try replacing your existing hard drive with a larger drive For more information about installing a larger drive see Replacing the hard...

Page 20: ...12 Chapter 1 Checking Out Your Gateway Computer www gateway com...

Page 21: ...d this chapter to find out how to Use your computer safely Protect your computer from power source problems Start and turn off your computer Use the keyboard Use the mouse Use the computer display Ins...

Page 22: ...d glare on your computer display and light shining directly into your eyes Reduce glare by installing shades or curtains on windows and by installing a glare screen filter on your computer display Use...

Page 23: ...ard is at or slightly below the level of your elbow This position lets your shoulders relax while you type Adjust the chair height adjust the forward tilt of the seat or use a footrest to distribute y...

Page 24: ...t with your back straight so your knees hips and elbows form right angles when you work Take breaks to stand and stretch your legs Avoid twisting your torso or neck Avoiding discomfort and injury from...

Page 25: ...your computer during a power failure Although you cannot run your computer for an extended period of time with a UPS a UPS lets you run your computer long enough to save your work and shut down your c...

Page 26: ...r 1 Click Start then click Turn Off Computer The Turn Off Computer dialog box opens 2 Click Turn Off Windows shuts down and turns off your computer Tips Tricks When you turn off your computer certain...

Page 27: ...peration you may have to restart reboot your computer To close unresponsive programs and restart your computer 1 Press CTRL ALT DEL then click Task Manager The Task Manager window opens 2 Click the Ap...

Page 28: ...ors Show if your NUM LOCK CAPS LOCK or SCROLL LOCK keys are activated Press the corresponding key to activate the function Windows keys Press one of these keys to open the Windows Start menu These key...

Page 29: ...e standard mouse As you move the mouse the pointer arrow on the display moves in the same direction You can use the left and right buttons on the mouse to select objects on the display You can use the...

Page 30: ...sition the pointer over the object Quickly press and release the left mouse button once This action is called clicking Start a program or open a file or folder Position the pointer over the object Qui...

Page 31: ...such a device whenever you plug it into the appropriate port When you use a USB device for the first time your computer will prompt you to install any software the device needs After doing this you c...

Page 32: ...24 Chapter 2 Getting Started www gateway com...

Page 33: ...3 25 Getting Help This chapter tells you about additional information resources available to help you use your computer Read this chapter to learn how to access HelpSpot Online help Gateway Web site...

Page 34: ...uickly discover and use the many features of your Gateway computer HelpSpot also has an area called Contact Gateway that helps you find the right resource at Gateway to answer your questions or help s...

Page 35: ...om You can find help information by clicking a link performing a search or browsing the index To learn about using your Gateway computer your mouse and other tasks click the Using your computer link o...

Page 36: ...you entered in the Search box Microsoft Knowledge Base These topics are located on the Microsoft Web site and contain the words you entered in the Search box You must be connected to the Internet to s...

Page 37: ...contains several short videos to help introduce you to new concepts or show you how to perform various tasks To play a HelpSpot video To watch a video in HelpSpot click Video Tutorials on the HelpSpo...

Page 38: ...or learn how to perform a task while you are using the program You can access most online help information by selecting a topic from a Help menu or by clicking a Help button You can search for inform...

Page 39: ...hours per day 7 days per week and provides the most current drivers product specifications tutorials and personalized information about your system Visit the Gateway eSupport Web site at support gatew...

Page 40: ...n article specific to the question you have The Tutorials link lets you access an extensive library of how to articles and videos on topics such as making audio CDs and installing a hard drive Downloa...

Page 41: ...4 33 Windows Basics Read this chapter to learn how to Use the Windows desktop Manage files and folders Work with documents Use shortcuts...

Page 42: ...l desk Think of the desktop as your personalized work space where you open programs and perform other tasks Your desktop may be different from this example depending on how your computer is set up Hel...

Page 43: ...e running Click a program s button on the taskbar to open the program s window The Start button provides access to programs files help for Windows and other programs and computer tools and utilities C...

Page 44: ...wing you the first level of menu items 2 Click All Programs to see all programs and files in the Start menu When you move the mouse pointer over any menu item that has an arrow next to it another menu...

Page 45: ...ck All Programs 2 Right click press the right mouse button the program that you want to add to the desktop 3 Click Send To then click Desktop create shortcut A shortcut icon for that program appears o...

Page 46: ...s When you double click the icon for a drive folder file or program a window opens on the desktop This example shows the Local Disk C window which opens after you double click the Local Disk C icon in...

Page 47: ...the taskbar Clicking the program button in the taskbar opens the window again Clicking the maximize button expands the active window to fit the entire computer display Clicking the maximize button aga...

Page 48: ...nd delete the information just as you would reorganize and throw away information in a file cabinet Viewing drives Drives are like file cabinets because they hold files and folders A computer almost a...

Page 49: ...are much like the folders in a file cabinet They can contain files and other folders Files are much like paper documents letters spreadsheets and pictures that you keep on your computer In fact all in...

Page 50: ...he existing folder If you do not see the contents of the drive or folder click Show the contents of this drive or Show the contents of this folder 4 Click File New then click Folder The new folder is...

Page 51: ...there To copy a file or folder to another folder 1 Locate the file or folder you want to copy For more information see Viewing drives on page 40 and Searching for files on page 48 2 Right click press...

Page 52: ...ns on the desktop 3 Click Cut on the pop up menu 4 Open the destination folder 5 With the pointer inside the destination folder right click 6 Click Paste The file or folder you moved appears in its ne...

Page 53: ...ee Shortcuts on page 55 If you cannot find the file you want to delete see Searching for files on page 48 2 Click File then click Delete Windows moves the files and folders to the Recycle Bin To recov...

Page 54: ...r that may be inside yet another folder and so on Windows drives folders and files are organized in the same way as a real file cabinet in that they may have many levels usually many more levels than...

Page 55: ...find If you do not see the contents of a folder click Show the contents of this drive or Show the contents of this folder 3 Continue double clicking folders and their subfolders until you find the fil...

Page 56: ...e they are stored on your hard drive you can use the Search utility to search by Name or part of a name Creation date Modification date File type Text contained in the file Time period in which it was...

Page 57: ...window opens Click All files and folders 2 If you want to search by file or folder name type in all or part of the file or folder name in the name box in the left pane of the window If you type all of...

Page 58: ...ptions Search can find files meeting more criteria than file name You can narrow your search by selecting the search options that you want You can search by the Date the file was created or modified S...

Page 59: ...ate save open and print a document using Microsoft WordPad Similar procedures apply to other programs such as WordPerfect Microsoft Word and Microsoft Excel For more information about using a program...

Page 60: ...to open the Save in list then click the folder where you want to save the file If you do not see the folder you want browse through the folders listed below the Save in list 3 Type a new file name in...

Page 61: ...pen 3 Click the arrow button to open the Look in list then click the folder you want to open If you do not see the folder you want browse through the folders listed below the Look in list 4 Double cli...

Page 62: ...documentation To print a document 1 Make sure that the printer is turned on and loaded with paper 2 Start the program and open the document 3 Click File then click Print The Print dialog box opens 4...

Page 63: ...then click each of the remaining items Select multiple adjacent items in a list or window Click the first item in the list press and hold down the SHIFT key then click the last item in the list Perman...

Page 64: ...56 Chapter 4 Windows Basics www gateway com...

Page 65: ...ion about the Internet and the World Wide Web Read this chapter to learn how to Set up and access an Internet account using America Online Connect to a Web site using a browser Download files from the...

Page 66: ...t service provider ISP Cable and DSL modems a connection known as broadband use your TV cable or special telephone lines to connect to your ISP and access the Internet Cable and DSL modems connect to...

Page 67: ...Setting up an Internet account Before you can view the information on the World Wide Web you need to set up an Internet account with an Internet service provider ISP If you have chosen America Online...

Page 68: ...m your America Online Internet account Click X in the top right corner of the America Online window Your computer disconnects from the Internet If you are using a service other than America Online che...

Page 69: ...avigator or the browser built into America Online Web pages can contain text animations music and other multimedia features A group of related Web pages is called a Web site You can access Web sites t...

Page 70: ...y com then click GO on the browser address bar OR On the current Web page click a link to a Web site The Web browser locates the server computer on the Internet downloads transfers data to your comput...

Page 71: ...nload 3 Create or locate the folder where you want to store the file on your computer For more information see Working with files and folders on page 40 4 Click the link on the Web page for the file t...

Page 72: ...ice provider ISP or company that hosts that user Your e mail address is assigned when you sign up for an account with an ISP For example a person with an account with America Online might have an e ma...

Page 73: ...d 3 Double click the message you want to read For more information about managing and organizing your e mail messages see the online help in your e mail program Help and Support For general informatio...

Page 74: ...66 Chapter 5 Using the Internet www gateway com...

Page 75: ...n on using the multimedia capabilities of your computer Read this chapter to learn how to Adjust the volume Record and play audio files Use Windows Media Player Use the CD or DVD drive Play CDs and DV...

Page 76: ...overall volume level using hardware controls If you are using external speakers turn the knob on the front of the speakers OR Use the volume control buttons on the keyboard For more information see Mo...

Page 77: ...t does not appear in the window click Options Properties the check box next to the audio device you want to adjust then click OK 5 Drag the volume level and balance sliders for the device you want to...

Page 78: ...f the Microphone jacks see Checking Out Your Gateway Computer on page 1 2 Click Start All Programs Accessories Entertainment then click Sound Recorder The Sound Recorder opens 3 Click record then spea...

Page 79: ...opens 3 Click the file you want to play then click Open 4 Play the file by clicking play then stop playing the file by clicking stop Help and Support For more information about making or playing an a...

Page 80: ...several types of audio and video files including WAV MIDI MP3 AU AVI and MPEG formats For more information about the using the Windows Media Player click Help To play a file using the Windows Media Pl...

Page 81: ...n 4 Play the file by clicking play then stop playing the file by clicking stop Important If the menu bar does not appear click the show menu bar button Help and Support For more information about play...

Page 82: ...e Use a CD RW drive for installing programs playing audio CDs accessing data and creating CDs You can only write to a CD R disc once You can write to and erase CD RW discs multiple times For more info...

Page 83: ...CD or DVD drive www gateway com Inserting a CD or DVD Important Some music CDs have copy protection software You may not be able to play these CDs on your computer CD or DVD drive Activity indicator...

Page 84: ...The CD or DVD drive tray closes Listening to CDs You can use the CD or DVD drive on your computer to listen to music CDs Important When you place a single sided disc in the tray make sure that the la...

Page 85: ...Player The Windows Media Player opens OR If a dialog box does not open with a list of CD players click Start All Programs then click Windows Media Player The Windows Media Player opens 3 When the med...

Page 86: ...o play a music CD 1 To have MusicMatch automatically list the album artist and track names of your CD connect to the Internet before inserting your CD 2 Insert the music CD into the CD or DVD drive on...

Page 87: ...MPEG Layer 3 is a standard for digitally compressing high fidelity music into compact files without noticeably sacrificing quality MP3 files end in the file extension MP3 To create MP3 files 1 To have...

Page 88: ...click Start All Programs MusicMatch then click MusicMatch Jukebox The MusicMatch window opens 4 If the CD is playing click Stop 5 Click Record The Recorder window opens 6 Click to clear the check box...

Page 89: ...dit track information 1 In MusicMatch click My Library The library window opens 2 In the library window right click the file then click Edit Track Tag s The Edit Track Tag s dialog box opens 3 Enter i...

Page 90: ...e MP3 files from the tracks on your music CD MusicMatch automatically adds these files to your music library Dragging and Dropping Drag and drop files from Windows Explorer or your desktop to the musi...

Page 91: ...ic library display settings 1 In MusicMatch click Options then click Settings The Settings window opens 2 Click the Music Library tab 3 Click an arrow button to open a column list then click the categ...

Page 92: ...io station then click the arrow in the play this station box MusicMatch connects to the station and plays the audio If you do not see Featured Radio Stations or Radio Stations drag the scroll bar on t...

Page 93: ...data capacity Because of this increased capacity full length movies several albums of music or several gigabytes of data can fit on a single disc If your computer has a DVD drive you can play DVDs wi...

Page 94: ...olume controls in the DVD player to adjust the volume For more information on using the DVD player see its online help Important If the InterVideo DVD player is not on your Start menu or if Windows Me...

Page 95: ...ideal for backing up important files such as tax records letters MP3s digital movies or photos For information on creating music CDs see Creating music CDs on page 92 Important We recommend that you d...

Page 96: ...ble CD drive 2 If a CD Drive dialog box opens click Create a CD using Roxio Easy CD Creator then click OK The Select a Project window opens OR If a dialog box does not open click Start All Programs Ro...

Page 97: ...The Easy CD Creator window opens 4 Click the arrow button to open the Select Source Files list then click the drive or folder where the files you want to add to the writable CD are located If you do...

Page 98: ...90 Chapter 6 Using Multimedia www gateway com 5 Click the file you want to record hold down the CTRL or SHIFT key when you click to select multiple files in the Source pane then click Add record...

Page 99: ...es click record The Record CD Setup dialog box opens 7 Click Start Recording Help and Support For more information about creating CDs in Windows XP click Start then click Help and Support Type the key...

Page 100: ...nt If you record copyrighted material on a CD you need permission from the copyright owner Otherwise you may be violating copyright law and be subject to payment of damages and other remedies If you a...

Page 101: ...pens click Create a CD using Roxio Easy CD Creator then click OK The Select a Project window opens OR If a dialog box does not open click Start All Programs Roxio Easy CD Creator then click Project Se...

Page 102: ...CD Creator window opens 4 Click the arrow button to open the Select Source Files list then click the drive or folder where the music files that you want to add to the writable CD are located If you do...

Page 103: ...key when you click to select multiple files in the Source pane then click Add Tips Tricks You can add any combination of music tracks or MP3 files to a music CD project You can add up to 99 tracks and...

Page 104: ...ox opens 7 Click Start Recording When the recording is complete you may see a Record Complete dialog box Select the appropriate option Help and Support For more information about creating CDs in Windo...

Page 105: ...two drives on page 99 To copy a CD using one drive 1 Insert the CD you want to copy into your recordable CD drive 2 If a dialog box opens click Take no action Important We recommend that you do not us...

Page 106: ...g box opens click Create a CD using Roxio Easy CD Creator then click OK The Select a Project window opens OR If a dialog box does not open click Start All Programs Roxio Easy CD Creator then click Pro...

Page 107: ...rrow button to open the Record to list then click the recordable drive 7 Click Copy CD Copier copies the information on the source CD to your hard drive prompts you to insert the blank CD then copies...

Page 108: ...g box opens click Create a CD using Roxio Easy CD Creator then click OK The Select a Project window opens OR If a dialog box does not open click Start All Programs Roxio Easy CD Creator then click Pro...

Page 109: ...at contains the source CD 7 Click the arrow button to open the Record to list then click the drive that contains the blank CD this is your recordable CD drive 8 Click Copy The information on the sourc...

Page 110: ...102 Chapter 6 Using Multimedia www gateway com...

Page 111: ...about customizing your computer by changing settings in Windows Read this chapter to learn how to Change screen and display settings Change the background and screen saver Adjust the mouse settings Ad...

Page 112: ...image types require various color depths for optimum appearance For example simple color drawings may appear adequately in 256 colors while color photographs need millions of colors to be displayed w...

Page 113: ...n to open the Color quality list then click the color depth you want 5 Click OK then click Yes Help and Support For more information about adjusting display settings in Windows XP click Start then cli...

Page 114: ...ding the display easier The higher the resolution the smaller individual components of the screen such as icons and menu bars appear To adjust the screen resolution 1 Click Start then click Control Pa...

Page 115: ...og box title bars To change desktop colors 1 Click Start then click Control Panel The Control Panel window opens If your Control Panel is in Category View click Appearance and Themes 2 Click Double cl...

Page 116: ...esktop OR If you want to create a new color scheme as part of a desktop theme a Click Advanced The Advanced Appearance dialog box opens b Click the the arrow button to open the Item list then click th...

Page 117: ...lick Start then click Control Panel The Control Panel window opens If your Control Panel is in Category View click Appearance and Themes 2 Click Double click the Display icon The Display Properties di...

Page 118: ...Flat panel displays cannot be damaged with image burn in You can also use a screen saver to keep others from viewing your screen while you are away from your computer Windows supplies a variety of sc...

Page 119: ...vailable you cannot customize the screen saver you selected 6 If you want to display the Welcome Login screen whenever you exit the screen saver click the On resume display Welcome screen check box 7...

Page 120: ...guration and other mouse settings To change your mouse settings 1 Click Start then click Control Panel The Control Panel window opens If your Control Panel is in Category View click Printers and Other...

Page 121: ...e available in other accounts If this happens install the program or device in the accounts that need it Files created in one account are not accessible from other accounts unless the files are stored...

Page 122: ...s 1 Click Start then click Log Off The Log Off Windows dialog box opens 2 Click Switch User The Windows Welcome screen opens 3 Click the user account that you want to use When you switch between user...

Page 123: ...e information in the memory is not saved to the hard drive If power is interrupted the information is lost Hibernate also called save to disk writes all current memory RAM information to the hard driv...

Page 124: ...wer saving options such as when the monitor or hard drive is automatically turned off You can select one of the defined power schemes or create a custom power scheme Advanced power settings let you as...

Page 125: ...eme 4 Click OK Changing advanced power settings To change advanced power management settings 1 Click Start then click Control Panel The Control Panel window opens If your Control Panel is in Category...

Page 126: ...he power setting mode you want to use 5 Click OK Activating and using Hibernate mode To activate Hibernate mode 1 Click Start then click Control Panel The Control Panel window opens If your Control Pa...

Page 127: ...way com 3 Click the Hibernate tab 4 Click the Enable hibernation check box then click Apply Hibernate mode is now an option you can select in the Power Schemes and Advanced tabs and in the Turn Off Co...

Page 128: ...elected power savings mode Click Start then click Turn Off Computer Press and hold SHIFT then click Hibernate Setting up an uninterruptible power supply To install an uninterruptible power supply UPS...

Page 129: ...l of the UPS device 6 Click the serial port where the UPS device is attached 7 Click Finish then click OK Help and Support For more information about setting up an uninterruptable power supply in Wind...

Page 130: ...122 Chapter 7 Customizing Your Computer www gateway com...

Page 131: ...printer or other peripheral devices and other unique computer settings that you want to move from your old computer to your new one Read this chapter to learn about Using the Windows XP Files and Sett...

Page 132: ...sfer Wizard The wizard also moves specific files or entire folders such as My Documents My Pictures and Favorites To open the Files and Settings Transfer Wizard Click Start All Programs Accessories Sy...

Page 133: ...s Find or Search to locate other personal data files For more information see Searching for files on page 48 To find files in the My Documents folder 1 In Windows XP click Start then click My Document...

Page 134: ...es or Folders The Search Results window opens 2 Use Windows Find or Search to locate data files by file name or file type For help on finding files click Help then click Help and Support Center or Hel...

Page 135: ...et setup program provided by your local ISP or contact your ISP to see if they have an updated version of their software and install it on your new computer If you use MSN as your ISP or if you know y...

Page 136: ...marks or Microsoft Internet Explorer favorites For more information see your Internet browser program s online help Installing your old printer or scanner Windows may have built in support for older p...

Page 137: ...hen click Control Panel The Control Panel window opens If your Control Panel is in Category View click Printers and Other Hardware 6 Click Double click the Printers and Faxes icon then click Add a pri...

Page 138: ...contain any serial numbers or product ID keys that may be required for program installation and registration Remember to check the publisher s Web site for important program updates If you have troub...

Page 139: ...hapter provides basic information about maintaining your computer hardware and software Read this chapter to learn how to Care for your computer Protect your computer from viruses Manage hard drive sp...

Page 140: ...s can erase data on hard drives Avoid subjecting your computer to extreme temperature changes The case can become brittle and easy to break in cold temperatures and can melt or warp in high temperatur...

Page 141: ...urchase Monthly When needed See Check for viruses X X page 134 Manage hard drive space X page 137 Clean up hard drives X X page 138 Scan hard drive for errors X X page 139 Defragment hard drive X X pa...

Page 142: ...ram to check files and programs that are attached to e mail messages or downloaded from the Internet Checking all programs for viruses before installing them Disabling macros on suspicious Microsoft W...

Page 143: ...ng your computer from viruses www gateway com To scan for viruses 1 Click Start All Programs Norton AntiVirus then click Norton AntiVirus 2003 Norton AntiVirus opens 2 Click Scan for Viruses Scan for...

Page 144: ...2 Turn off your computer and leave it off for at least 30 seconds 3 Turn on your computer and rescan for the virus To update Norton AntiVirus 1 Make sure that you are connected to the Internet 2 Clic...

Page 145: ...al utilities you can use to manage your hard drive Checking hard drive space To check hard drive space 1 Click Start then click My Computer The My Computer window opens 2 Right click the drive that yo...

Page 146: ...r window opens 2 Right click the hard drive that you want to delete files from for example Local Disk C then click Properties The Properties dialog box opens at the General tab 3 Click Disk Cleanup Th...

Page 147: ...you use your computer less frequently once a month may be adequate Also use Error checking if you encounter hard drive problems To check the hard drive for errors 1 Click Start then click My Computer...

Page 148: ...l minutes After Windows has finished checking the drive for errors it provides a summary of the problems that it found 6 Correct any problems that are found by following the on screen instructions 7 C...

Page 149: ...ther than as multiple pieces scattered across different areas of the drive Defragmenting the information stored on the drive can improve hard drive performance While the Disk Defragmenter program is r...

Page 150: ...progress on the computer display When finished Disk Defragmenter asks if you want to quit the program 6 Click Close or Yes then click the X in the top right corner to close the Disk Defragmenter windo...

Page 151: ...dable drive on page 87 If you do not have a high capacity backup device and you want to purchase one you can contact Gateway s Add on Sales department or visit the Accessories Store at accessories gat...

Page 152: ...ule and follow the on screen instructions to customize the task Important Your computer must be on during scheduled tasks If your computer is off scheduled tasks will not run Help and Support For more...

Page 153: ...any components Use a damp lint free cloth to clean your computer and other parts of your system Do not use abrasive or solvent cleaners because they can damage the finish on components Your computer i...

Page 154: ...k after it dries you may need to replace it Cleaning the computer screen If your computer screen is a flat panel display use a soft cloth and water to clean the computer screen Squirt a little water o...

Page 155: ...ning the mouse will likely improve its accuracy Clean your optical mouse by wiping the bottom of the mouse with a damp lint free cloth To clean your trackball mouse 1 Turn the mouse upside down 2 Rota...

Page 156: ...ropyl alcohol 5 Replace the mouse ball and lock the retaining ring into place Help and Support For a video tutorial about cleaning the mouse in Windows XP click Start then click Help and Support Type...

Page 157: ...earn how to Reinstall device drivers Update device drivers Reinstall programs Reinstall Windows If you are not comfortable with the procedures covered in this chapter seek help from a more experienced...

Page 158: ...information about diagnostics and troubleshooting tools in Windows XP click Start then click Help and Support Type the keyword troubleshooting in the HelpSpot Search box then click the arrow Run Syst...

Page 159: ...se you are directed to do so while troubleshooting or if a message tells you that there is a problem with a device driver reinstall the device drivers by following the instructions in To reinstall dev...

Page 160: ...lable for Automatic Installation To select these drivers click Manual Installation 8 Click Install 9 Follow any additional on screen instructions Depending on the device driver you are reinstalling yo...

Page 161: ...t box type d runmenu exe where d is the drive letter of the CD or DVD drive 4 Click OK 5 If this is the first time you have inserted the red Drivers CD accept the End User License Agreement EULA by cl...

Page 162: ...ll then click Change Remove and follow the on screen instructions 4 Insert the yellow Applications CD into the CD or DVD drive If the program starts automatically go to Step 8 OR If the program does n...

Page 163: ...ur computer follow the on screen instructions To reinstall other programs from a CD 1 If you just reinstalled Windows go to Step 4 Otherwise go to the next step 2 Click Start Control Panel then click...

Page 164: ...ware device drivers and some programs as well You can install any remaining programs by using the program CDs that came with your computer To reinstall your programs follow the instructions in Reinsta...

Page 165: ...ers 12 When prompted remove the red Drivers CD and insert the blue Operating System CD into the CD or DVD drive then press any key to continue 13 When prompted accept the License Agreement by pressing...

Page 166: ...dows desktop by clicking Close 20 Install additional programs by following the instructions in To reinstall programs from the Applications CD s on page 154 21 Install other software such as Microsoft...

Page 167: ...en and close the computer case Remove and install drives and components Remove and install add in cards Remove and install system boards Add memory Change the battery You must open the computer case t...

Page 168: ...cal Support The telephone must be directly connected to a telephone jack and cannot be connected to your computer Gathering the tools you need Some tools and supplies that you may need to work on your...

Page 169: ...ove components from their antistatic bags only when you are ready to use them Do not lay components on the outside of antistatic bags because only the inside of the bags provide electrostatic protecti...

Page 170: ...ions in Preventing static electricity discharge on page 161 2 Shut down your computer then disconnect the power cord and modem network and all peripheral device cables 3 Press the power button to drai...

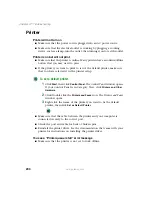
Page 171: ...163 Opening the case www gateway com 4 Remove the two thumbscrews from the side panel cover...

Page 172: ...164 Chapter 11 Upgrading Your Computer www gateway com 5 Slide the side panel toward the back of the computer then pull the panel away from the computer...

Page 173: ...ening the case www gateway com Removing the front bezel To remove the front bezel Position the computer where you can grasp the front bottom edge of the bezel then pull the bezel out and away from the...

Page 174: ...the side panel 1 Make sure that all of the internal cables are arranged inside the case so they will not be pinched when you close the case 2 Align the door tabs into the top and bottom case notches t...

Page 175: ...way com 3 Replace the two side panel thumbscrews 4 Reconnect the cables and power cord Replacing the front bezel To replace the front bezel 1 Align the latch pins with the computer latch holes 2 Press...

Page 176: ...or replace 5 25 inch drives such as CD or DVD drives and 3 5 inch drives such as diskette drives To add or replace a CD DVD or diskette drive 1 Remove the side panel by following the instructions in...

Page 177: ...ding a drive locate an empty drive bay OR If you are replacing a drive disconnect the drive cables noting their locations and orientation You will reconnect the cables after you install the new drive...

Page 178: ...ssary See the drive documentation for further instructions 6 Slide the new drive into the drive bay Push firmly until the drive release latch locks the drive into place 7 Reconnect the drive cables us...

Page 179: ...ace the hard drive 1 Remove the side panel by following the instructions in Removing the side panel on page 162 2 Disconnect the drive cables noting their locations and orientation You will reconnect...

Page 180: ...e drive bay Push firmly until the drive release latch locks the hard drive into place 6 Reconnect the drive cables using your notes from Step 2 The red striped edge of the data ribbon cable indicates...

Page 181: ...card 1 Remove the side panel by following the instructions in Removing the side panel on page 162 2 For more stability place your computer on its side To avoid scratching the case place it on a towel...

Page 182: ...ter 11 Upgrading Your Computer www gateway com 4 If you are replacing a card remove the retention screw that secures the card to the case OR If you are adding a card remove a retention screw from a bl...

Page 183: ...e card but do not bend the card sideways 6 Install the new card into the add in slot You can slightly seesaw the card end to end to help insert the card but do not bend the card sideways 7 Secure the...

Page 184: ...the instructions in Closing the case on page 166 10 See the documentation that came with the add in card for any special software installation instructions Replacing the power supply To replace the p...

Page 185: ...gateway com 3 Disconnect the power supply cables from all components such as hard drives CD or DVD drives and the system board noting their locations and orientation You will reconnect the cables afte...

Page 186: ...178 Chapter 11 Upgrading Your Computer www gateway com 4 Remove the four retention screws that secure the power supply to the case 5 Slide the power supply up and away from the power supply brackets...

Page 187: ...n page 166 Replacing the system board To replace the system board 1 Remove the side panel by following the instructions in Removing the side panel on page 162 2 For more stability place your computer...

Page 188: ...screws 6 Lift the system board up and out of the case 7 Align the new system board on the standoffs and secure into the computer case with the screws 8 Reconnect the power and data cables using your...

Page 189: ...3 10 Close the case by following the instructions in Closing the case on page 166 Installing memory When you upgrade the computer memory make sure that you install the correct type of memory module fo...

Page 190: ...Remove the side panel by following the instructions in Removing the side panel on page 162 2 For more stability place your computer on its side To avoid scratching the case place it on a towel or oth...

Page 191: ...Fill the DIMM 0 memory slot first When adding memory fill the DIMM 1 memory slot Align the notches on the new DIMM with the notches on the memory module bank and press the module firmly into the bank...

Page 192: ...Windows starts and the Windows desktop appears 10 Click Start Control Panel then click Performance and Maintenance if in Category view Click Double click System The amount of memory in your computer...

Page 193: ...own all the values in the menus and submenus then exit from the utility 3 Shut down your computer 4 Remove the side panel by following the instructions in Removing the side panel on page 162 5 For mor...

Page 194: ...s the battery into the socket until it snaps into place 9 Replace the side panel by following the instructions in Replacing the side panel on page 166 10 Reconnect all external cables and the power co...

Page 195: ...s chapter to learn how to Troubleshoot typical hardware and software problems Get telephone support Use automated troubleshooting systems Get tutoring and training If the suggestions in this chapter d...

Page 196: ...ry these things first before going to the following sections Make sure that the power cable is connected to your computer and an AC outlet and that the AC outlet is supplying power If you use a power...

Page 197: ...to help you diagnose and fix problems PC Doctor is a comprehensive hardware diagnostic and system information tool that can test your computer and determine its configuration PC Doctor provides 85 pr...

Page 198: ...u are trying to play a DVD make sure that you have a DVD drive To identify your drive type see Identifying drive types on page 74 Your computer may be experiencing some temporary memory problems Shut...

Page 199: ...ning CDs and DVDs on page 192 Reinstall the audio device drivers For more information see Reinstalling device drivers on page 151 A DVD movie will not play Make sure that you have a DVD drive To ident...

Page 200: ...t play the disc s regional code and your DVD drive s regional code may not match Cleaning CDs and DVDs Clean discs by wiping from the center to the edge not around in a circle using a product such as...

Page 201: ...from the hard drive using Disk Cleanup For more information see Using Disk Cleanup on page 138 Empty the Recycle Bin by right clicking the Recycle Bin icon then clicking Empty Recycle Bin Save your fi...

Page 202: ...sure that the IDE connectors are enabled in the BIOS Setup utility To enter the BIOS Setup utility restart your computer then press and hold F1 while your computer restarts Reinstall the device drive...

Page 203: ...affect Internet performance The condition of the telephone lines in your residence or at your local telephone service The condition of the Internet computers to which you connect and the number of use...

Page 204: ...is resting on the keyboard Make sure that a key is not stuck Press each key to loosen a key that might be stuck then restart your computer Liquid spilled in the keyboard If you spilled liquid in the...

Page 205: ...l telephone services such as call waiting call messaging or voice mail make sure that all messages are cleared and call waiting is disabled before using the modem Contact your telephone service to get...

Page 206: ...e and have them check the telephone line for noise or low line levels Try another telephone line either a different telephone number in your house or a telephone line at a different location If you ca...

Page 207: ...our modem connection speed click the Direct Dial option After your modem connects move the mouse pointer over the Dial Up Networking icon located next to the clock on your taskbar Your modem connectio...

Page 208: ...or the modem has failed to respond the modem did not pass diagnostics Reinstall the device driver For more information see Reinstalling device drivers on page 151 Open your computer and reseat the mo...

Page 209: ...106 The computer is running but there is no picture Make sure that the monitor is plugged in and turned on If the monitor is turned on the power LED should be lit Adjust the brightness and contrast c...

Page 210: ...ze the internal aperture grille These wires are most obvious when the monitor displays a white background The aperture grille allows more light to pass through the screen for brighter colors and great...

Page 211: ...e by wiping the bottom with a clean damp cloth Make sure that the optical sensor is clean and free or debris If you have a trackball mouse see Cleaning the mouse on page 147 Power My system is turned...

Page 212: ...up To set a default printer 1 Click Start then click Control Panel The Control Panel window opens If your Control Panel is in Category View click Printers and Other Hardware 2 Click Double click the P...

Page 213: ...the printer documentation for more information about adding additional memory You see a Printer is out of paper error message After adding paper make sure that the printer is online Many printers have...

Page 214: ...uter 2 During the restart press and hold the F1 key The main menu of the BIOS Setup utility opens Help and Support For more information about sound troubleshooting in Windows XP click Start then click...

Page 215: ...OS Setup Utility Main Advanced Security Power Boot Exit Item Specific Help BIOS Version Processor Type Processor Speed Front Side Bus Speed Cache Ram System Memory Memory Bank 0 Memory Bank 1 Memory B...

Page 216: ...re from Gateway see the manufacturer s documentation and technical support resources If you have how to questions about using a program check Online Help Printed documentation The Microsoft Windows do...

Page 217: ...ftware tutorial service Get tutorial assistance for software issues billed by the minute 800 229 1103 charged to your credit card 900 555 4695 charged to your telephone bill Gateway Technical Support...

Page 218: ...many cases additional product information and online documents for Gateway supplied hardware can be found in our Web site s Documentation Library This user s guide The software publisher s Web site Th...

Page 219: ...ft Word Excel and PowerPoint www gateway com country Gateway Learning Libraries A variety of courses and tutorials are available on CD Select from several easy to use learning libraries www gateway co...

Page 220: ...212 Chapter 12 Troubleshooting www gateway com...

Page 221: ...marked on the product and in the documentation are followed Setting up your system Read and follow all instructions marked on the product and in the documentation before you operate your system Retai...

Page 222: ...trically grounded to provide some protection against voltage surges and buildup of static charges Care during use Do not walk on the power cord or allow anything to rest on it Do not spill anything on...

Page 223: ...ning the equipment off and on the user is encouraged to try to correct the interference by one or more of the following measures Reorient or relocate the receiving antenna Increase the separation betw...

Page 224: ...5 0 To be certain of the number of devices that may be connected to a line as determined by the total RENs contact the local telephone company If this device causes harm to the telephone network the t...

Page 225: ...ipment must also be installed using an acceptable method of connection In some cases the inside wiring associated with a single line individual service may be extended by means of a certified connecto...

Page 226: ...under a US Department of Health and Human Services DHHS Radiation Performance Standard Should the unit ever need servicing contact an authorized service location California Proposition 65 Warning War...

Page 227: ...th regard to proper grounding of the mast and supporting structure grounding of the lead in wire to an antenna discharge unit size of grounding conductors location of antenna discharge unit connection...

Page 228: ...lines or circuits Contact with them could be fatal Reference Grounding component 1 Electric service equipment 2 Power service grounding electrode system NEC Art 250 Part H 3 Ground clamps 4 Grounding...

Page 229: ...slogan are registered trademarks and black and white spotted box logo GATEWAY Gateway Astro Gateway Work Gateway Connected touch pad Gateway Connected music player Gateway Cyber Ware Gateway Educatio...

Page 230: ...222 Appendix A www gateway com...

Page 231: ...o CD cleaning 192 copying 97 playing 76 78 audio in jack 6 AVI file 72 B background 109 backing up files 143 battery replacing 185 bezel removing 165 replacing 167 BIOS Setup utility 206 broadband Int...

Page 232: ...onsive program 19 window 39 55 color changing depth 104 changing number of 104 changing scheme 107 connecting PS 2 keyboard 5 PS 2 mouse 5 to Ethernet 6 to Internet 6 60 to network 6 to Web site 62 co...

Page 233: ...Disk Cleanup 138 Disk Defragmenter 141 diskette drive adding 168 replacing 168 display changing resolution 106 using screen saver 110 documentation Gateway Web site 31 help 26 HelpSpot 26 online help...

Page 234: ...s troubleshooting 199 files backing up 143 copying 43 55 cutting 43 55 deleting 35 45 55 138 downloading 63 finding 46 48 moving 43 opening 22 36 pasting 43 55 recovering 45 193 renaming 55 searching...

Page 235: ...r 10 installing add in cards 173 battery 185 cards 173 CD drive 168 CD RW drive 168 devices 23 digital camera 23 digital video camera 23 diskette drive 168 drivers 151 drives 168 171 DVD drive 168 DVD...

Page 236: ...pace 137 cleaning case 145 cleaning component exteriors 145 cleaning computer screen 146 cleaning keyboard 146 cleaning mouse 147 defragmenting 141 deleting files 138 suggested schedule 133 using Sche...

Page 237: ...music library building 82 changing settings 83 MusicMatch building music library 82 changing library settings 83 creating MP3 files 79 creating music files 79 editing track information 81 listening t...

Page 238: ...port 6 troubleshooting 204 USB port 3 5 printing documents 54 programs closing 55 closing unresponsive 19 opening 22 36 reinstalling 130 154 PS 2 port keyboard 5 mouse 5 R radio listening with MusicM...

Page 239: ...en objects getting information 22 moving 22 selecting 22 Scroll Lock indicator 20 scroll wheel 21 Search utility 49 searching for files and folders 46 48 49 126 in HelpSpot 28 serial number 5 6 7 8 13...

Page 240: ...rnet settings from old computer 127 settings from old computer 123 troubleshooting add in cards 190 audio 205 automated system 209 cards 190 CD drive 190 CD RW drive 190 cleaning CD 192 cleaning DVD 1...

Page 241: ...eb browser 59 61 Web page 61 Web site 61 connecting to 62 downloading files 63 Gateway 31 window 38 close button 39 closing 39 55 maximize button 39 menu bar 39 minimize button 39 title bar 39 Windows...

Page 242: ...234...

Page 243: ......

Page 244: ...NSK DWL DT310 USR GDE R1 07 03...

Reviews: