background image

62

Chapter 4: Windows Basics

www.gateway.com

Printing a document

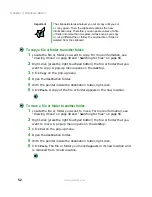
To print a document, you must have a printer connected to your computer or 
have access to a network printer. For more information about installing or using 
your printer, see the printer documentation.

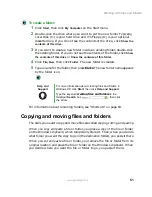
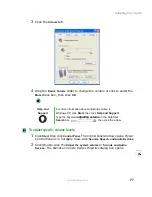
To print a document:

1

Make sure that the printer is turned on and loaded with paper.

2

Start the program and open the document.

3

Click 

File

, then click 

Print

. The Print dialog box opens.

4

Set the print options, then click 

OK

. The document prints.

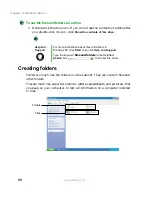
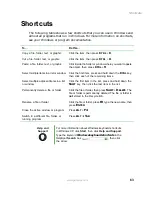
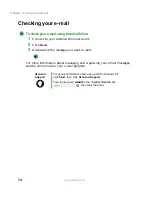
Help and 

Support

For more information about printing documents in 
Windows XP, click Start, then click Help and Support.

Type the keyword 

printing 

in the HelpSpot Search box 

, then click the arrow.

Summary of Contents for 400VTX

Page 1: ......

Page 2: ......

Page 3: ...g from power source problems 18 Starting your notebook 19 Waking up your notebook 20 Turning off your notebook 20 Restarting rebooting your notebook 21 Status indicators 22 Using the keyboard 24 Key types 25 System key combinations 26 Multi function buttons 28 Using the EZ Pad touchpad 29 Using the touchpad 30 Connecting the modem 32 Connecting to a wired Ethernet network 33 Broadband Internet con...

Page 4: ...ility 57 Working with documents 59 Creating a new document 59 Saving a document 60 Opening a document 61 Printing a document 62 Shortcuts 63 5 Using the Internet 65 Learning about the Internet 66 Setting up an Internet account 67 Accessing your Internet account 68 Using the World Wide Web 69 Connecting to a Web site 71 Downloading files 72 Using e mail 73 Sending e mail 73 Checking your e mail 74 ...

Page 5: ...9 7 Sending and Receiving Faxes 111 Installing and configuring Fax 112 Installing Fax 112 Configuring Fax 113 Sending a simple fax 116 Setting up your cover page template 117 Faxing from programs 118 Faxing a scanned document 118 Receiving and viewing a fax 119 Canceling a fax 119 Automatically retry sending a fax 120 Automatically cancelling a fax 121 8 Managing Power 123 Monitoring the battery c...

Page 6: ...er accounts 154 11 Networking Your Computer 157 Benefits of networking 158 Sharing a single Internet connection 158 Sharing drives 158 Sharing peripheral devices 159 Streaming audio and video files 159 Playing multi player games 159 Selecting a network connection 160 Wired Ethernet network 160 Wireless Ethernet network 160 Using a wired Ethernet network 161 Ethernet Fast Ethernet or Gigabit Ethern...

Page 7: ...176 Installing a parallel port printer 177 Installing your old programs 178 13 Maintaining Your Computer 179 Caring for your computer 180 Creating an emergency startup diskette 182 Protecting your computer from viruses 184 Managing hard drive space 187 Checking hard drive space 187 Using Disk Cleanup 188 Checking the hard drive for errors 189 Defragmenting the hard drive 191 Backing up files 193 U...

Page 8: ...D drives 226 Cleaning CDs or DVDs 228 Device installation 228 Diskette drive 229 Display 230 File management 231 Hard drive 231 Internet 232 Keyboard 234 Memory 234 Memory card reader 235 Modem 235 Mouse 239 Networks 240 Passwords 240 PC Cards 240 Power 241 Printer 241 Sound 243 Video 244 Telephone support 245 Before calling Gateway Technical Support 245 Telephone numbers 246 Tutoring and training...

Page 9: ...r notebook s model and serial number How to locate the Microsoft Certificate of Authenticity How to locate the specifications for your notebook What accessories are available for your notebook Tips Tricks To access the contents of this guide while you are traveling click Start All Programs then click Gateway Utilities You can also download an electronic copy from support gateway com support manlib...

Page 10: ...ED green battery is fully charged LED orange battery is charging LED red battery is malfunctioning This LED only lights up when the notebook is plugged in Power indicator The LED shows the notebook power status LED on notebook is on LED blinking notebook is in Standby mode LED off notebook is off LCD panel release latch Open the LCD panel by pressing the release latch LCD panel release latch Batte...

Page 11: ...al Bus devices such as a USB Iomega Zip drive printer scanner camera keyboard or mouse into these ports PC Card eject button Press the eject button to remove the PC Card from the PC Card slot For more information see Adding and removing a PC Card on page 210 PC Card slot Insert one Type II or one Type III PC Card into this slot For more information see Adding and removing a PC Card on page 210 PC ...

Page 12: ... diskette into the optional diskette drive For more information see Using the optional diskette drive on page 83 Insert a memory card from a digital camera MP3 player PDA or cell phone into the optional memory card reader For more information see Using the optional memory card reader on page 108 Component Icon Description ...

Page 13: ... page 84 This drive may be a DVD or combination DVD CD RW drive To determine the type of drive in the notebook examine the drive tray s plastic cover and compare the logo to those listed in Identifying drive types on page 84 Kensington lock slot Secure your computer to an object by connecting a Kensington cable lock to this slot Kensington lock slot DVD or DVD CD RW drive ...

Page 14: ...formation see Connecting to a wired Ethernet network on page 33 and Networking Your Computer on page 157 Power connector Plug the AC adapter cable into this connector Parallel port Plug a parallel device such as a printer into this port Monitor port Plug an analog VGA monitor into this port Ventilation fan Helps cool internal components Do not block or insert objects into these slots Monitor port ...

Page 15: ...lip into this hole to manually restart the notebook Hard drive bay The hard drive is located in this bay For more information see Replacing the hard drive kit on page 217 Battery latch Slide to release the battery Battery bay Insert the battery into this bay For more information see Changing batteries on page 127 System label Includes the product model number For more information see Identifying y...

Page 16: ...nent Icon Description Multi function buttons Press these buttons to open programs assigned to them These buttons are set to open your default e mail program your default Web browser online help and the My Computer window For more information see Multi function buttons on page 28 Multi function buttons Status indicators Power button Keyboard Touchpad ...

Page 17: ...ing the keyboard on page 24 Power button Press to turn the power on or off You can also configure the power button for Standby Resume mode For more information on configuring the power button mode see Changing power settings on page 131 Status indicators Inform you when a drive is in use or when a button has been pressed that affects how the keyboard is used For more information see Status indicat...

Page 18: ...nce Gateway serial number You can locate the Gateway serial number Printed on a white sticker on the bottom or back of your notebook Printed on the customer invoice that came with your notebook The invoice also contains your customer ID number Displayed in HelpSpot Click Start Help and Support then click View product serial number Important The labels shown in this section are for informational pu...

Page 19: ...a wireless communications device The label is located on the bottom of your notebook Microsoft Certificate of Authenticity The Microsoft Certificate of Authenticity label found on the bottom of your notebook includes the product key code for your operating system IEEE 802 11b RLAN Approvals FCC ID HFS9550015318 CANADA ID 1787104509A ...

Page 20: ...PC s configuration link in HelpSpot or visit Gateway s eSupport page at support gateway com The eSupport page also has links to additional Gateway documentation and detailed specifications View your computer s serial number by clicking Start Help and Support then clicking View system serial number Check your specifications by clicking Start Help and Support then clicking See your PC s configuratio...

Page 21: ...13 Finding your specifications www gateway com You can also find out more about your computer at the Gateway eSupport site Visit support gateway com For more information see Using eSupport on page 42 ...

Page 22: ...need additional space for accessories or supplies Memory Large programs such as multimedia games or graphics programs use a lot of memory If your programs are running more slowly than you think they should try adding more memory See Adding or replacing memory on page 213 for more information Printers You can attach almost any type of printer to your notebook The most common types are inkjet and la...

Page 23: ...ut your Gateway notebook Read this chapter to find out how to Connect the AC adapter Start and turn off your notebook Identify the status indicators Use the keyboard Use the EZ Pad touchpad Connect the modem Connect to an Ethernet network Install peripheral devices ...

Page 24: ...ter Important If the battery is not fully charged before you use your notebook on battery power for the first time the battery life may be much shorter than you expect If the battery life seems short even after being charged for 24 hours the battery may need to be recalibrated For information see Recalibrating the battery on page 126 Warning Make sure that you use the AC adapter that came with you...

Page 25: ...eave your notebook connected to AC power for at least 24 hours The battery charge meter may not show a charge for several hours For more information about the battery charge meter on your model see Monitoring the battery charge on page 124 5 If the battery charge meter does not show a full charge after 24 hours contact Gateway Technical Support at support gateway com then click Contact Us Warning ...

Page 26: ... connecting them to a surge protector which absorbs voltage surges and prevents them from reaching your notebook Warning High voltages can enter your notebook through both the power cord and the modem connection Protect your notebook by using a surge protector If you have a telephone modem use a surge protector that has a modem jack If you have a cable modem use a surge protector that has an anten...

Page 27: ...D panel 2 Press the power button located above the keyboard The power button is preset to On Off mode However you can also set it to function in Standby Resume mode For instructions on changing the power button mode see Changing power settings on page 131 3 If you are starting your notebook for the first time follow the on screen instructions to set up your notebook Power button ...

Page 28: ...ower button For more information on changing power saving settings see Changing power settings on page 131 Turning off your notebook To turn off your notebook 1 Click Start then click Turn Off Computer The Turn Off Computer dialog box opens 2 Click Turn Off Windows shuts down and turns off your notebook Important If for some reason you cannot use the Turn Off Computer option in Windows to turn off...

Page 29: ...hat is not responding 2 Click the program that is not responding 3 Close the program by clicking End Task 4 If your notebook does not respond turn it off wait ten seconds and turn it on again As a part of the regular startup process a program to check the disk status runs automatically When the checks are finished Windows starts Important If your notebook does not turn off immediately complete the...

Page 30: ... been pressed that affects how the keyboard is used Indicator Icon Description Diskette drive The 1 44 MB diskette drive or the memory card reader is in use Disc drive The DVD or DVD CD RW drive is in use Hard drive The hard drive is in use Caps Lock Caps Lock is turned on Hard drive Caps Lock Scroll Lock Pad Lock Disc drive Diskette drive ...

Page 31: ...way com Scroll Lock Scroll Lock is turned on For more information see System key combinations on page 26 Pad Lock Numeric keypad is turned on For more information see System key combinations on page 26 Indicator Icon Description 1 ...

Page 32: ...e functions including shortcut keys for Windows function keys for specific system operations and the Pad Lock keys for the numeric keypad You can attach an external keyboard to the notebook using a USB port You do not need to shut down the notebook to connect a USB keyboard Function keys System keys Navigation keys Volume keys FN key Windows key Numeric keypad Application key Arrow keys LCD bright...

Page 33: ...e page to the beginning of a document or to the end of a document Volume keys Press these colored keys in combination with the FN key to increase or decrease the volume or to turn off all sound FN key Press the FN key in combination with a colored system key such as STATUS STANDBY or PAUSE to perform a specific action Windows key Press this key to open the Windows Start menu This key can also be u...

Page 34: ...itor must be plugged into the monitor port on your notebook Enter Standby mode Press the power button to leave Standby mode For more information see Changing power modes on page 130 Turn on Pad Lock so you can use the numeric keypad Press this key combination again to turn off Pad Lock The Pad Lock status indicator appears when this function is turned on Pause the text scrolling in a DOS screen Pr...

Page 35: ...y combination again to restore the sound For more information see Adjusting the volume on page 76 Increase volume For more information see Adjusting the volume on page 76 Decrease volume For more information see Adjusting the volume on page 76 Press and hold FN then press this system key To Home PgUp PgDn ...

Page 36: ...Press the multi function buttons to open the programs associated with them Button Icon Press to E mail Open your default e mail program Internet Open your default Web browser Help Open online help My Computer Open the My Computer window E mail Internet Help My Computer ...

Page 37: ...the EZ Pad touchpad The EZ Pad consists of a touchpad two buttons and a rocker switch When you move your finger on the touchpad the pointer arrow on the screen moves in the same direction Left touchpad button Right touchpad button Rocker switch Touchpad ...

Page 38: ...e touchpad settings on page 152 Using the touchpad To Do this Move the pointer on the screen Move your finger around on the touchpad If you run out of space and need to move the pointer farther lift your finger move it to the middle of the touchpad then continue moving your finger Select an object on the screen Position the pointer over the object Quickly press and release the left button once Thi...

Page 39: ...rtcut menu or find more information about an object on the screen Position the pointer over the object Quickly press and release the right button once This action is called right clicking Move an object on the screen Position the pointer over the object Press the left button and hold it down then use the touchpad to move drag the object to the appropriate part of the screen Release the button to d...

Page 40: ...he modem 1 Insert one end of the modem cable into the modem jack on the back of your notebook 2 Insert the other end of the modem cable into a telephone wall jack The modem will not work with digital or PBX telephone lines 3 Start your notebook then start your communications program Warning To reduce the risk of fire use only No 26 AWG or larger telecommunications line cord ...

Page 41: ...e back of your notebook 2 Insert the other end of the network cable into a network jack Ask your network administrator to help you select the correct network jack Important Your notebook may be equipped with built in wireless Ethernet or you may have a wireless Ethernet PC Card For information about connecting to a wired or wireless Ethernet network see Networking Your Computer on page 157 For inf...

Page 42: ...hecking Out Your Gateway 400 on page 1 USB ports support plug and play and hot swapping which means that your computer will usually recognize such a device whenever you plug it into the appropriate port When you use an USB device for the first time your computer will prompt you to install any software the device needs After doing this you can disconnect and reconnect the device at any time Paralle...

Page 43: ...3 35 Getting Help This chapter tells you about additional information resources available to help you use your computer Read this chapter to learn how to access HelpSpot Online help Gateway Web site ...

Page 44: ...uickly discover and use the many features of your Gateway computer HelpSpot also has an area called Contact Gateway that helps you find the right resource at Gateway to answer your questions or help solve your problems To start HelpSpot Click Start then click Help and Support HelpSpot opens If this is the first time you have started HelpSpot you may experience a brief wait while HelpSpot builds th...

Page 45: ...om You can find help information by clicking a link performing a search or browsing the index To learn about using your Gateway computer your touchpad and other tasks click the Using your computer link on the HelpSpot main page ...

Page 46: ... you entered in the Search box Microsoft Knowledge Base These topics are located on the Microsoft Web site and contain the words you entered in the Search box You must be connected to the Internet to search for and access these topics Gateway com Search These topics are located on the Gateway Web site and contain the words you entered in the Search box You must be connected to the Internet to sear...

Page 47: ...ains several short videos to help introduce you to new concepts or show you how to perform various tasks To play a HelpSpot video To watch a video in HelpSpot click Video and online tutorials on the HelpSpot home page then click a video title The video plays ...

Page 48: ...c or learn how to perform a task while you are using the program You can access most online help information by selecting a topic from a Help menu or by clicking a Help button You can search for information by viewing the help contents checking the index searching for a topic or keyword or browsing through the online help ...

Page 49: ... hours per day 7 days per week and provides the most current drivers product specifications tutorials and personalized information about your system Visit the Gateway eSupport Web site at support gateway com For more information about connecting to the Internet see Using the Internet on page 65 ...

Page 50: ...h the reference area to locate an article specific to the question you have The Tutorials link lets you access an extensive library of how to articles and videos on topics such as making audio CDs and installing a hard drive Downloads tab The Downloads tab provides the latest software updates for BIOS and driver upgrades By entering your serial number you get drivers specific to your system Click ...

Page 51: ...4 43 Windows Basics Read this chapter to learn how to Use the Windows desktop Manage files and folders Work with documents Use shortcuts ...

Page 52: ...al desk Think of the desktop as your personalized work space where you open programs and perform other tasks Your desktop may be different from this example depending on how your computer is set up Help and Support For more information about the Windows XP desktop click Start then click Help and Support Type the keyword Windows desktop in the HelpSpot Search box then click the arrow ...

Page 53: ...u opens and reveals related files programs or commands Desktop elements Description The taskbar is the bar at the bottom of the computer display containing the Start button on the left and a clock on the right Other buttons on the taskbar represent programs that are running Click a program s button on the taskbar to open the program s window The Start button provides access to programs files help ...

Page 54: ...that you use frequently To add icons to the desktop 1 Click Start then click All Programs 2 Right click press the right touchpad button the program that you want to add to the desktop Help and Support For more information about the Windows XP Start menu click Start then click Help and Support Type the keyword Windows Start menu in the HelpSpot Search box then click the arrow ...

Page 55: ...ive folder file or program a window opens on the desktop This example shows the Local Disk C window which opens after you double click the Local Disk C icon in the My Computer window Help and Support For more information about desktop icons in Windows XP click Start then click Help and Support Type the keyword desktop icons in the HelpSpot Search box then click the arrow Minimize Maximize Close Ti...

Page 56: ... the taskbar Clicking the program button in the taskbar opens the window again Clicking the maximize button expands the active window to fit the entire computer display Clicking the maximize button again restores the window to its former size Clicking the close button closes the active window or program Clicking an item on the menu bar starts an action such as Print or Save Help and Support For mo...

Page 57: ... you would reorganize and throw away information in a file cabinet Viewing drives Drives are like file cabinets because they hold files and folders A computer almost always has more than one drive Each drive has a letter usually Local Disk C for the hard drive and 3 Floppy A for the optional diskette drive You may also have more drives such as a DVD or DVD CD RW drive or a memory card reader To vi...

Page 58: ...e much like the folders in a file cabinet They can contain files and other folders Files are much like paper documents letters spreadsheets and pictures that you keep on your computer In fact all information on a computer is stored in files Help and Support For more information about files and folders in Windows XP click Start then click Help and Support Type the keyword files and folders in the H...

Page 59: ...r name appears by the folder icon For information about renaming folders see Shortcuts on page 63 Copying and moving files and folders The skills you need to copy and move files are called copying cutting and pasting When you copy and paste a file or folder you place a copy of the file or folder on the Windows clipboard which temporarily stores it Then when you decide what folder you want the copy...

Page 60: ...e or folder you want to move For more information see Viewing drives on page 49 and Searching for files on page 56 2 Right click press the right touchpad button the file or folder that you want to move A pop up menu opens on the desktop 3 Click Cut on the pop up menu 4 Open the destination folder 5 With the pointer inside the destination folder right click 6 Click Paste The file or folder you move...

Page 61: ...hat you want to delete For instructions on how to select multiple files and folders see Shortcuts on page 63 If you cannot find the file you want to delete see Searching for files on page 56 2 Click File then click Delete Windows moves the files and folders to the Recycle Bin Help and Support For more information about copying files and folders or moving files and folders in Windows XP click Start...

Page 62: ... or folders to their original locations To empty the Recycle Bin 1 Double click the Recycle Bin icon on the desktop The Recycle Bin window opens 2 Click File then click Empty Recycle Bin Windows asks you if you are sure that you want to empty the bin 3 Click Yes Windows permanently deletes all files in the Recycle Bin Caution Emptying the Recycle Bin permanently erases any files or folders in the ...

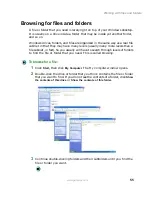
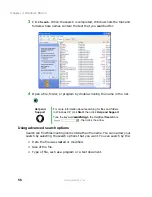
Page 63: ...y many more levels than a file cabinet in fact So you usually will have to search through levels of folders to find the file or folder that you need This is called browsing To browse for a file 1 Click Start then click My Computer The My Computer window opens 2 Double click the drive or folder that you think contains the file or folder that you want to find If you do not see the contents of a fold...

Page 64: ...reation date Modification date File type Text contained in the file Time period in which it was created or modified You can also combine search criteria to refine searches Files and folders found using this utility can be opened copied cut renamed or deleted directly from the list in the results window Help and Support For more information about browsing for files and folders in Windows XP click S...

Page 65: ... window opens Click All files and folders 2 If you want to search by file or folder name type in all or part of the file or folder name in the name box in the left pane of the window If you type all of the name Search will list all files and folders of that name If you type part of the name Search will list all of the file and folder names containing the letters you typed ...

Page 66: ...options Search can find files meeting more criteria than file name You can narrow your search by selecting the search options that you want You can search by the Date the file was created or modified Size of the file Type of file such as a program or a text document Help and Support For more information about searching for files and folders in Windows XP click Start then click Help and Support Typ...

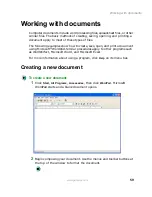
Page 67: ...eate save open and print a document using Microsoft WordPad Similar procedures apply to other programs such as WordPerfect Microsoft Word and Microsoft Excel For more information about using a program click Help on its menu bar Creating a new document To create a new document 1 Click Start All Programs Accessories then click WordPad Microsoft WordPad starts and a blank document opens 2 Begin compo...

Page 68: ... to open the Save in list then click the folder where you want to save the file If you do not see the folder you want browse through the folders listed below the Save in list 3 Type a new file name in the File name box 4 Click Save Help and Support For more information about saving documents in Windows XP click Start then click Help and Support Type the keyword saving in the HelpSpot Search box th...

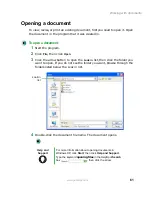
Page 69: ...Open 3 Click the arrow button to open the Look in list then click the folder you want to open If you do not see the folder you want browse through the folders listed below the Look in list 4 Double click the document file name The document opens Help and Support For more information about opening documents in Windows XP click Start then click Help and Support Type the keyword opening files in the ...

Page 70: ...r documentation To print a document 1 Make sure that the printer is turned on and loaded with paper 2 Start the program and open the document 3 Click File then click Print The Print dialog box opens 4 Set the print options then click OK The document prints Help and Support For more information about printing documents in Windows XP click Start then click Help and Support Type the keyword printing ...

Page 71: ...hen click each of the remaining items Select multiple adjacent items in a list or window Click the first item in the list press and hold down the SHIFT key then click the last item in the list Permanently delete a file or folder Click the file or folder then press SHIFT DELETE The file or folder is permanently deleted The file or folder is not stored in the Recycle Bin Rename a file or folder Clic...

Page 72: ...64 Chapter 4 Windows Basics www gateway com ...

Page 73: ...tion about the Internet and the World Wide Web Read this chapter to learn how to Set up and access an Internet account using America Online Connect to a Web site using a browser Download files from the Internet Send and receive e mail using America Online ...

Page 74: ...rnet service provider ISP Cable and DSL modems a connection known as broadband use your TV cable or special telephone lines to connect to your ISP and access the Internet Cable and DSL modems connect to your computer through an Ethernet jack and provide a faster connection speed than a standard telephone modem Important For the location of your modem and Ethernet jacks see Back on page 6 Your comp...

Page 75: ... Setting up an Internet account Before you can view the information on the World Wide Web you need to set up an Internet account with an Internet service provider ISP If you have chosen America Online as an ISP follow these instructions to set up and connect to your account To set up a different ISP service or to transfer an existing account to this computer contact the ISP directly If you set up ...

Page 76: ...om your America Online Internet account Click X in the top right corner of the America Online window Your computer disconnects from the Internet If you are using a service other than America Online check with your ISP for the correct procedure for disconnecting Important Make sure that your computer disconnects correctly from your Internet account If you do not have an unlimited hours ISP account ...

Page 77: ...r which comes installed on your new computer Netscape Navigator or the browser built into America Online Web pages can contain text animations music and other multimedia features A group of related Web pages is called a Web site You can access Web sites to shop track investments read the news download programs and much more You can explore a Web site or visit other Web sites by clicking areas on a...

Page 78: ...70 Chapter 5 Using the Internet www gateway com To learn more about using the Web browser features click Help in the menu bar Web page Link Linked Web page ...

Page 79: ...com then click GO on the browser address bar OR On the current Web page click a link to a Web site The Web browser locates the server computer on the Internet downloads transfers data to your computer and displays the page on the site that you requested Sometimes Web pages display slowly The speed that a Web page displays on your screen depends on the complexity of the Web page and other Internet ...

Page 80: ...download 3 Create or locate the folder where you want to store the file on your computer For more information see Working with files and folders on page 49 4 Click the link on the Web page for the file that you want to download 5 Follow the on screen instructions for saving the file in the folder that you want A copy of the file is downloaded to your computer The time that it takes to transfer the...

Page 81: ...vider ISP or company that hosts that user Your e mail address is assigned when you sign up for an account with an ISP For example a person with an account with America Online might have an e mail address that is similar to this one Sending e mail To send e mail using America Online 1 Connect to your America Online account 2 Click Write 3 Type the e mail address of the recipient you want to send e ...

Page 82: ...Click Read 3 Double click the message you want to read For more information about managing and organizing your e mail messages see the online help in your e mail program Help and Support For general information about using e mail in Windows XP click Start then click Help and Support Type the keyword e mail in the HelpSpot Search box then click the arrow ...

Page 83: ...ia capabilities of your notebook Read this chapter to learn how to Adjust the volume Record and play audio files Use Windows Media Player Use the optional diskette drive Use a DVD or DVD CD RW drive Play CDs Use MusicMatch Play DVDs Create CDs Use the optional memory card reader ...

Page 84: ...he knob on the front of the speakers OR Use the mute and volume control buttons on the keyboard For more information see System key combinations on page 26 To adjust the overall volume level from Windows 1 Click Start then click Control Panel The Control Panel window opens If your Control Panel is in Category View click Sounds Speech and Audio Devices 2 Click Double click the Adjust the system vol...

Page 85: ...The Control Panel window opens If your Control Panel is in Category View click Sounds Speech and Audio Devices 2 Click Double click the Adjust the system volume or Sounds and Audio Devices The Sounds and Audio Devices Properties dialog box opens Help and Support For more information about adjusting volume in Windows XP click Start then click Help and Support Type the keyword adjusting volume in th...

Page 86: ...just does not appear in the window click Options Properties the check box next to the audio device you want to adjust then click OK 5 Drag the volume level and balance sliders for the device you want to adjust For more information about the volume controls click Help in the window 6 Click X in the top right corner of the window to close it ...

Page 87: ... location of the Microphone jack see Left side on page 3 2 Click Start All Programs Accessories Entertainment then click Sound Recorder The Sound Recorder opens 3 Click record then speak into the microphone 4 When you finish recording click stop 5 Click File then click Save As The Save As dialog box opens 6 Name the recording specify the location where you want to save the recording then click Sav...

Page 88: ... opens 3 Click the file you want to play then click Open 4 Play the file by clicking play then stop playing the file by clicking stop Help and Support For more information about making or playing an audio recording in Windows XP click Start then click Help and Support Type the keyword recording audio or playing audio in the HelpSpot Search box then click the arrow ...

Page 89: ...ia Player can play several types of audio and video files including WAV MIDI MP3 AU AVI and MPEG formats For more information about using the Windows Media Player click Help To play a file using the Windows Media Player 1 Click Start All Programs then click Windows Media Player The Windows Media Player opens Video file information Video screen Stop Play ...

Page 90: ...e by clicking play then stop playing the file by clicking stop Important If the menu bar does not appear click the show menu bar button Help and Support For more information about playing audio and video using the Windows Media Player in Windows XP click Start then click Help and Support Type the keyword Media Player in the HelpSpot Search box then click the arrow ...

Page 91: ...ptional diskette drive with the label facing up 2 To access a file on the diskette click Start then click My Computer Double click the drive letter for example the A drive then double click the file name 3 To remove the diskette make sure that the diskette status indicator is off see Status indicators on page 22 then press the diskette eject button Warning Do not expose diskettes to water or magne...

Page 92: ...of the following logos Inserting a CD or DVD DVD drive Use a DVD drive for installing programs playing audio CDs playing DVDs and accessing data You cannot use this drive to create CDs Combination DVD CD RW drive Use a combination DVD CD RW drive for installing programs playing audio CDs playing DVDs accessing data and recording music and data to CD R or CD RW discs For more information see Creati...

Page 93: ... up then press down carefully on the disc until it snaps into place 3 Push the tray in until it is closed Important Some music CDs have copy protection software You may not be able to play these CDs on your computer Important When you place a single sided disc in the tray make sure that the label side is facing up If the disc has two playable sides place the disc so the name of the side you want t...

Page 94: ...ch to listen to CDs For more information see Using MusicMatch on page 88 To play a CD 1 Insert a CD into the DVD drive 2 If a dialog box opens with a list of CD players click Windows Media Player The Windows Media Player opens OR If a dialog box does not open with a list of CD players click Start then click Windows Media Player The Windows Media Player opens Important Some music CDs have copy prot...

Page 95: ...r audio or you want to change the volume Adjusting the volume on page 76 Help and Support For more information about playing CDs in Windows XP click Start then click Help and Support Type the keyword playing CDs in the HelpSpot Search box then click the arrow Play Stop Next Previous Mute Volume ...

Page 96: ...c CDs Edit music track information Use your music files to build a music library Listen to Internet Radio For more information on using MusicMatch see its online help Playing CDs You can use the MusicMatch program to play music CDs Important Some music CDs have copy protection software You may not be able to play these CDs on your computer ...

Page 97: ...sic CD into the DVD drive on your computer The first time you insert a music CD the Audio CD dialog box opens 2 Click Play Audio CD using MUSICMATCH Jukebox then click OK MusicMatch opens the CD begins playing and the names of the music tracks appear in the playlist area ...

Page 98: ...iceably sacrificing quality MP3 files end in the file extension MP3 To create rip MP3 files 1 Insert a music CD into your DVD drive 2 If an Audio CD dialog box opens click Play Audio CD using MUSICMATCH Jukebox then click OK The MusicMatch window opens OR If a dialog box does not open click Start All Programs MusicMatch then click MusicMatch Jukebox The MusicMatch window opens Important Some music...

Page 99: ...3 Click the record button The Recorder window opens 4 Click to clear the check box for any track you do not want to record rip 5 Click REC 6 When a message appears that tells you the CD drive needs to be configured click OK Track list REC ...

Page 100: ...on To edit track information 1 In MusicMatch click My Library The library window opens 2 In the library window right click the file then click Edit Track Tag s The Edit Track Tag dialog box opens 3 Enter information such as track title lead artist album and genre 4 Click OK The new track information appears in the MusicMatch playlist music library and recorder window ...

Page 101: ...3 files from the tracks on your music CD MusicMatch automatically adds these files to your music library Dragging and Dropping Drag and drop files from Windows Explorer or your desktop to the music library Downloading files from the Internet When you are connected to the Internet MP3 files that you download are automatically added to your music library Caution During the download process MP3 files...

Page 102: ... music library display settings To change the music library display settings 1 In MusicMatch click Options then click Settings The Settings window opens 2 Click the Music Library tab 3 Click the categories that you want to display in the columns then click OK ...

Page 103: ...The Radio window opens 3 To select one of the MusicMatch Internet radio stations click one of the Popular Stations MusicMatch connects to the station and plays the audio OR To play another Internet radio station click Broadcast Stations the appropriate category in the Station Selector the radio station then click play MusicMatch connects to the station and plays the audio ...

Page 104: ... program To play a DVD 1 Make sure that the speakers are turned on or headphones are plugged in and that the volume is turned up 2 Turn off your screen saver and standby timers 3 To play a DVD using InterVideo DVD click Start All Programs DVD then click DVD Player The InterVideo DVD Player video screen and control panel open OR To play a DVD using Windows Media Player click Start All Programs then...

Page 105: ...es such as tax records letters MP3s digital movies or photos For information on creating music CDs see Creating music CDs on page 101 Help and Support For more information about playing DVDs in Windows XP click Start then click Help and Support Type the keyword playing DVDs in the HelpSpot Search box then click the arrow Important We recommend that you do not use your computer for other tasks whil...

Page 106: ...CD RW drive 2 If a CD Drive dialog box opens click Create a CD using Roxio Easy CD Creator then click OK The Select a Project window opens OR If a dialog box does not open click Start All Programs Roxio Easy CD Creator then click Project Selector The Select a Project window opens make a data CD dataCD project ...

Page 107: ...Easy CD Creator window opens 4 Click the arrow button to open the Select Source Files list then click the drive or folder where the files you want to add to the writable CD are located If you do not see the folder you want browse through the folders in the Source pane Source Pane Add Select Source Files ...

Page 108: ...lick the file you want to record hold down the CTRL or SHIFT key when you click to select multiple files in the Source pane then click Add 6 After you have added all of your files click record The Record CD Setup dialog box opens record Start Recording ...

Page 109: ...CDs in the HelpSpot Search box then click the arrow Important We recommend that you do not use your computer for other tasks while creating CDs Important If you record copyrighted material on a CD you need permission from the copyright owner Otherwise you may be violating copyright law and be subject to payment of damages and other remedies If you are uncertain about your rights contact your legal...

Page 110: ... then click OK The Select a Project window opens OR If a dialog box does not open click Start All Programs Roxio Easy CD Creator then click Project Selector The Select a Project window opens Tips Tricks Most home and car stereos can read CD R discs but cannot read CD RW discs To make sure that the CD that you create will play on home and car CD players use a CD R disc make a music CD musicCD proje...

Page 111: ...iles list then click the drive or folder where the music files that you want to add to the writable CD are located If you do not see the folder you want browse through the folders in the Source pane 5 Click the file you want to record hold down the CTRL or SHIFT key when you click to select multiple files in the Source pane then click Add Source pane Add Select Source Files Source pane ...

Page 112: ...es click record The Record CD Setup dialog box opens Tips Tricks You can add any combination of music tracks or MP3 files to a music CD project You can add up to 99 tracks and files or up to 650 MB 74 minute CD or 700 MB 80 minute CD of tracks and files to a music CD project record Start Recording ...

Page 113: ... Help and Support For more information about creating CDs in Windows XP click Start then click Help and Support Type the keyword creating CDs in the HelpSpot Search box then click the arrow Important We recommend that you do not use your computer for other tasks while creating CDs Important If you record copyrighted material on a CD you need permission from the copyright owner Otherwise you may be...

Page 114: ...og box opens click Create a CD using Roxio Easy CD Creator then click OK The Select a Project window opens OR If a dialog box does not open click Start All Programs Roxio Easy CD Creator then click Project Selector The Select a Project window opens CD copier CD copier ...

Page 115: ...e arrow button to open the Record to list then click the DVD CD RW drive 7 Click Copy CD Copier copies the information on the source CD to your hard drive prompts you to insert the blank CD then copies the information from the hard drive to the blank CD Help and Support For more information about copying CDs in Windows XP click Start then click Help and Support Type the keyword copying CDs in the ...

Page 116: ...puter and a device that uses memory cards such as a PDA MP3 player or cellular phone Memory card types The memory card reader supports the following card types Each slot is assigned a different drive letter for example the E and F drives so data can be transferred from one media type to another Card Type Slot CompactFlash right IBM Microdrive right Memory Stick left MultiMediaCard left Secure Digi...

Page 117: ...ds the notebook 2 To access a file on the memory card click Start then click My Computer Double click the drive letter for example the E drive then double click the file name 3 To remove the memory card make sure that diskette drive status indicator see Status indicators on page 22 is off then pull the memory card out of the computer Important Do not use the remove hardware icon in the taskbar to ...

Page 118: ...110 Chapter 6 Using Multimedia www gateway com ...

Page 119: ...ets you send and receive faxes using the modem Read this chapter to learn how to Install and configure Fax Create and send a new fax Set up a fax cover page template Fax a document you scanned or created in another program Receive view and print a fax ...

Page 120: ...soft Windows XP dialog box does not open click Start then click Control Panel The Control Panel window opens Click Double click Add and Remove Programs The Add or Remove Programs dialog box opens Click Add Remove Windows Components The Windows Components Wizard opens 3 Click Fax Services then click Next 4 Click Finish to exit the Windows Components Wizard Important Your modem cable must be install...

Page 121: ...e you send your first fax you need to set up your user information Your fax cover sheets and fax headers contain this information some of which is required by law The Fax Configuration Wizard opens the first time you try to send a fax Important The first time you run the Fax Configuration Wizard you may need to provide information in the Location Information and the Phone and Modem Options dialog ...

Page 122: ...or Sending or Receiving Faxes screen opens 4 Click the arrow to open the Please select the fax device list then click the modem you are using to send and receive faxes 5 If you want the modem to automatically answer the telephone in order to receive faxes click the Enable Receive check box 6 Click Next The Transmitting Subscriber Identification TSID screen opens 7 Type the transmitting fax identif...

Page 123: ...me identifier that you typed in Step 7 The Routing Options screen opens 10 If you set up your computer to receive faxes select a folder you want to store received faxes in and a printer you want to print received faxes on then click Next The Configuration Summary screen opens 11 Click Finish Important Some fax machines cannot use special characters such as hyphens We suggest using spaces instead o...

Page 124: ... click Next The Recipient Information screen opens 3 Type the name and fax number of the recipient of your fax 4 If you need to use the area code for your recipient click Use dialing rules to enter the full ten digit fax number 5 If you want to send your fax to more than one recipient click Add and type the name and fax number of the next recipient 6 When you have added all your recipients click N...

Page 125: ...izard and the Fax Configuration Wizard when you send your fax To set up your fax cover page template 1 Click Start All Programs Accessories Communications Fax then click Fax Cover Page Editor The Cover Page Fax Cover Page Editor opens If the Cover Page Editor Tips dialog box opens click OK 2 If you want to include fields that are imported from either the Send Fax Wizard or the Fax Configuration Wi...

Page 126: ...Faxing from programs To fax a document directly from most programs 1 Open your document in the program it was created in 2 Click File then click Print The Print dialog box opens 3 Click the arrow button to open the Name list then click the Fax printer 4 Click Print or OK The Send Fax Wizard opens 5 Complete the wizard by following the instructions in Sending a simple fax on page 116 Faxing a scann...

Page 127: ...Console is open it detects incoming faxes and stores them in the Inbox 2 To view a fax click Inbox then double click the fax you want to view The fax viewer opens where you can view and print the fax Canceling a fax You can cancel a fax that you have set up to send at a time in the future To cancel a fax that has not been sent 1 If Fax is not open click Start All Programs Accessories Communication...

Page 128: ... Printers and Other Hardware Click View installed printers or fax printers The Printers and Faxes window opens OR If your Control Panel is in Classic View double click the Printers and Faxes icon The Printers and Faxes window opens 3 Right click Fax then click Properties The Fax Properties dialog box opens 4 Click the Devices tab then click Properties The Modem dialog box opens 5 Specify the numbe...

Page 129: ... Category View click Printers and Other Hardware Click View installed printers or fax printers The Printers and Faxes window opens OR If your Control Panel is in Classic View double click the Printers and Faxes icon The Printers and Faxes window opens 3 Right click Fax then click Properties The Fax Properties dialog box opens 4 Click the Devices tab then click Properties The Modem dialog box opens...

Page 130: ...122 Chapter 7 Sending and Receiving Faxes www gateway com ...

Page 131: ...e power consumption to get the most use out of the battery Read this chapter to learn how to Check and recharge the battery Recalibrate the battery Change batteries Extend the life of the battery by conserving battery power and using alternate power sources Change power saving settings ...

Page 132: ...to view the power status box which opens in the upper left corner of the screen The power status box shows the current power source the battery charge level and the power management mode Looking at the battery charge indicator LED green battery is fully charged LED orange battery is charging LED red battery is malfunctioning Important If the power cord or battery icon does not appear on the taskba...

Page 133: ...ike an inaccurate charge you may need to recalibrate the battery For more information see Recalibrating the battery on page 126 Recharging the battery The battery recharges while it is installed and your notebook is connected to AC power While the battery is recharging the battery charge indicator turns orange and the battery icon in the taskbar has a lightning bolt Important If the power cord or ...

Page 134: ...nced menu 4 Highlight Battery Auto Learning then select Enabled by pressing the spacebar 5 Open the Exit menu then highlight Exit Saving Changes and press ENTER 6 Select Yes then press ENTER The battery recalibration process begins and a screen opens showing you the progress The entire process will take several hours When the recalibration has finished the message Press Esc key to exit appears 7 P...

Page 135: ...tlet go to Step 2 OR If your notebook is on and is not plugged into an AC outlet save your work and turn off the notebook 2 Close the LCD panel 3 Turn your notebook over so the bottom is facing up Warning Danger of explosion if battery is incorrectly replaced Replace only with a Gateway 400VTX battery Discard used batteries according to the manufacturer s instructions The battery used in this devi...

Page 136: ...ateway com 4 Slide the battery release latch and lift the battery out of the bay 5 Place a recharged battery into the bay and press down until it snaps into place 6 Turn your notebook over 7 Open the LCD panel and press the power button ...

Page 137: ...nd using Hibernate mode on page 135 Using the DVD drive only when necessary These drives use a large amount of power Recharging the battery often taking an extra battery and fully recharging the batteries before traveling For more information see Recharging the battery on page 125 and Changing batteries on page 127 Using alternate power sources To extend battery life use alternate power sources wh...

Page 138: ...e mode For more information on using Hibernate mode see Activating and using Hibernate mode on page 135 Using power saving modes Always save your work before using Standby mode In Standby mode your notebook reduces or turns off the power to most devices except memory However the information in memory is not saved to the hard drive If power is interrupted the information is lost When in Hibernate m...

Page 139: ... advanced power settings and activating Hibernate mode Power schemes groups of power settings let you change power saving options such as when the display or hard drive is automatically turned off You can select one of the defined power schemes or create a custom power scheme Alarms can alert you when the battery charge is low Advanced power settings let you assign different power saving modes to ...

Page 140: ...your Control Panel is in Category View click Performance and Maintenance 2 Click Double click the Power Options icon The Power Options Properties dialog box opens 3 Click the arrow button to open the Power Schemes list then click the power scheme you want OR Set the timers then save your custom power scheme by clicking Save As and typing a name for the scheme 4 Click OK ...

Page 141: ...egory View click Performance and Maintenance 2 Click Double click the Power Options icon The Power Options Properties dialog box opens 3 Click the Alarms tab 4 Adjust the alarm settings 5 Click OK Help and Support For more information about changing the power scheme in Windows XP click Start then click Help and Support Type the keyword power scheme in the HelpSpot Search box then click the arrow ...

Page 142: ...and Maintenance 2 Click Double click the Power Options icon The Power Options Properties dialog box opens 3 Click the Advanced tab 4 Click the arrow button to open a Power buttons list then click the power setting mode you want to use 5 Click OK Help and Support For more information about changing the alarm options in Windows XP click Start then click Help and Support Type the keyword alarm option...

Page 143: ...Panel is in Category View click Performance and Maintenance 2 Click Double click the Power Options icon The Power Options Properties dialog box opens 3 Click the Hibernate tab Help and Support For more information about changing the power management settings in Windows XP click Start then click Help and Support Type the keyword power management in the HelpSpot Search box then click the arrow ...

Page 144: ...x then click the Power Schemes tab Click the arrow button to open a System hibernates list then click the time you want to use OR Open the Power Options Properties dialog box then click the Advanced tab Hibernate is now an option in the Power buttons lists As a manually selected power savings mode click Start then click Turn Off Computer Press and hold SHIFT then click Hibernate Help and Support F...

Page 145: ...your radio frequency wireless connections Transferring files Protecting your notebook from loss and theft Managing your notebook s power efficiently Tips Tricks To access the contents of this guide while you are traveling click Start All Programs then click Gateway Utilities You can also download an electronic copy from support gateway com support manlib ...

Page 146: ...reless devices If your notebook is equipped with a wireless device check with the local radio approval authorities prior to your trip for any restrictions on the use of a wireless device in the destination country If your notebook came equipped with an internal embedded wireless device see Safety Regulatory and Legal Information on page 249 for general wireless regulatory guidelines Wireless commu...

Page 147: ...als Be ready to claim your notebook as soon as it passes through the x ray machine in security checkpoints Write down your notebook model number and serial number see Identifying your model on page 10 in case of theft or loss and keep the information in a safe place Also tape your business card or an address label to your notebook and accessories Whoever sits next to you or behind you can see your...

Page 148: ...u highlight Exit Saving Changes then press ENTER When you start your computer you are prompted to enter the user password you set in Step 3 Power Take your AC power adapter to recharge the battery If you are traveling internationally take power plug adapters Take a portable surge protector to protect your notebook from power surges To get the best performance from your notebook avoid using the bat...

Page 149: ...heral devices take a portable USB hub to provide additional USB ports Take a network cable if you need to connect to a network Some hotels provide Internet connectivity only through their networks Take your System Restoration CDs in case you need to install an additional driver or software ...

Page 150: ...142 Chapter 9 Travel Tips www gateway com ...

Page 151: ...des information about customizing your computer by changing settings in Windows Read this chapter to learn how to Change screen and display settings Change the background and screen saver Adjust the touchpad settings Add change and switch user accounts ...

Page 152: ...r adequately in 256 colors while color photographs need millions of colors to be displayed with optimum quality Windows lets you choose from several color depth settings We recommend that you use the 32 bit True Color setting at all times If the color in your images seems false or jumpy especially after you have played a game or run a video intensive program check the color depth setting and retur...

Page 153: ...can increase the screen resolution to fit more icons on your desktop or you can decrease the resolution to make reading the display easier The higher the resolution the smaller individual components of the screen such as icons and menu bars appear Help and Support For more information about adjusting display settings in Windows XP click Start then click Help and Support Type the keyword changing d...

Page 154: ...s 2 Click Double click the Display icon The Display Properties dialog box opens 3 Click the Settings tab 4 Drag the Screen resolution slider to the size you prefer 5 To save your changes click OK then click Yes Help and Support For more information about adjusting screen resolution in Windows XP click Start then click Help and Support Type the keyword changing screen resolution in the HelpSpot Sea...

Page 155: ...ws desktop items such as the background color and dialog box title bars To change desktop colors 1 Click Start then click Control Panel The Control Panel window opens If your Control Panel is in Category View click Appearance and Themes 2 Click Double click the Display icon The Display Properties dialog box opens 3 Click the Appearance tab ...

Page 156: ...olor or font settings for the item d Click OK then click the Themes tab e Click Save As type a name for the new theme then click OK twice The new colors appear on your desktop Changing the desktop background You can change the Windows desktop background picture Windows provides several backgrounds or you can use pictures that you have created or retrieved from other sources To change the desktop b...

Page 157: ...cation 5 If you want the picture you chose to cover the entire screen click the arrow button to open the Position list then click Stretch or Tile 6 If the picture you chose does not cover the entire screen and you did not choose to stretch or tile the image in Step 5 you can change the solid color behind the picture by clicking the arrow button to open the Color list then clicking a color 7 Click ...

Page 158: ...ommercial products To select a screen saver 1 Click Start then click Control Panel The Control Panel window opens If your Control Panel is in Category View click Appearance and Themes 2 Click Double click the Display icon The Display Properties dialog box opens 3 Click the Screen Saver tab Help and Support For more information about changing the desktop background in Windows XP click Start then cl...

Page 159: ...cannot customize the screen saver you selected 6 If you want to display the Welcome Login screen whenever you exit the screen saver click the On resume display Welcome screen check box 7 If you want to change the time before the screen saver is activated click the up or down arrows next to the Wait box 8 Click OK Help and Support For more information about selecting a screen saver in Windows XP cl...

Page 160: ...inter speed left hand or right hand configuration and other touchpad settings To change your touchpad settings 1 Click Start then click Control Panel The Control Panel window opens If your Control Panel is in Category View click Printers and Other Hardware 2 Click Double click the Mouse icon The Mouse Properties dialog box opens ...

Page 161: ... setting then modify the setting 5 To assign a function to the rocker switch click the in front of Buttons click the up or down button then click the action you want 6 Click OK to save changes Help and Support For more information about changing mouse settings in Windows XP click Start then click Help and Support Type the keyword mouse settings in the HelpSpot Search box then click the arrow ...

Page 162: ... be available in other accounts If this happens install the program or device in the accounts that need it Files created in one account are not accessible from other accounts unless the files are stored in the Shared Documents folder The Shared Documents folder is accessible from all accounts on that computer and from other computers on the network To add delete or modify user accounts 1 Click Sta...

Page 163: ...ts 1 Click Start then click Log Off The Log Off Windows dialog box opens 2 Click Switch User The Windows Welcome screen opens 3 Click the user account that you want to use When you switch between user accounts any programs that were running for the previous user continue to run ...

Page 164: ...156 Chapter 10 Customizing Your Computer www gateway com ...

Page 165: ...single Internet connection among the connected computers Read this chapter to learn about Benefits of using a network in your home small office or home office Types of network connections Purchasing additional network equipment Installing and configuring your notebook for Ethernet networking Turning wireless Ethernet on and off ...

Page 166: ...ng drives With a network you can copy files from computer to computer by copying and pasting or dragging and dropping You will no longer waste your time transferring files by using diskettes In addition you can map a drive on a networked computer to another computer and access the files as if they were located on the hard drive of the computer you are using Help and Support For more information ab...

Page 167: ... With a home network you can play multi player games Load a game like Microsoft Midtown Madness 2 on your computers and in minutes you and your friends can race in competing cars through the streets of San Francisco Help and Support For more information about sharing network devices in Windows XP click Start then click Help and Support Type the keyword sharing in the HelpSpot Search box then click...

Page 168: ... connect You are creating a network in an office or business where network speed is more important than moving about with your computer Your computer has an Ethernet jack for connecting to the network Wireless Ethernet network Create a wireless Ethernet IEEE 802 11a or IEEE 802 11b network if You are looking for an alternative to installing cable for connectivity The ability to move about with you...

Page 169: ...orks are typically built using Fast or Gigabit Ethernet components To create a wired Ethernet network you or your electrician must Install special Ethernet cables in your home or office Install an Ethernet card in each of your desktop computers if your computers do not already have built in Ethernet jacks Install an Ethernet PC Card in each of your notebooks if your notebooks do not already have b...

Page 170: ...ontrol point for the network Attached to the router are all of your computers or Ethernet ready devices Also connected to the router is a cable or DSL modem that provides access to the Internet Tips Tricks To add the ability to access a wireless Ethernet network to your wired Ethernet network connect an access point to the router switch or hub For more information about accessing a wireless Ethern...

Page 171: ... on your network from intruders trying to access your data over the Internet Built in switching with enough ports for all computers and devices on the network so you will not have to purchase a hub or switch If you did not purchase a router that includes built in switching or if the router does not have enough ports to attach all your computers an Ethernet hub or switch with enough ports for all c...

Page 172: ...ning Radio frequency wireless communication can interfere with equipment on commercial aircraft Current aviation regulations require wireless devices to be turned off while traveling in an airplane IEEE 802 11a and IEEE 802 11b communication devices are examples of devices that provide wireless communication For instructions to turn wireless Ethernet on and off see Turning your wireless Ethernet o...

Page 173: ...t for the network Attached to the access point is the cable or DSL modem that provides access to the Internet Each of the computers or Ethernet ready devices communicate with the access point using radio waves If your computer does not have built in wireless Ethernet capabilities you need to add a wireless PCI card desktop PC card notebook or USB adapter Tips Tricks If you want to access a wireles...

Page 174: ...ireless Ethernet built in OR A wireless Ethernet PC Card installed in each notebook that does not have wireless Ethernet built in A wireless Ethernet access point to connect your wireless Ethernet network to the Internet or a wired Ethernet network Important IEEE 802 11a and IEEE 802 11b use different radio frequencies All wireless Ethernet components should use the same frequency A combination of...

Page 175: ... a peer to peer also known as ad hoc wireless Ethernet network if you are setting up or joining a temporary computer to computer network This type of network does not include access into a wired network or the Internet You can create this type of network to quickly move files from one computer to another ...

Page 176: ...h notebook that does not have wireless Ethernet built in For more information For more information about purchasing equipment for your home or office Ethernet network discuss your particular needs with your Gateway store representative In addition several books and Internet sites are dedicated to networking See these sources for more information about networking your home or office with wired or w...

Page 177: ...ck Control Panel The Control Panel window opens If your Control Panel is in Category View click Network and Internet Connections The Network and Internet Connections window opens 2 Click Double click Network Connections The Network Connections window opens 3 Right click Wireless Network Connection then click Enable to turn on wireless Ethernet or click Disable to turn off wireless Ethernet Warning...

Page 178: ...170 Chapter 11 Networking Your Computer www gateway com ...

Page 179: ...ings a printer or other peripheral devices and other unique computer settings that you want to move from your old computer to your new one Read this chapter to learn about Using the Files and Settings Transfer Wizard Transferring Files Transferring Internet Settings Installing your old printer or scanner Installing your old programs ...

Page 180: ... Wizard The wizard also moves specific files or entire folders such as My Documents My Pictures and Favorites To open the Files and Settings Transfer Wizard Click Start All Programs Accessories System Tools then click Files and Settings Transfer Wizard Help and Support For more information about using the Files and Settings Transfer Wizard in Windows XP click Start then click Help and Support Type...

Page 181: ...a files Use Windows Find or Search to locate other personal data files For more information see To find files using Find or Search on page 174 or see Searching for files on page 56 To find files in the My Documents folder 1 In Windows XP click Start then click My Documents The My Documents window opens and displays many of your saved personal data files Go to Step 4 OR In Windows 98 Windows Me or ...

Page 182: ...les or Folders The Search Results window opens 2 Use Windows Find or Search to locate data files by file name or file type For help on finding files click Help then click Help and Support Center or Help Topics For more information see Searching for files on page 56 File type File usually ends in Documents DOC TXT RTF HTM HTML DOT Spreadsheets XLS XLT TXT Pictures JPG BMP GIF PDF PCT TIF PNG EPS Mo...

Page 183: ...net setup program provided by your local ISP or contact your ISP to see if they have an updated version of their software and install it on your new computer If you use MSN as your ISP or if you know your ISP settings use the Windows Internet Connection Wizard To use the Internet Connection Wizard 1 Click Start All Programs Accessories Communications then click New Connection Wizard The New Connec...

Page 184: ...rks or Microsoft Internet Explorer favorites For more information see your Internet browser program s online help Installing your old printer or scanner Windows may have built in support for older printers scanners or other peripheral devices This means you do not need any additional software Newer devices however usually require your original software installation CDs or diskettes If you have tro...

Page 185: ...trol Panel The Control Panel window opens If your Control Panel is in Category View click Printers and Other Hardware 6 Click Double click the Printers and Faxes or Printers icon then click Add a printer or Add Printer The Add Printer wizard opens 7 Install your printer by following the on screen instructions See your peripheral device s user guide for installation information and tips Because mos...

Page 186: ...d contain any serial numbers or product ID keys that may be required for program installation and registration Remember to check the publisher s Web site for important program updates If you have trouble after installing your old programs you can restore your computer s previous settings using System Restore Tips Tricks If your new computer comes with a newer version of a program it is usually bet...

Page 187: ...asic information about maintaining your computer hardware and software Read this chapter to learn how to Care for your computer Create an emergency startup diskette Protect your computer from viruses Manage hard drive space Back up files Clean your computer ...

Page 188: ...me brittle and easy to break in cold temperatures and can melt or warp in high temperatures Damage due to either extreme is not covered by your warranty As a general rule your computer is safest at temperatures that are comfortable for you Keep all liquids away from your computer When spilled onto computer components almost any liquid can result in extremely expensive repairs that are not covered ...

Page 189: ...www gateway com Recalibrate the battery X page 126 Clean computer case X page 195 Clean keyboard X page 195 Clean computer screen X page 196 Clean mouse X page 196 Maintenance task Immediately after purchase Monthly When needed See ...

Page 190: ... your computer To create an emergency startup diskette 1 Insert a blank diskette labeled Startup into the optional diskette drive 2 Click Start then click My Computer The My Computer window opens 3 Right click 3 Floppy A then click Format The Format 3 Floppy A dialog box opens Important This procedure uses the optional diskette drive If you do not have a diskette drive in your computer you can pur...

Page 191: ...d 5 When you see the warning message click OK Windows copies files to the emergency startup diskette 6 When Windows finishes copying files remove the diskette from the diskette drive 7 Slide the write protect tab up to prevent the diskette from being erased or infected by viruses 8 Store your emergency startup diskette in a safe place with your other backup software media Not write protected Write...

Page 192: ...o check files and programs that are on diskettes attached to e mail messages or downloaded from the Internet Checking all programs for viruses before installing them Disabling macros on suspicious Microsoft Word and Excel files These programs will warn you if a document that you are opening contains a macro that might have a virus Periodically updating the Norton AntiVirus program to protect again...

Page 193: ...can for viruses 1 Click Start All Programs Norton AntiVirus then click Norton AntiVirus 2003 Norton AntiVirus opens 2 Click Scan for Viruses 3 Click the type of scan you want to make in the Scan for Viruses area then under Actions click Scan Scan for viruses Scan ...

Page 194: ... least 30 seconds 3 Turn on your computer and rescan for the virus To update Norton AntiVirus 1 Make sure that you are connected to the Internet 2 Click Start All Programs Norton AntiVirus then click LiveUpdate Norton AntiVirus The LiveUpdate wizard opens 3 Follow the on screen instructions to update your Norton AntiVirus program with the latest virus protection files 4 When the program has finish...

Page 195: ...ral utilities you can use to manage your hard drive Checking hard drive space To check hard drive space 1 Click Start then click My Computer The My Computer window opens 2 Right click the drive that you want to check for available file space then click Properties Drive space information appears ...

Page 196: ...ter window opens 2 Right click the hard drive that you want to delete files from for example Local Disk C then click Properties The Properties dialog box opens at the General tab 3 Click Disk Cleanup The Disk Cleanup dialog box opens 4 Make sure that the check box beside each file type you want to delete is selected For more information about file types you can delete read the descriptions in the ...

Page 197: ... you use your computer less frequently once a month may be adequate Also use Error checking if you encounter hard drive problems To check the hard drive for errors 1 Click Start then click My Computer The My Computer window opens 2 Right click the hard drive that you want to check for errors for example Local Disk C then click Properties The Properties dialog box opens Help and Support For more in...

Page 198: ...ral minutes After Windows has finished checking the drive for errors it provides a summary of the problems that it found 6 Correct any problems that are found by following the on screen instructions 7 Click OK Help and Support For more information about checking the hard drive for errors in Windows XP click Start then click Help and Support Type the keyword checking for disk errors in the HelpSpot...

Page 199: ...rather than as multiple pieces scattered across different areas of the drive Defragmenting the information stored on the drive can improve hard drive performance While the Disk Defragmenter program is running do not use your keyboard or touchpad because using them may continuously stop and restart the defragmenting process Also if you are connected to a network log off before starting Disk Defragm...

Page 200: ... progress on the computer display When finished Disk Defragmenter asks if you want to quit the program 6 Click Close or Yes then click the X in the top right corner to close the Disk Defragmenter window Help and Support For more information about defragmenting the hard drive in Windows XP click Start then click Help and Support Type the keyword defragmenting in the HelpSpot Search box then click t...

Page 201: ... DVD CD RW drive or Zip drive to do a complete hard drive backup For more information see Creating CDs on page 97 If you do not have a high capacity backup device and you want to purchase one you can contact Gateway s Add on Sales department or visit our Accessory Store at accessories gateway com Using the Scheduled Task Wizard The Scheduled Task Wizard lets you schedule maintenance tasks such as ...

Page 202: ... Wizard opens 3 Click Next then click the task or program you want to schedule and follow the on screen instructions to customize the task Important Your computer must be on during scheduled tasks If your computer is off scheduled tasks will not run Help and Support For more information about using the Scheduled Tasks Wizard in Windows XP click Start then click Help and Support Type the keyword Sc...

Page 203: ... not use abrasive or solvent cleaners because they can damage the finish on components Your computer is cooled by air circulated through the vents on the case so keep the vents free of dust With your computer turned off and unplugged brush the dust away from the vents with a damp cloth Be careful not to drip any water into the vents Do not attempt to clean dust from the inside of your computer Cle...

Page 204: ...th the cloth Cleaning the mouse If you have a mouse and the mouse pointer begins moving erratically across the computer screen or becomes difficult to control precisely cleaning the mouse will likely improve its accuracy Clean your optical mouse by wiping the bottom of the mouse with a damp lint free cloth Caution The computer screen is made of specially coated glass and can be scratched or damage...

Page 205: ...ining ring on the bottom of the mouse counter clockwise then remove the retaining ring and mouse ball 3 Remove any dust lint or dirt from the mouse ball with a soft cloth 4 Clean the mouse rollers with a cotton swab dipped in isopropyl alcohol 5 Replace the mouse ball and lock the retaining ring into place Mouse rollers ...

Page 206: ...198 Chapter 13 Maintaining Your Computer www gateway com ...

Page 207: ...14 199 Restoring Software Read this chapter to learn how to Reinstall device drivers Update device drivers Reinstall programs Reinstall Windows ...

Page 208: ...e tried these steps first Use the diagnostics and troubleshooting tools found in HelpSpot For more information about diagnostics and troubleshooting tools in Windows XP click Start then click Help and Support Type the keyword troubleshooting in the HelpSpot Search box then click the arrow See the Troubleshooting section of this guide If these steps do not resolve the problem use the Gateway Restor...

Page 209: ...nstall device drivers because you are directed to do so while troubleshooting or if a message tells you that there is a problem with a device driver reinstall the device drivers by completing the following task If you just reinstalled Windows XP the device drivers were automatically reinstalled If you are not comfortable with the procedures covered in this section seek help from a more experienced...

Page 210: ...vice drivers to reinstall Grayed out drivers are not available for Automatic Installation To select these drivers click Manual Installation 7 Click Install 8 Follow any additional on screen instructions Depending on the device driver you are reinstalling you may only need to restart your computer to complete the installation However if a setup wizard opens when you restart your computer follow the...

Page 211: ... time you have inserted the red Gateway CD accept the End User License Agreement EULA by clicking Yes I accept it then clicking Continue The Gateway Driver and Application Recovery program starts and the Drivers and Application Recovery tab appears 6 Click the Web Updates tab 7 Click Check Now The Connect window opens Important If your system came equipped with a wireless device only use the drive...

Page 212: ...gram uninstall the old version first To reinstall programs from the red Gateway CD 1 If you just reinstalled Windows go to Step 4 Otherwise go to the next step 2 Click Start Control Panel then click Add or Remove Programs 3 In the Currently Installed Programs list click the program you want to uninstall then click Change Remove and follow the on screen instructions 4 Insert the red Gateway CD into...

Page 213: ...re reinstalling you may only need to restart your computer to complete the installation However if a setup wizard opens when you restart your computer follow the on screen instructions To reinstall other programs from a CD 1 If you just reinstalled Windows go to Step 4 Otherwise go to the next step 2 Click Start Control Panel then click Add or Remove Programs 3 In the Currently Installed Programs ...

Page 214: ... and some programs as well You can install any remaining programs by using the program CDs that came with your computer To reinstall your programs follow the instructions in Reinstalling programs on page 204 To reinstall Windows XP and the device drivers 1 Insert the red Gateway CD into the DVD drive 2 Restart your computer 3 Select 2 Boot from CD ROM 4 Select a language option 5 Select 1 Delete a...

Page 215: ...s files to your hard drive When your computer restarts do NOT press any key to boot from CD 14 When prompted insert the red Gateway CD then click Continue The Gateway Application Loader automatically installs your drivers and programs Your computer restarts several times during this process Do not press any keys or buttons during this process unless prompted to do so 15 When the Gateway Applicatio...

Page 216: ...208 Chapter 14 Restoring Software www gateway com ...

Page 217: ...Upgrading Your Notebook This chapter provides information about adding hardware devices to your notebook Read this chapter to learn how to Add and remove PC Cards Add and replace memory Replace the hard drive ...

Page 218: ...book when changing most cards because your notebook supports hot swapping Hot swapping means that you can insert a PC Card while your notebook is running If your PC Card does not work after hot swapping see the PC Card manufacturer s documentation for further information To insert a PC Card Push the card firmly into the bottom of the PC Card slot label side up until the outer edge of the card is f...

Page 219: ...n in the taskbar the PC Card name then click Stop OR Turn off your notebook 2 Release the eject button by pressing the PC Card eject button once 3 Eject the PC Card by pressing the eject button again Important If the remove hardware icon does not appear on the taskbar click the show hidden icons button ...

Page 220: ... workbench or other grounded object Unplug the power cord and the modem and network cables Remove the battery For more information see Changing batteries on page 127 Disconnect all peripheral devices and remove any PC Cards Warning ESD can permanently damage electrostatic discharge sensitive components in your notebook Prevent ESD damage by following ESD guidelines every time you install memory or...

Page 221: ...of antistatic bags because only the inside of the bags provide electrostatic protection Always hold components by their edges Avoid touching the edge connectors Never slide components over any surface Adding or replacing memory Your notebook uses memory modules called SO DIMMs Small Outline Dual Inline Memory Modules The modules are available in various capacities and any module can be placed in a...

Page 222: ... page 212 2 Turn off your notebook and disconnect the AC adapter and modem and network cables 3 Turn your notebook over so the bottom is facing up 4 Remove the battery 5 Loosen the memory bay cover screw then remove the memory bay cover 6 If you are removing a module gently press outward on the clip at each end of the memory module until the module tilts upward ...

Page 223: ...acement module at a 30 degree angle and press it into the empty memory slot This module is keyed so it can only be inserted in one direction If the module does not fit make sure that the notch in the module lines up with the tab in the memory bay Important Use only memory modules designed for the Gateway 400VTX ...

Page 224: ...om 9 Gently push the module down until it clicks in place 10 Replace the memory bay cover and tighten the cover screw 11 Insert the battery then turn your notebook over 12 Connect the power adapter and modem and network cables then turn on your notebook ...

Page 225: ...ace your original drive with a higher capacity drive To replace the hard drive kit 1 Follow the instructions under Preventing static electricity discharge on page 212 2 Turn off your notebook and disconnect the AC adapter and modem and network cables 3 Turn your notebook over so the bottom is facing up 4 Remove the battery Hard drive ...

Page 226: ...218 Chapter 15 Upgrading Your Notebook www gateway com 5 Remove the hard drive kit screws 6 Slide the old hard drive kit out of your notebook Screws ...

Page 227: ...d drive already includes the hard drive kit bracket go to Step 12 OR If you need to move the hard drive kit bracket from your old hard drive kit to your new hard drive go to Step 8 8 Remove the two screws that secure the hard drive to the hard drive kit bracket Screws ...

Page 228: ...220 Chapter 15 Upgrading Your Notebook www gateway com 9 Remove the bracket from the old drive ...

Page 229: ...acket is positioned as shown 11 Replace the two screws that secure the bracket to the drive 12 Slide the new hard drive kit into your notebook 13 Replace the screws that secure the hard drive kit to your notebook 14 Insert the battery and turn your notebook over 15 Connect the power adapter and modem and network cables then turn on your notebook Plastic strip ...

Page 230: ...222 Chapter 15 Upgrading Your Notebook www gateway com ...

Page 231: ...is chapter to learn how to Troubleshoot typical hardware and software problems Get telephone support Use automated troubleshooting systems Get tutoring and training If the suggestions in this chapter do not correct the problem see Getting Help on page 35 for more information about how to get help ...

Page 232: ...ernal components For more information about preventing damage from static electricity see Preventing static electricity discharge on page 212 After you complete any maintenance tasks where you remove the memory bay cover or hard drive kit make sure that you replace the cover or hard drive kit reinstall any screws then replace the battery before you start your notebook Warning Do not try to trouble...

Page 233: ...ipheral devices review the installation procedures you performed and make sure that you followed each instruction If an error occurs in a program see the program s printed documentation or the online help Software support tools Your notebook may include the following support tool to help you diagnose and fix problems PC Doctor is a comprehensive hardware diagnostic and system information tool that...

Page 234: ...Cleaning CDs or DVDs on page 228 An audio CD does not produce sound Make sure that the CD label is facing up then try again Some music CDs have copy protection software You may not be able to play these CDs on your notebook Make sure that the volume control on your notebook is turned up For more information see System key combinations on page 26 Make sure that the Windows volume control is turned ...

Page 235: ... DVD title exports and help reduce illegal disc distribution To be able to play a DVD the disc s regional code and your DVD drive s regional code must match The regional code on your DVD drive is determined by your notebook s delivery address The regional code for the United States and Canada is 1 The regional code for Mexico is 2 Your DVD drive s regional code must match the regional code of the ...

Page 236: ...ict To check IRQ usage 1 Click Start then click Control Panel The Control Panel window opens If your Control Panel is in Category View click Performance and Maintenance 2 Click Double click System click the Hardware tab then click Device Manager The Device Manager window opens 3 Click View then click Resources by type Double click Interrupt request IRQ All IRQs and their hardware assignments are d...

Page 237: ...n tab in the upper right corner of the diskette down unprotected The diskette may be full Delete unnecessary files on the diskette and try again Not all diskettes are IBM compatible Make sure that the diskette you are using is IBM compatible Try a different diskette Occasionally diskettes are flawed and cannot be read by the diskette drive You see a Disk is full error message Delete unnecessary fi...

Page 238: ...inations on page 26 Change the display settings For more information see Adjusting the screen and desktop settings on page 144 Move your notebook away from sources of electrical interference such as televisions unshielded speakers microwaves fluorescent lights and metal beams or shelves The display has pixels that are always dark or too bright This condition is normal and inherent in the TFT techn...

Page 239: ... an Insufficient disk space error message Delete unnecessary files from the hard drive using Disk Cleanup For more information see Using Disk Cleanup on page 188 Empty the Recycle Bin by right clicking the Recycle Bin icon then clicking Empty Recycle Bin Save your files to a diskette or another drive If the hard drive is full copy any files not regularly used to diskettes or other backup media the...

Page 240: ...stem disk NTLDR is missing or disk error message Eject the diskette from the diskette drive then press ENTER Internet You cannot connect to the Internet Make sure that the modem cable is plugged into the modem jack and not the Ethernet network jack See Back on page 6 to make sure that the connections have been made correctly Make sure that your notebook is connected to the telephone line and the t...

Page 241: ... affect Internet performance The condition of the telephone lines in your residence or at your local telephone service The condition of the Internet computers to which you connect and the number of users accessing those computers The complexity of graphics and multimedia on Web pages Having multiple Web browsers open performing multiple downloads and having multiple programs open on your notebook ...

Page 242: ...sing it again If the keyboard does not work after it dries you may need to replace it A keyboard character keeps repeating or you see a Keyboard stuck or Key failure error message Make sure that nothing is resting on the keyboard Make sure that a key is not stuck Press each key to loosen a key that might be stuck then restart your notebook Memory You see a Memory error message Make sure that the m...

Page 243: ...ine then check for a dial tone by plugging a working telephone into the telephone wall jack If you have additional telephone services such as call waiting call messaging or voice mail make sure that all messages are cleared and call waiting is disabled before using the modem Contact your telephone service to get the correct code to temporarily disable the service Also make sure that the modem dial...

Page 244: ...l a single number such as 1 When the dial tone stops listen for line noise Wiggle the modem cable to see if that makes a difference Make sure that the connectors are free from corrosion and all screws in the wall or telephone wall jack are secure You can also call your telephone service and have the telephone line checked for noise or low line levels Try another telephone line either a different t...

Page 245: ...or current Gateway hardware and software The server provides a secure connection and is a stand alone server You cannot use it to access the Internet The server cannot be accessed Mondays from 8 00 a m to 12 00 p m CT To access the gateway your way dial up server 1 Insert the red Gateway CD into the DVD drive 2 Click Help then click Support Web Site 3 To check your modem connection speed click the...

Page 246: ...w opens If your Control Panel is in Category View click Printers and Other Hardware 3 Click Double click the Phone and Modem Options icon then click the Modems tab 4 Click your modem then click Properties The Modem Properties dialog box opens 5 Click the Diagnostic tab then click Query Modem If information about the modem appears the modem passed diagnostics If no modem information is available a ...

Page 247: ...anel is in Category View click Printers and Other Hardware 2 Click Double click the Phone and Modem Options icon then click the Modems tab 3 Click the modem you want to adjust then click Properties 4 Click the Modem tab then adjust the Speaker volume control 5 Click OK twice to close the Phone and Modem Options dialog box Mouse The external mouse does not work Make sure that the mouse cable is plu...

Page 248: ...ions PC Cards You installed a PC Card and now your notebook is having problems Make sure that you have correctly installed required software for the PC Card For more information see your PC Card s documentation Make sure that the PC Card you installed is not causing a system resource conflict For more information on resource conflicts see Device installation on page 228 Help and Support For a vide...

Page 249: ...ies on page 127 Make sure that the battery is fully recharged For more information see Recharging the battery on page 125 Make sure that the battery is calibrated correctly For more information see Recalibrating the battery on page 126 Your notebook will not turn off even after pressing the power button for five seconds If your notebook has frozen and pressing the power button for five seconds doe...

Page 250: ...con The Printers and Faxes window opens 3 Right click the name of the printer you want to be the default printer then click Set as Default Printer Reinstall the printer driver See the guide that came with your printer for instructions on installing the printer driver You see a Printer queue is full error message Make sure that the printer is not set to work offline To make sure that the printer is...

Page 251: ... headphone jack see Left side on page 3 Make sure that the volume control on your notebook is turned up For more information see System key combinations on page 26 Make sure that the Windows volume control is turned up For more information see Adjusting the volume on page 76 Make sure that Mute controls are turned off For more information see System key combinations on page 26 or Adjusting the vol...

Page 252: ...g www gateway com Video The external monitor is not working Make sure that you have pressed FN LCD CRT to activate the external monitor option Make sure that the monitor is turned on and that the video cable is connected correctly ...

Page 253: ...tware from Gateway see the manufacturer s documentation and technical support resources If you have how to questions about using a program see Online Help Printed documentation The Microsoft Windows documentation The software publisher s Web site See the troubleshooting section of this chapter Have your customer ID serial number and order number available along with a detailed description of your ...

Page 254: ...tutorial assistance for software issues billed by the minute 800 229 1103 chargedto your credit card 900 555 4695 chargedto your telephone bill Gateway Technical Support Talk to a Gateway Technical Support representative about a non tutorial technical support question See Before calling Gateway Technical Support on page 245 before calling TDD Technical Support for hearing impaired is available Wee...

Page 255: ...In many cases additional product information and online documentation for Gateway supplied hardware can be found in our Web site s Documentation Library This user s guide The software publisher s Web site Tutoring For help on using hardware or software that came with your Gateway notebook contact Gateway s fee based tutorial hotline 800 229 1103 rate charged per minute charged to a major credit ca...

Page 256: ...grams including Microsoft Word Excel and PowerPoint www gateway com country Gateway Learning Libraries A variety of courses and tutorials are available on CD Select from several easy to use learning libraries www gateway com training Online Training from Learn Gateway More than 450 online courses are available from Learn Gateway All you have to do is go online and log in You select the subject mat...

Page 257: ...the latest standards for safety of information technology equipment However to ensure safe use of this product it is important that the safety instructions marked on the product and in the documentation are followed Warning Always follow these instructions to help guard against personal injury and damage to your Gateway system ...

Page 258: ...e appropriate outlet If you use an extension cord with this system make sure that the total ampere rating on the products plugged into the extension cord does not exceed the extension cord ampere rating If your system is fitted with a TV Tuner cable or satellite receiver card make sure that the antenna or cable system is electrically grounded to provide some protection against voltage surges and b...

Page 259: ...ries recommended by Gateway Important Do not use Gateway products in areas classified as hazardous locations Such areas include patient care areas of medical and dental facilities oxygen laden environments or industrial facilities Warning To reduce the risk of fire use only No 26 AWG or larger telecommunications line cord ...

Page 260: ...edded in your notebook is well below the RF exposure limits as known at this time Because the wireless devices which may be embedded into your notebook emit less energy than is allowed in radio frequency safety standards and recommendations Gateway believes these devices are safe for use Regardless of the power levels care should be taken to minimize human contact during normal operation As a gene...

Page 261: ...countries with your system check with the local Radio Approval authorities prior to any move or trip for any restrictions on the use of a wireless device in the destination country Warning If your system came equipped with an internal embedded wireless device do not operate the wireless device unless all covers and shields are in place and the system is fully assembled Warning Wireless devices are...

Page 262: ...ived including interference that may cause undesired operation of the device Unintentional emitter per FCC Part 15 This device has been tested and found to comply with the limits for a Class B digital device pursuant to Part 15 of the FCC rules These limits are designed to provide reasonable protection against harmful interference in a residential installation This equipment generates uses and can...

Page 263: ...s device complies with Part 15 of the FCC Rules Operation of this product is subject to the following two conditions 1 this device may not cause harmful interference and 2 this device must accept any interference received including interference that may cause undesired operation Caution Changes or modifications not expressly approved by Gateway could void the FCC compliance and negate your authori...

Page 264: ...equired The telephone company may request that you disconnect the equipment until the problem is resolved The telephone company may make changes in its facilities equipment operations or procedures that could affect the operation of this equipment If this happens the telephone company will provide advance notice in order for you to make necessary modifications to maintain uninterrupted service Thi...

Page 265: ... notebook is well below the RF exposure limits as set by Industry Canada Operation of this device is subject to the following two conditions 1 This device may not cause harmful interference and 2 this device must accept any interference received including interference that may cause undesired operation of the device Warning To prevent radio interference to licensed service or co channel Mobile Sat...

Page 266: ...a single line individual service may be extended by means of a certified connector assembly The customer should be aware that compliance with the above conditions may not prevent degradation of service in some situations Repairs to certified equipment should be made by an authorized Canadian maintenance facility designated by the supplier Any repairs or alterations made by the user to this equipme...

Page 267: ...n the system label As a general guideline a separation of 20 cm 8 inches between the wireless device and the body for use of a wireless device near the body this does not include extremities is typical This device should be used more than 20 cm 8 inches from the body when wireless devices are on The power output of the wireless device or devices which may be embedded in your notebook is well below...

Page 268: ...s are classified as Class 1 Laser Products under a US Department of Health and Human Services DHHS Radiation Performance Standard Should the unit ever need servicing contact an authorized service location Warning Use of controls or adjustments or performance of procedures other than those specified in this manual may result in hazardous radiation exposure To prevent exposure to laser beams do not ...

Page 269: ...iness slogan are registered trademarks and black and white spotted box logo GATEWAY Gateway Astro Gateway Work Gateway Connected touch pad Gateway Connected music player Gateway Cyber Ware Gateway Education Ware Gateway Flex Case Gateway Gaming Ware Gateway GoBack Gateway Gold Gateway Learning Ware Gateway Magazine Gateway Micro Server Gateway Money Ware Gateway Music Ware Gateway Networking Solut...

Page 270: ...262 Appendix A Safety Regulatory and Legal Information www gateway com ...

Page 271: ...g 79 81 86 88 recording 79 streaming 159 troubleshooting 243 audio CD See CD audio file streaming 159 automobile power adapter 14 129 AVI file 81 B background 148 backing up files 193 battery 14 alarm options 131 133 alternate power sources 129 bay 7 127 changing 127 charge indicator 2 17 124 charge status 124 charging 16 125 conserving power 129 icons 124 installing 127 latch 7 managing power 129...

Page 272: ... track information 92 inserting 84 playing audio with MusicMatch 88 playing music 86 troubleshooting 226 CD Copier 105 CD drive See DVD drive CD RW See CD CD RW drive See DVD CD RW drive cellular phone memory cards 108 Certificate of Authenticity 11 cleaning audio CD 228 case 195 CD 228 computer exterior 195 computer screen 196 DVD 228 keyboard 195 LCD panel 196 mouse 196 screen 196 clicking 30 cl...

Page 273: ...t printer 242 defragmenting hard drive 191 deleting files and folders 45 53 54 63 188 desktop 44 adding icons 46 adding shortcuts 46 adjusting settings 144 changing background 148 changing color depth 144 changing color scheme 147 changing number of colors 144 using 45 using Start menu 45 device drivers See drivers dialing codes 138 digital camera connecting 34 USB port 3 directional keys 25 Disk ...

Page 274: ...playing 96 troubleshooting 226 DVD drive 5 84 activity indicator 84 eject button 84 identifying 84 manual eject hole 84 status indicator 22 troubleshooting 226 using 84 DVD CD RW drive 5 84 97 activity indicator 84 eject button 84 identifying 84 manual eject hole 84 status indicator 22 troubleshooting 226 using 84 97 E eject button diskette drive 83 DVD 84 electrostatic discharge ESD 212 e mail 67...

Page 275: ...nd folders 55 56 174 HelpSpot topics 38 specifications 12 floppy disk See diskette Fn key 25 26 folders copying 51 63 creating 50 51 cutting 51 63 deleting 45 53 63 finding 55 56 moving 51 opening 30 50 pasting 51 63 recovering 54 renaming 63 searching for 55 56 viewing list 50 fragmentation 191 function keys 25 G game multi player 159 Gateway eSupport 12 13 model number 7 10 serial number 10 12 W...

Page 276: ...connection 34 button 28 connecting to 68 downloading files 72 requirements to access 67 sharing access 158 transferring settings from old computer 175 troubleshooting 232 Internet connection sharing 158 troubleshooting 232 236 Internet radio 95 Internet service provider ISP 66 67 connecting to 68 disconnecting from 68 setting up account 67 transferring settings from old computer 175 InterVideo DVD...

Page 277: ...8 line tester 138 links 69 lock cable 139 Kensington cable 5 M maintenance 179 backing up files 193 checking for drive errors 189 checking hard drive space 187 cleaning case 195 cleaning component exteriors 195 cleaning computer display 196 cleaning keyboard 195 cleaning mouse 197 creating startup diskette 182 defragmenting 191 deleting files 188 suggested schedule 180 using Scheduled Task Wizard ...

Page 278: ...86 playing DVD 96 recording audio 79 using diskette drive 83 using DVD drive 84 using recordable CD drive 84 using Windows Media Player 81 86 96 multi player game playing 159 music library building 93 changing settings 94 MusicMatch building music library 93 changing library settings 94 creating MP3 files 90 creating music files 90 editing track information 92 listening to Internet radio 95 playin...

Page 279: ...rds See cards PDA memory cards 108 peer to peer networking 167 168 peripheral devices 34 playing audio CD 86 audio CD with MusicMatch 88 audio file 80 81 DVD 96 Media Player file 81 multimedia files 81 multi player games 159 music CD 86 Windows Media Player file 81 Plug and Play devices USB support for 34 pointer 29 moving 30 ports See connections power AC adapter 16 129 advanced settings 131 134 ...

Page 280: ...ct button 84 identifying drive 84 manual eject hole 84 status indicator 22 troubleshooting 226 using 84 97 recording audio file 79 CD tracks 90 data CD 97 music CD 101 recovering files and folders 53 Recycle Bin 45 deleting files and folders 53 emptying 54 recovering files and folders 54 re dialing telephone 120 reinstalling drivers 201 peripheral devices 176 printer 176 programs 178 204 scanner 1...

Page 281: ...78 setting up safety precautions 250 sharing devices 159 drives 158 Internet connection 158 printer 159 See also networking shortcut menus accessing 31 shortcuts adding to desktop 46 buttons 28 closing programs 63 closing windows 63 copying 63 cutting 63 deleting files and folders 63 keyboard 63 opening menu 31 pasting 63 renaming files and folders 63 selecting adjacent items in list 63 selecting ...

Page 282: ...ng fax 119 configuring Fax 113 installing Fax 112 line protector 138 line tester 138 receiving and viewing faxes 119 retrying fax 120 sending fax 116 sending faxes from program 118 sending scanned image fax 118 setting up fax cover page template 117 using Fax 111 telephone support 245 title bar 48 touchpad 9 buttons 29 30 changing settings 152 clicking 30 double clicking 30 dragging screen objects...

Page 283: ...chnical support 245 telephone support 245 video 244 Web site connection speed 233 turning off notebook 20 21 wireless Ethernet 169 turning on notebook 19 wireless Ethernet 169 tutoring fee based 247 U updating device drivers 42 203 Norton AntiVirus 186 upgrading 209 USB port 3 34 user accounts adding 154 switching 155 V video playing 81 96 streaming 159 troubleshooting 244 video file streaming 159...

Page 284: ... key 25 Windows Media Player 81 86 96 wired Ethernet network 160 161 equipment list 163 example 162 wireless Ethernet label 11 using while traveling 138 wireless Ethernet network 160 164 access point equipment list 166 access point example 165 ad hoc equipment list 168 ad hoc example 167 peer to peer equipment list 168 peer to peer example 167 turning off 169 turning on 169 Wordpad 59 World Wide W...

Page 285: ......

Page 286: ......
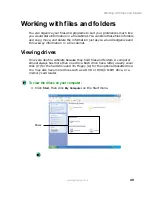
Reviews: