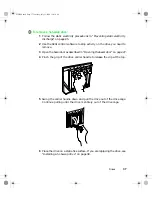
Drives
39
4
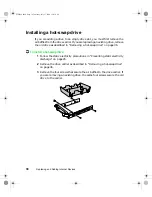
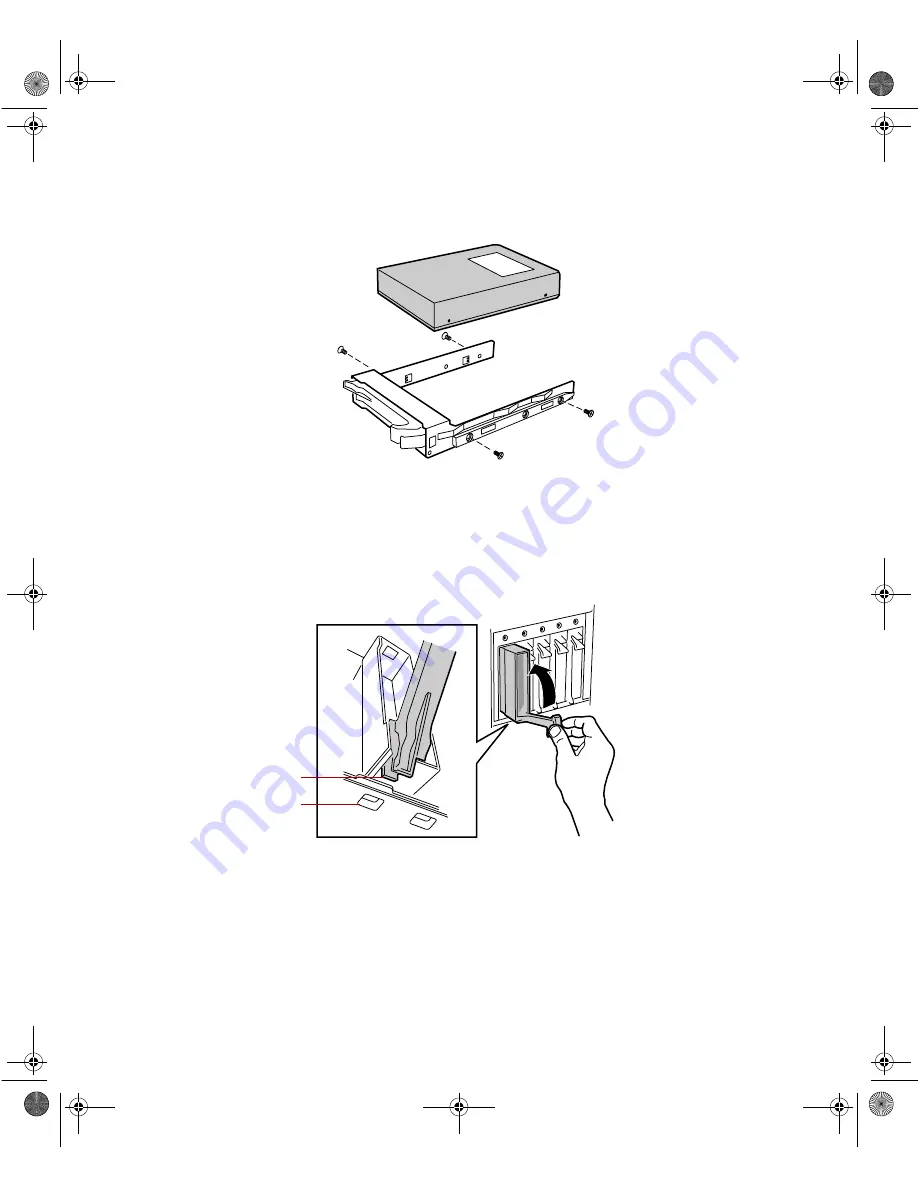
Use the four screws you removed in Step 3 to secure the new drive to
the drive carrier.
5
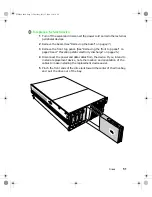
With the drive carrier handle in the open position, align the drive carrier
rails with the grooves at the top and bottom of the drive bay.
6
Slide the drive into the bay until the handle starts to close. Make sure
the tab on the bottom of the handle fits into the slot on the bottom of
the drive cage.
7
Close the handle securely to set the drive connector into the connector
at the back of the drive cage.
8
Close the bezel door.
9
Use the SCSI control utility to format and configure the new drive.
Tab
Slot
8506284.book Page 39 Thursday, July 13, 2000 11:43 AM
Summary of Contents for 8450R
Page 1: ...A MAN US 8450R SYS GDE R0 6 00 8450R Server System Manual ...
Page 5: ...iv 8506284 book Page iv Thursday July 13 2000 11 43 AM ...
Page 19: ...18 System Features 8506284 book Page 18 Thursday July 13 2000 11 43 AM ...
Page 25: ...24 System Setup 8506284 book Page 24 Thursday July 13 2000 11 43 AM ...
Page 119: ...118 Using the BIOS Setup Utility 8506284 book Page 118 Thursday July 13 2000 11 43 AM ...
Page 147: ...146 Troubleshooting 8506284 book Page 146 Thursday July 13 2000 11 43 AM ...
Page 161: ...160 Safety Regulatory and Notices 8506284 book Page 160 Thursday July 13 2000 11 43 AM ...
Page 172: ...A MAN US 8450R SYS GDE R0 6 00 8450R Server System Manual ...


