Installing Memory and Hardware 37
5.
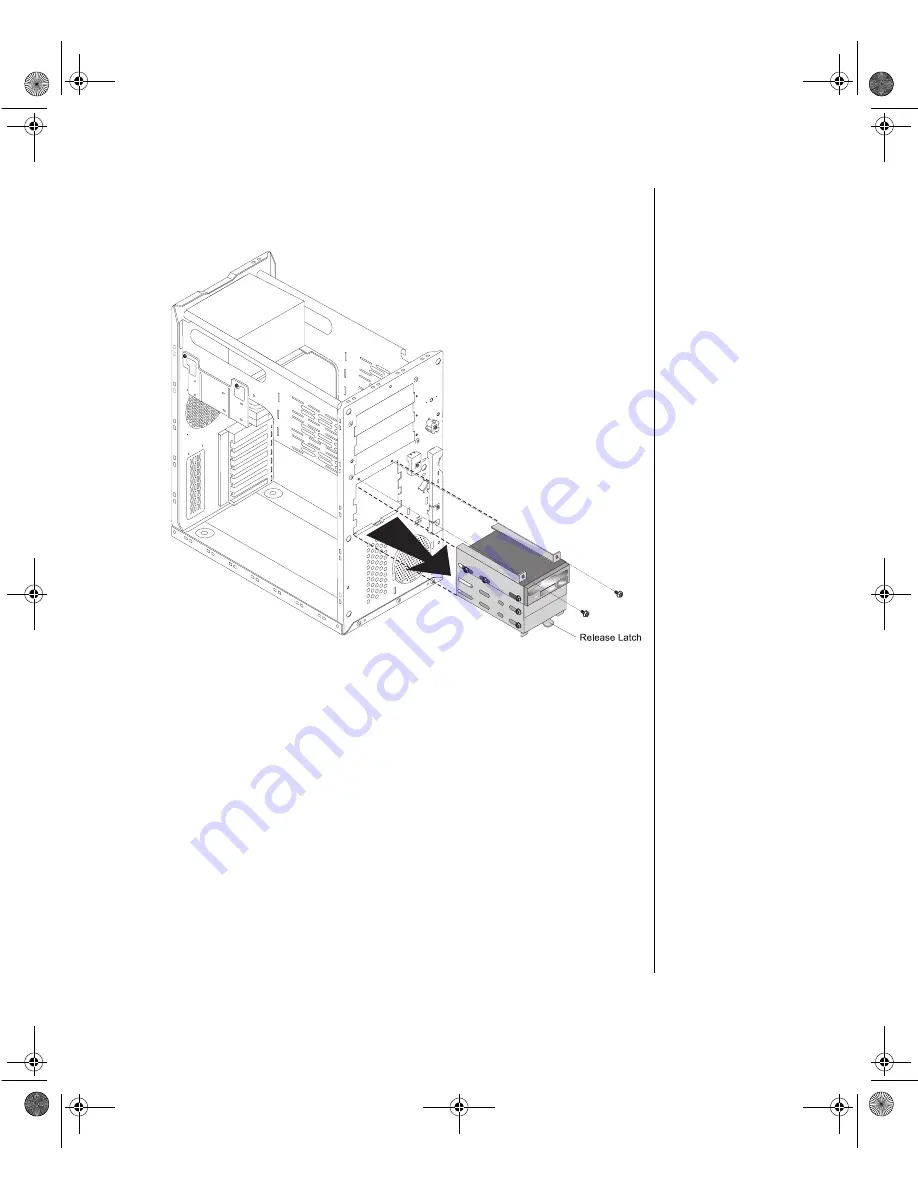
Remove the screws that secure the drive cage in place and pull the
drive cage out of the system.
Figure 16: Removing the 3.5-Inch Disk Drive Assembly
6.
Remove the drive from the bay by removing the screws that secure it to
the bay and pulling it straight out of the bay.
7.
Remove the replacement drive from its protective cover and install it
into the bay using the screws you removed in the previous step.
8.
Replace the drive cage in the chassis and secure it with the screws you
removed in step 5.
9.
Connect the data and power cables to the disk drive, making sure the
cables match their original position. (See the drive documentation for
proper drive jumper settings and cable orientation.)
10.
Close the case, as described in Chapter 1.
11.
Reconnect the power cord and turn on the system.
3436.book Page 37 Friday, August 7, 1998 10:23 AM


