36 Maintaining and Troubleshooting the Gateway ALR 8200 Server
Adding and replacing drives
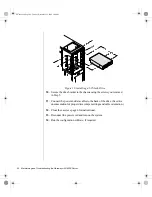
The case must be opened to add or change drives (such as disk drives and
CD-ROM drives) in the system.
Replacing the 3.5-inch diskette drive
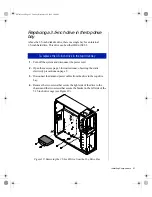
The 3.5-inch diskette drive is secured to a metal mounting bracket, which
lets you install and remove the drive from the system chassis.
1.
Turn off the system and disconnect the power cord.
2.
Open the case (see page 3 for instructions), observing the static
electricity precautions on page 2.
3.
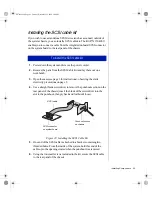
Disconnect the power and data cables from the back of the floppy
drive, noting their location and orientation. (You will reconnect these
cables after you install the new drive.)
4.
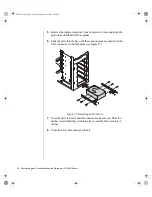
Remove the screws securing the drive bracket to the system chassis,
and remove the drive from the chassis.
5.
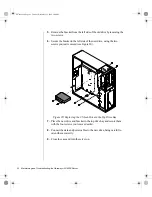
Remove the crews securing the 3.5-inch drive to the bracket, and then
remove the 3.5-inch drive.
6.
Place the new 3.5-inch drive in the mounting bracket.
7.
Secure the drive to the mounting bracket using the crews you removed
in Step 5.
8.
Place the drive in the chassis.
9.
Secure the drive bracket to the chassis with the screws you removed in
Step 4.
10.
Connect the power and data cables to the 3.5-inch drive, making sure
the cables match their original position. (See drive documentation for
proper drive jumper settings and cable orientation.)
To replace the 3.5-inch diskette drive
4079tl.book Page 36 Tuesday, December 22, 1998 2:04 PM


