22
www.gateway.com
Chapter 3: Getting Started
2
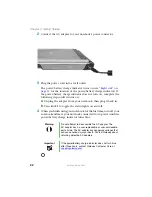
Connect the AC adapter to your notebook’s power connector.
3
Plug the power cord into a wall outlet.
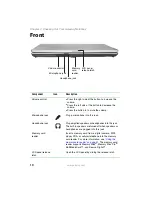
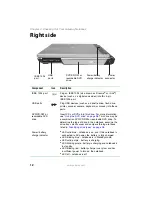
The power/battery charge indicator turns on (see
for the location of the power/battery charge indicator). If
the power/battery charge indicator does not turn on, complete the
following steps until it turns on:
a
Unplug the adapter from your notebook, then plug it back in.
b
Press
F
N
+
F1
to toggle the status lights on and off.
4
When you finish using your notebook for the first time, turn off your
notebook and leave your notebook connected to AC power until the
power/battery charge indicator turns blue.
Warning
Do not attempt to disassemble the AC adapter. The
AC adapter has no user-replaceable or user-serviceable
parts inside. The AC adapter has dangerous voltages that
can cause serious injury or death. Contact Gateway about
returning defective AC adapters.
Important
If the power/battery charge indicator does not turn blue
after three hours, contact Gateway Customer Care at
Summary of Contents for M210
Page 1: ...Gateway Notebook User Guide ...
Page 2: ......
Page 6: ...iv www gateway com ...
Page 14: ...8 www gateway com Chapter 1 Getting Help ...
Page 61: ...Chapter 6 55 Upgrading Your Notebook Adding and replacing memory Replacing the hard drive ...
Page 70: ...64 www gateway com Chapter 6 Upgrading Your Notebook ...
Page 116: ...110 www gateway com Appendix A Safety Regulatory and Legal Information ...
Page 125: ......


