82
www.gateway.com
Chapter 6: Upgrading Your Notebook
11
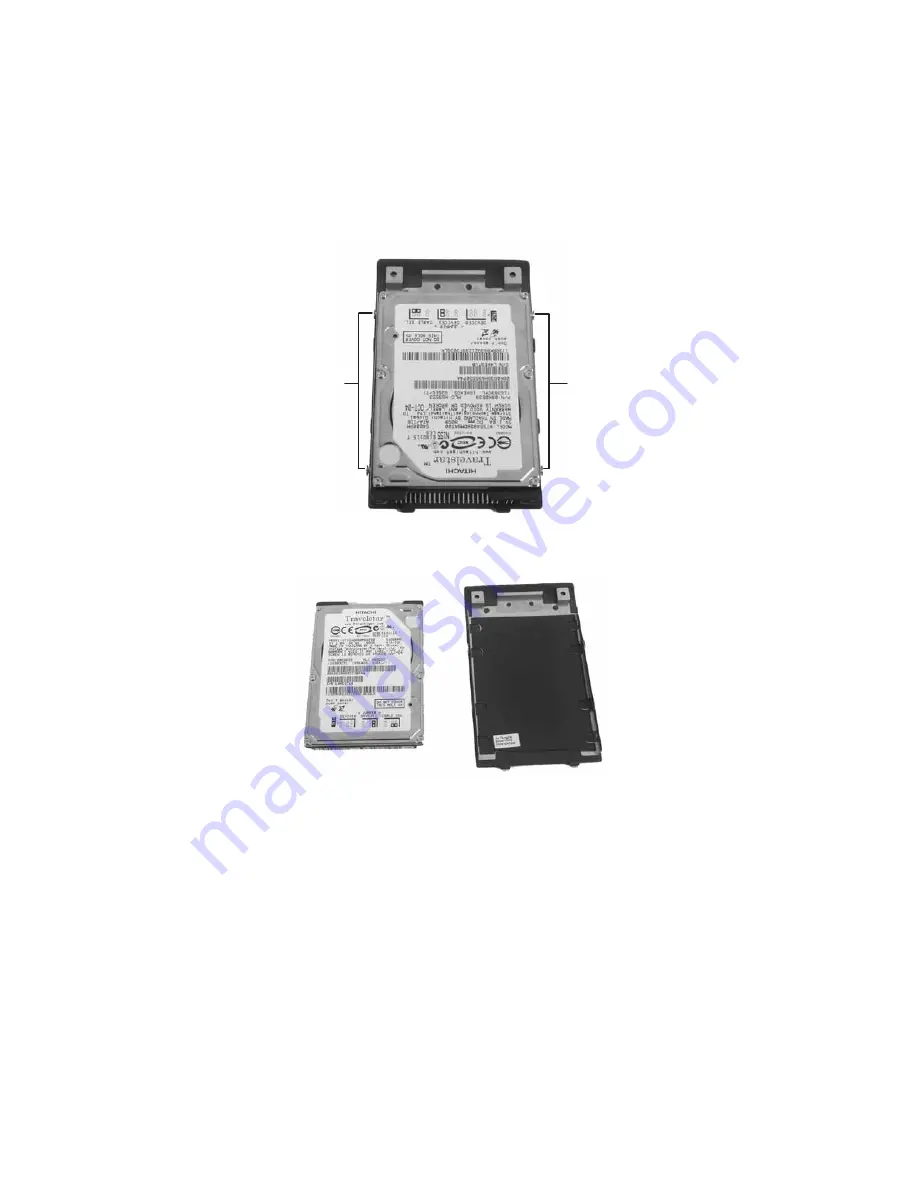
Remove the screws that secure the hard drive to the hard drive cover.
12
Remove the cover from the old drive.
13
Insert the new drive onto the cover so the screw holes line up.
14
Replace the screws that secure the cover to the drive.
15
Slide the new hard drive kit into your notebook, then replace the
cover screws.
16
Insert the batteries, then turn your notebook over.
17
Reconnect the optional port replicator.
Screws
Screws
Summary of Contents for M460
Page 1: ...Gateway Notebook User Guide ...
Page 2: ......
Page 26: ...20 www gateway com Chapter 2 Checking Out Your Gateway Notebook ...
Page 50: ...44 www gateway com Chapter 3 Getting Started ...
Page 68: ...62 www gateway com Chapter 4 Using Drives and Ports ...
Page 78: ...72 www gateway com Chapter 5 Managing Power ...
Page 79: ...Chapter 6 73 Upgrading Your Notebook Adding and replacing memory Replacing the hard drive ...
Page 90: ...84 www gateway com Chapter 6 Upgrading Your Notebook ...
Page 98: ...92 www gateway com Chapter 7 Using the Optional Port Replicator ...
Page 136: ...130 www gateway com Chapter 9 Troubleshooting ...
Page 158: ...152 www gateway com ...
Page 159: ......
Page 160: ...MAN M460 MYSTQ USR GDE R2 6 05 ...


