: Troubleshooting
124
•
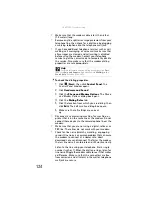
Make sure that the modem cable is less than 6 feet
(1.8 meters) long.
•
Remove any line splitters or surge protectors from your
telephone line, then check for a dial tone by plugging
a working telephone into the telephone wall jack.
•
If you have additional telephone services such as call
waiting, call messaging, or voice mail, make sure that
all messages are cleared and call waiting is disabled
before using the modem. Contact your telephone
service to get the correct code to temporarily disable
the service. Also make sure that the modem dialing
properties are set appropriately.
To check the dialing properties:
1
Click
(
Start
), then click
Control Panel
. The
Control Panel
window opens.
2
Click
Hardware and Sound
.
3
Click the
Phone and Modem Options
. The
Phone
and Modem Options
dialog box opens.
4
Click the
Dialing Rules
tab.
5
Click the location from which you are dialing, then
click
Edit
. The
Edit Location
dialog box opens.
6
Make sure that all settings are correct.
•
Disconnect any answering machine, fax machine, or
printer that is on the same line as the modem. Do not
connect these devices to the same telephone line as the
modem.
•
Make sure that you are not using a digital, rollover, or
PBX line. These lines do not work with your modem.
•
Check for line noise (scratchy, crackling, or popping
sounds). Line noise is a common problem that can cause
the modem to connect at a slower rate, abort
downloads, or even disconnect. The faster the modem,
the less line noise it can tolerate and still work correctly.
Listen to the line using your telephone. Dial a single
number (such as 1). When the dial tone stops, listen for
line noise. Wiggle the modem cable to see if that makes
a difference. Make sure that the connectors are free
from corrosion and all screws in the wall or telephone
wall jack are secure.
Help
F
or
m
ore
in
f
or
ma
tion
ab
out
di
al
in
g
properties
,
c
l
ic
k
Start
,
then
c
l
ic
k
Help and Support
. Ty
pe
the
k
e
yw
ord
dialing
in
the
Search Help
box
,
then
press
E
NTER
.
Summary of Contents for NA1
Page 1: ... NOTEBOOK REFERENCEGUIDE ...
Page 2: ......
Page 8: ...Contents vi ...
Page 13: ...CHAPTER2 5 Checking Out Your Notebook Front Left Right Back Bottom Keyboard area ...
Page 50: ...CHAPTER 3 Setting Up and Getting Started 42 ...
Page 116: ...CHAPTER 8 Upgrading Your Notebook 108 ...
Page 117: ...CHAPTER9 109 Troubleshooting Safety guidelines First steps Troubleshooting Telephone support ...
Page 146: ...CHAPTER 9 Troubleshooting 138 ...
Page 167: ...159 www gateway com wireless network switch 6 troubleshooting 129 working safely 14 ...
Page 168: ...160 Index ...
Page 169: ......

