www.gateway.com
57
5
If your new optical drive already has it’s own bracket and bezel, go to
step 10
.
If you need to use the bracket and bezel from the old optical drive, perform
steps
6
–
9
as necessary.
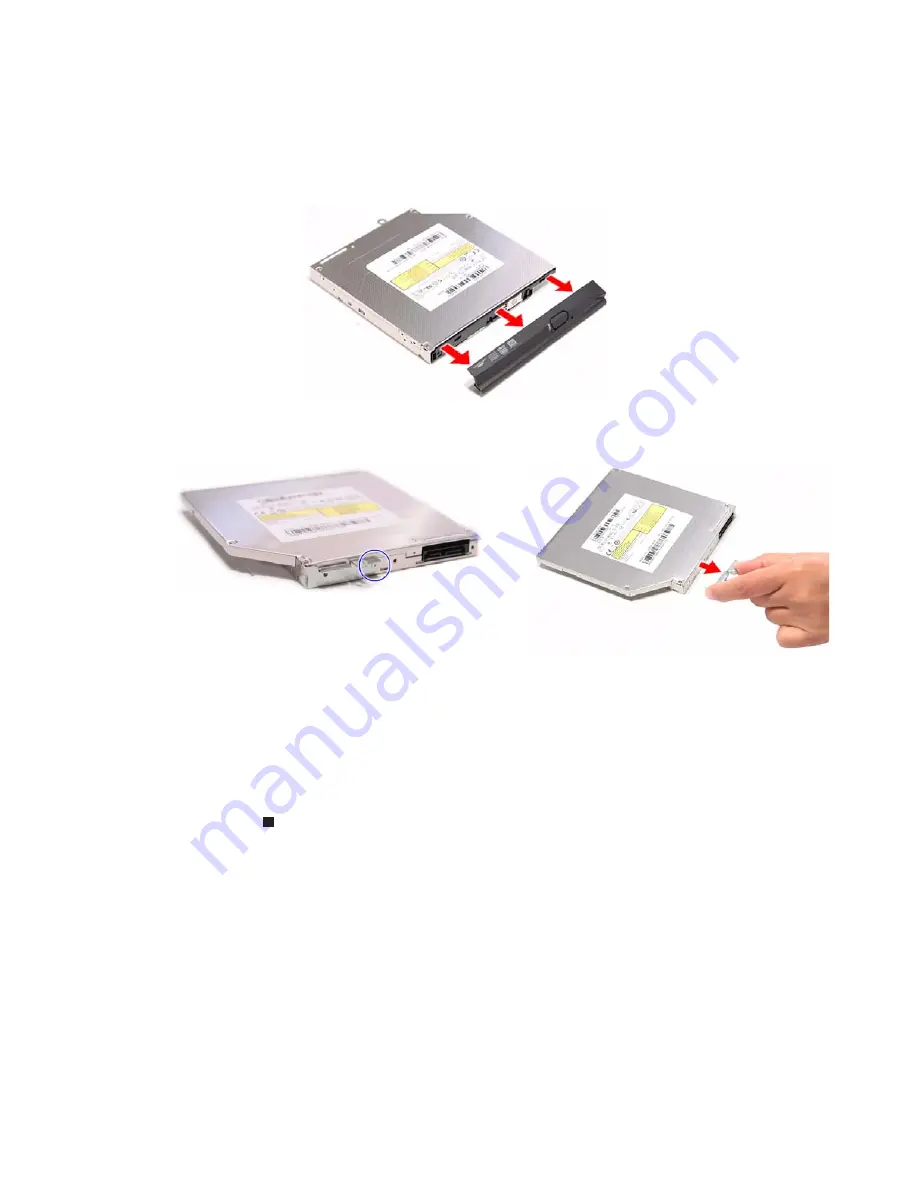
6
Detach the bezel from the old optical drive.
7
Remove the screw that secures the optical drive bracket, and then detach
the bracket from the drive.
8
Attach the bezel to the new optical drive.
9
Attach the bracket to the new optical drive and secure it with the screw
removed in
step 7
.
10
Slide the new optical drive into the drive bay and make sure it’s properly
engaged to the ODD1 connector.
11
Secure the new drive to the system board with the screw removed in
step 3
.
12
Reinstall the bay cover.
Summary of Contents for NV-53
Page 1: ... NV53 SERVICEGUIDE ...
Page 6: ...Contents iv ...
Page 12: ...CHAPTER 1 System specifications 6 System block diagram ...
Page 48: ...CHAPTER 2 System utilities 42 ...
Page 140: ...CHAPTER 4 Troubleshooting 134 ...
Page 141: ...CHAPTER5 135 Connector locations System board layout ...
Page 144: ...CHAPTER 5 Connector locations 138 ...
Page 145: ...CHAPTER6 139 FRU Field Replaceable Unit list Introduction Exploded diagram FRU list ...
Page 161: ...APPENDIXB 155 Online support information ...
Page 167: ......
Page 168: ...MAN NV5x SVC GDE R1 04 09 ...


