CHAPTER 3: Replacing notebook components
66
10
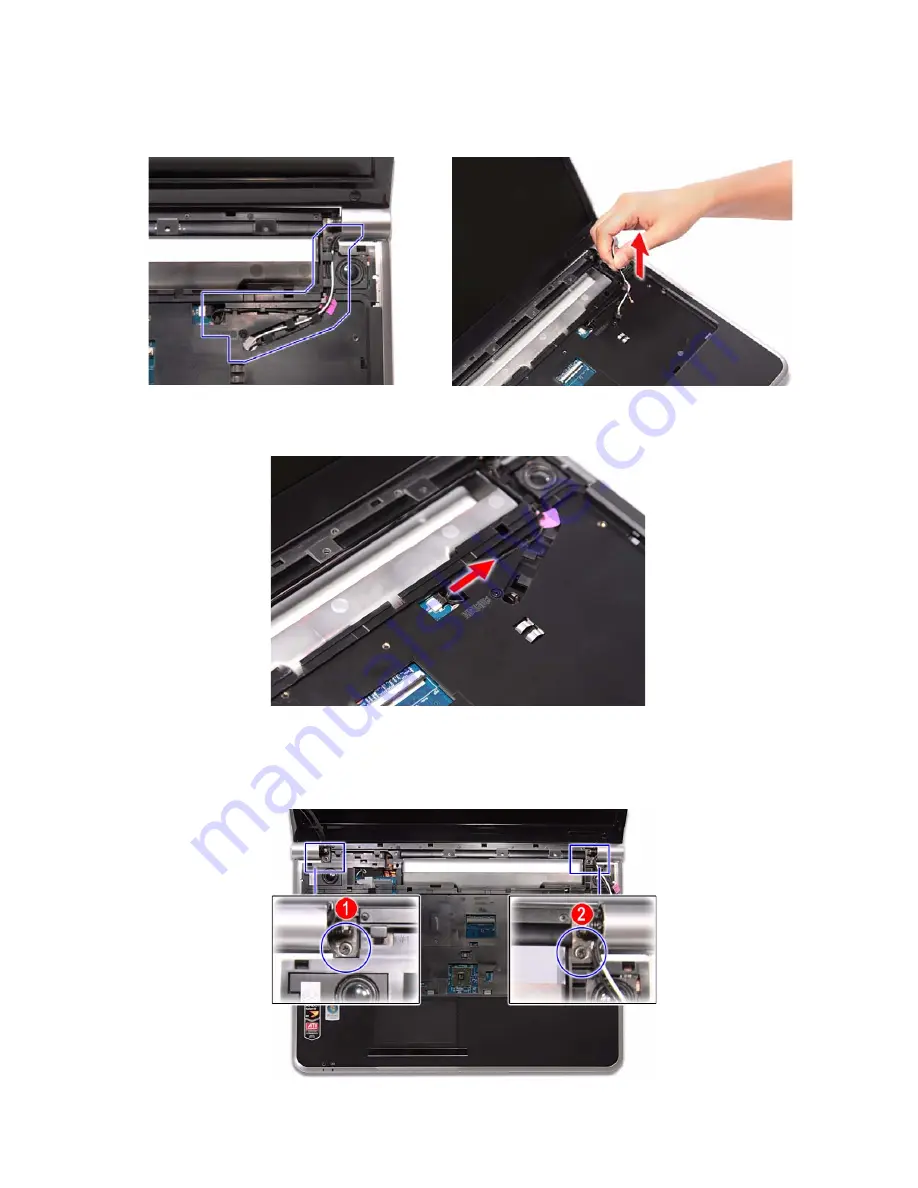
Release the antenna cables from their palm rest latches, and then pull them
out
from underneath the computer
.
11
Disconnect the power button board cable from its system board connector, and then
release it from its palm rest latches.
12
Carefully open the LCD panel to its fully extended position.
13
Move the
LCD, webcam, and microphone cables away from the top hinge screws.
14
Remove the top hinge screws securing the LCD assembly.
Summary of Contents for NV-53
Page 1: ... NV53 SERVICEGUIDE ...
Page 6: ...Contents iv ...
Page 12: ...CHAPTER 1 System specifications 6 System block diagram ...
Page 48: ...CHAPTER 2 System utilities 42 ...
Page 140: ...CHAPTER 4 Troubleshooting 134 ...
Page 141: ...CHAPTER5 135 Connector locations System board layout ...
Page 144: ...CHAPTER 5 Connector locations 138 ...
Page 145: ...CHAPTER6 139 FRU Field Replaceable Unit list Introduction Exploded diagram FRU list ...
Page 161: ...APPENDIXB 155 Online support information ...
Page 167: ......
Page 168: ...MAN NV5x SVC GDE R1 04 09 ...


