www.gateway.com
63
3
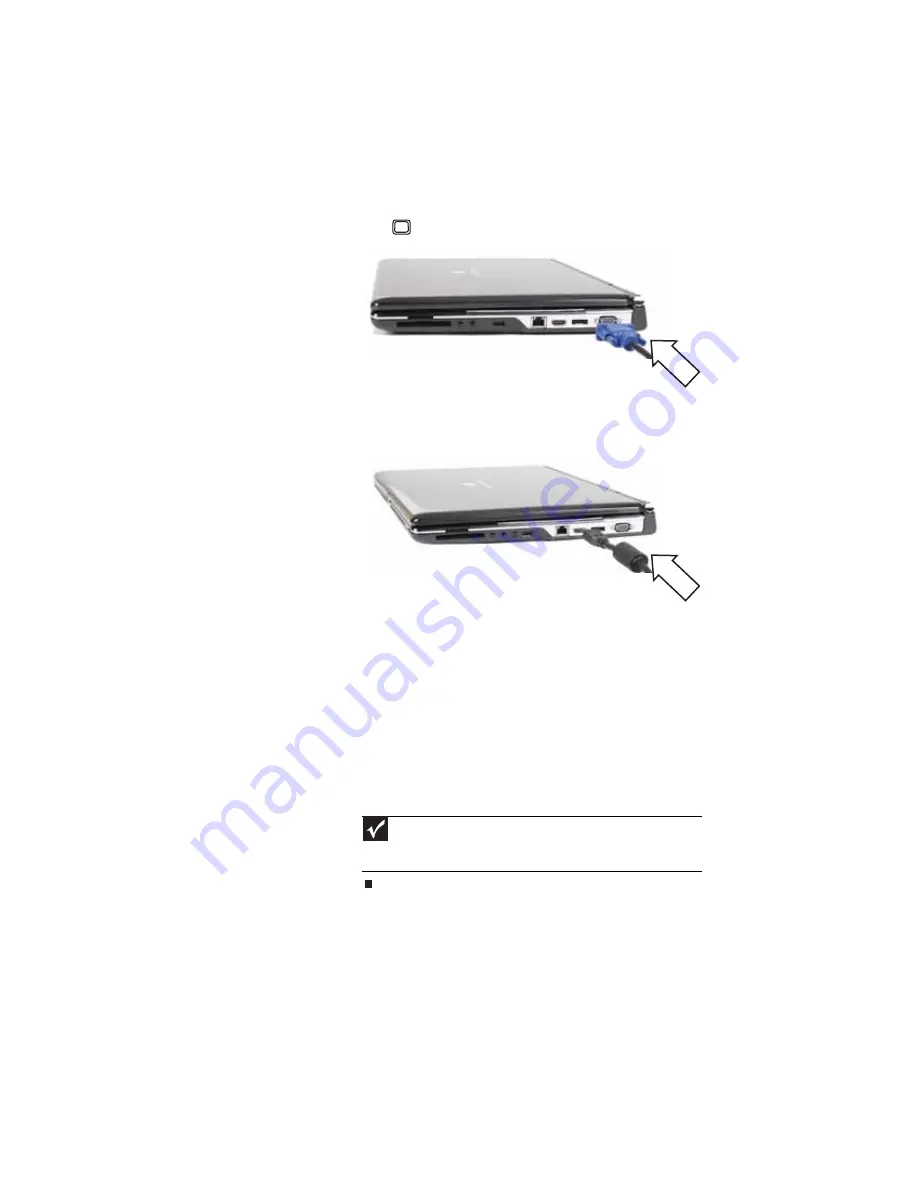
Plug the other end of the VGA cable into the monitor
port
on your notebook.
-OR-
Plug the other end of the HDMI cable into the optional
HDMI port on your notebook.
4
Turn on your notebook.
5
Plug the projector’s, monitor’s, or television’s power cord
into an AC power source and turn it on.
Windows recognizes the new hardware and the New
Display Detected dialog box opens.
6
Select the options for the projector, monitor, or
television, then click OK.
7
Press F
N
+F4 to switch between viewing the display on
the LCD panel, viewing the display on the projector,
monitor, or television, and viewing the display on both
the LCD panel and the projector, monitor, or television.
Important
If a monitor, projector, or television is connected and you close the
LCD panel, your notebook may turn off the LCD panel, but will not enter
Sleep mode.
Summary of Contents for P-171
Page 1: ...NOTEBOOK REFERENCEGUIDE...
Page 2: ......
Page 8: ...Contents vi...
Page 12: ...CHAPTER 1 About This Reference 4...
Page 13: ...CHAPTER2 5 Checking Out Your Notebook Front Left Right Back Bottom Keyboard area LCD panel...
Page 56: ...CHAPTER 3 Setting Up and Getting Started 48...
Page 108: ...CHAPTER 7 Maintaining Your Notebook 100...
Page 119: ...CHAPTER9 111 Troubleshooting Safety guidelines First steps Troubleshooting Telephone support...
Page 146: ...CHAPTER 9 Troubleshooting 138...
Page 167: ......
Page 168: ...MAN GODZILLA HW REF GDE R1 5 08...


