3-38
Machine Maintenance Procedures
Front CCD Removal
0
Prerequisite:
Mainboard Removal
1.
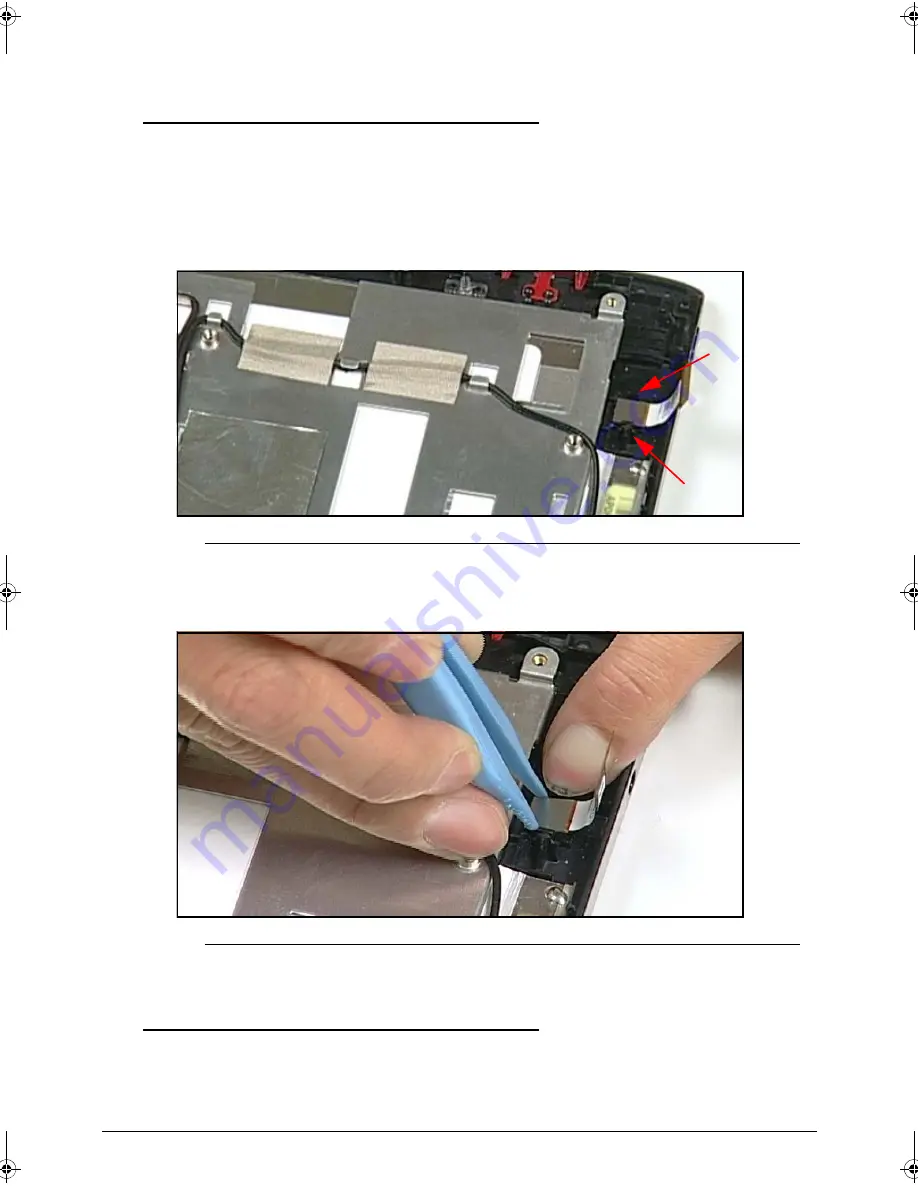
Release bezel locking latches (A).(Figure 3-52)
Figure 3-52.
Release Bezel Locking Latches
2.
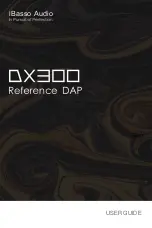
Remove front camera from bezel.(Figure 3-53)
Figure 3-53.
Removing Front CCD
Front CCD
Installation
0
1.
Install and secure front camera in bezel locking latches (A).(Figure 3-52)
2.
Install mainboard.
A
A
SG_GW_MAYA.book Page 38 Tuesday, August 2, 2011 10:03 AM
Summary of Contents for TP-A60G
Page 1: ...Gateway TP A60W TP A60G SERVICE GUIDE ...
Page 9: ...CHAPTER 1 Hardware Specifications ...
Page 38: ...1 30 Hardware Specifications and Configurations ...
Page 39: ...CHAPTER 2 Diagnostic Utilities ...
Page 40: ...2 2 Introduction 2 3 NGA EUU Installation Procedure 2 3 Picasso Diagnostic Tool 2 11 ...
Page 49: ...Q I 20 11 ICONIA tab A500 Diagnostic Tool SOP Release date Apr 14 2011 ...
Page 60: ...Q I 20 11 6 Speaker Loud tone sounds in left speaker then switches to right speaker ...
Page 69: ...Q I 20 11 Un installation procedure Step 4 Select OK start to uninstall ...
Page 72: ...CHAPTER 3 Maintenance Procedures ...
Page 125: ...3 54 Machine Maintenance Procedures ...
Page 126: ...CHAPTER 4 Troubleshooting ...
Page 145: ...4 20 Troubleshooting ...
Page 146: ...CHAPTER 5 Jumper and Connector Locations ...
Page 147: ...5 2 Mainboard Top 5 3 Mainboard Bottom 5 4 ...
Page 150: ...CHAPTER 6 Field Replaceable Unit List ...
Page 165: ...6 16 FRU List ...
Page 166: ...CHAPTER 7 Model Definition and Configuration ...
Page 167: ...7 2 TP A60W 7 3 ...
Page 170: ...CHAPTER 8 Test Compatible Components ...
Page 171: ...8 2 Android OS Environment Test 8 4 TP A60W TP A60G 8 4 ...
Page 175: ...8 6 Test Compatible Components ...
Page 176: ...CHAPTER 9 Online Support Information ...
Page 177: ...9 2 Introduction 9 3 ...
Page 179: ...9 4 Online Support Information ...


