Button Instructions
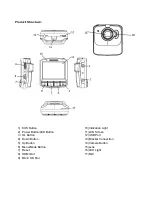
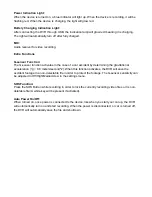
Power Button:
When the DVR is turned off, press it once to turn it on. While the system is on, hold down the power
button to turn it off. The Power Button is also used to turn the LED on or off during use.
MENU/MODE Button
:
Pressing this button once will open the menu. Pressing the menu button again while in the menu will
change to the second settings tab.
This button is also used to change between video, photo and playback modes by holding down the
button for 2 seconds then letting go.
OK Button:
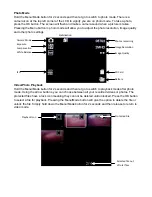
The OK is used to start recording in video mode. Pressing the button again in video mode will stop
the recording. In photo mode, the OK button is used to take a picture.
The OK button is also used to select a setting in the menu.
Up Button:
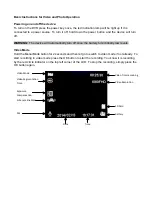
The up button is used while in the menu to move the highlighted area for selecting.
The up button
can also be used to zoom in under the standby or shooting mode. Pressing the Up button while
recording will activate the file protection (A key will be present on the top of the screen if activated).
Down Button:
The down button is used while in the menu to move the highlighted area for selecting. The down
button can also be used to mute the MIC on the fly when fully zoomed out, either during standby or
recording.
HDMI Port:
The HDMI port provides a HD output interface using the mini HDMI to HDMI cable (Not provided)
that can be plugged into a HDMI port on a supported device.
Micro SD Slot:
Where the Micro SD card is inserted (Max size is 32GB).
SOS Emergency Button:
Pressing the SOS Emergency lock button while recording will activate file protection (A white key will
be present if activated)
Camera Button:
Pressing the camera button while recording will take a picture and save it to the SD card.
USB Interface:
The USB port can be used to charge the device or be connected to a computer for data
transmission.
Reset:
To hard reset the device in the case of a system jam or crash.
Summary of Contents for GHDVR291
Page 1: ... USER GUIDE GHDVR291 ...


