background image

1

GAUI 

TAI SHIH HOBBY CORPORATION

Thank you for purchasing 

GAUI 

EP255 High Performance RC Helicopter from 

Tai Shih Hobby Corporation (TSH). We hope you will enjoy the joy of flight.

感謝您購買泰世科技出品的 

GAUI 

EP255 

高性能遙控直升機,我們希望您可以盡情享受

飛行的樂趣。

In order to understand full assembly sequences, this instruction manual shows
the assembly information of this model, even though some elements are 
supplied as pre-assembled. Please refer to this manual when carrying 
out maintenance or replacing parts.

為了要讓使用者詳細瞭解組裝順序,即使有些部件已經預先組裝完成,
本說明書將提供這台遙控模型的組裝資訊。同時,敬請參閱保養與主要零件更換資訊。

CAUTION: This radio controlled helicopter is not a toy.

警告:這台遙控直升機不是玩具。

SAFETY PRECAUTIONS

 This kit includes some preassembled components. Please check for any 

 loose screws and tighten them before you proceed with assembly.
 You are responsible for assembly, safe operation, maintenance, inspection and 
 adjustment of the model.
 Before beginning assembly, please read these instructions thoroughly.

 Check all parts. If you find any defective or missing parts, contact your local 

 dealer or 

GAUI

 TSH distributor.

 Before you proceed to RC helicopter activity, please check and follow thoroughly 

 related regulation of aero modeling in your country/region.

安全資訊與注意事項

 這台遙控模型包含預先組合完成的部件。

 在進行組裝之前,請仔細檢查這些預先組裝部件上的所有螺絲均有仔細鎖緊。

 您有完全的責任對於這台遙控模型的組裝,安全操作,保養,檢查與調整。

 請先檢查所有的零件,如果發現任何不良品,遺失品,請向模型店或是當地的

 泰世代理商連絡。

 在您進行遙控直升機活動時,請先詳細瞭解與遵守當地遙控模型的相關法規。

前言

Preface

Summary of Contents for Hurricane 255

Page 1: ...N Recommendation We highly recommand using the latest version of the Assembly Instruction Manual To download the latest version please visit the Of cial TSH GAUI web site www gaui com tw GAUI ASSEMBLY...

Page 2: ...ht Check P 14 3 Symbols for Assembly Notices P 5 After Flight Check 1 1 Specification Check 2 P 15 2 4 Fuselage Assembly P 6 Check 3 3 Landing Sledges Assembly 7 Upgrade Replacement Parts P 18 Fuselag...

Page 3: ...parts CAUTION This radio controlled helicopter is not a toy SAFETY PRECAUTIONS This kit includes some preassembled components Please check for any loose screws and tighten them before you proceed with...

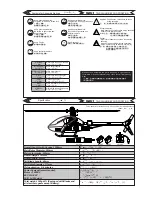
Page 4: ...product is intended for being operated by experienced mature radio control helicopter pilots under controlled safety conditions and on locations properly authorized and setup for safe flying and away...

Page 5: ...frequencies 5 I will not knowingly operate my model aircraft within three 3 miles of any preexisting flying site without a frequency management agreement See AMA Document 922 for Testing for RF Inter...

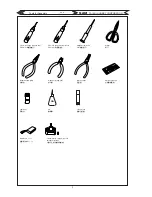
Page 6: ...agon Screw Driver 2 5mm Hexagon Screw Driver Philips Screw Drive Scissor Needle nosed pliers Diagonal cutting plier Ball Link Plier Dial Pitch Gauge Lubricant CA Thread Lock Battery 3S 11 1v Transmitt...

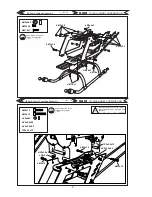
Page 7: ...l thread lock Specification B Bearing B B Dia in x Dia out x Thickness B X X TapScrew Dia out x Length X M Machine Screw M M Dia out x Length M X P tube P P Dia in x Dia out x Length P X X Pillar P P...

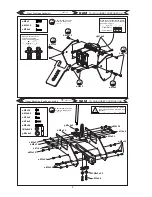
Page 8: ...6 c 1 4x4 d 1 4x6 e M2x8 4 f B2x5x2 5 g B3x6x2 a M2x3 2 a M2x3 2 a M2x3 2 a M2x3 2 a M2x3 2 a M2x3 2 a M2x3 2 a M2x3 2 c M1 4x6 b M2x3 2 b M2x3 2 a M2x5 a M2x5 a M2x5 Apply thread lock on all screws...

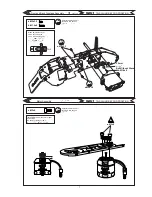
Page 9: ...l position a M2x3 2 b M1 4x6 a M3x6 Apply thread lock on all screws in this section Apply thread lock on all screws in this section a M2x3 2 a M2x3 2 b M1 4x6 Ball without Stand 3 5mm Install Motor an...

Page 10: ...ly thread lock on all screws in this section Apply thread lock on all screws in this section a B3x6x2 b M2x3 2 b M2x3 2 b M2x3 2 d M1 4x7 d M1 4x7 d M1 4x7 a M2x10 b M2x14 b M2x14 c P2x4x2 d P2x3 5x25...

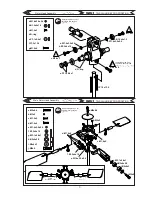
Page 11: ...de without thread Apply thread lock on all screws in this section a W1 4x2 5x0 4 b B1 5x4x1 2 c M1 4x3 d O ring e P3 1x4 6x1 f P1 2x13 5 g M1 4x6 Rotor Head Assembly Main Rotor Head Assembly a W1 4x2...

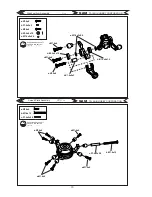
Page 12: ...x2x3 c M1 4x6 d B1 5x4x1 2 e W1 4x2x0 4 c P1 4x2x9 5 b M1 4x15 a M1 4x6 a M1 4x6 a M1 4x6 a M1 4x6 Apply thread lock on all screws in this section Apply thread lock on all screws in this section Washo...

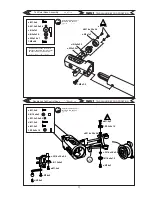
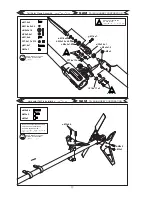
Page 13: ...screws in this section Apply thread lock on all screws in this section Insert belt into pulley of tail rotor shaft and assemble tail rotor shaft as described by exploded view a M1 4x4 b W1 4x2 5x0 4 c...

Page 14: ...screws in this section Do not over tighten the M1 4x4 screw Apply thread lock on all screws in this section Insert the horizontal fin base and servo base on the tail book as below exploded view e M1 4...

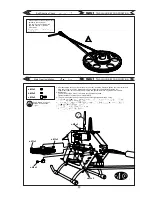
Page 15: ...ear set insert the Mast and tighten the lower collar and main gear collar pull up the Mast and Main gear assembly then install and tighten the upper mast collar set the belt tension properly and tight...

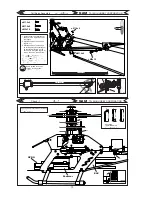
Page 16: ...h 2 Adjust position of servo base figure 1 1 3 Adjust position of servo base by turning around the tail boom so that the ball screw on the servo horn is aligned figure 2 clip on the servo rod ball lin...

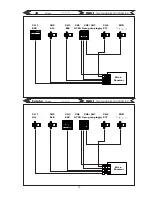
Page 17: ...H HOBBY CORPORATION Wiring Wiring Micro Receiver Micro Receiver CH 1 CH2 CH3 CH4 CH5 CH7 CH6 RUD ESC AIL ELE GYRO Gyro gain plug s PIT CH 1 CH2 CH3 CH4 CH5 CH7 CH6 RUD AIL ELE ESC GYRO Gyro gain plug...

Page 18: ...ms should be set to be horizontally leveled as shown in figure 7 Move the throttle stick to the top position the maximum positive pitch should be around 11 to 13 degrees If is is not the case set the...

Page 19: ...m travel to left and right should not touch the Tail Gear Case and Tail Hub there should be a distance for 0 5mm or less at each side Please follow your own gyro s instruction manual for adjustments 3...

Page 20: ...rformance Main Gear 255 207515 H255 Upper Mast Collar 255 207516 One Way B Auto rotation Main Gear Set 207517 H255 Swashplate Guide 255 207518 H255 CNC Mast Mount 255 CNC 207519 H255 CNC Motor Mount 2...

Page 21: ...19 GAUI TAI SHIH HOBBY CORPORATION Note...

Page 22: ...20 GAUI TAI SHIH HOBBY CORPORATION Note...

Page 23: ......

Page 24: ...GAUI http www gaui com tw E mail gaui gaui com tw F A X 886 2 2610 5567...

Reviews: