3-1
Chapter 3 - Maintenance
Operator Preventive Maintenance
Operator Preventive Maintenance
Overview
To maintain the Gaylord Ventilator in good working order and to keep the system operating at optimum ef
-
ficiency, preventive maintenance, using the following schedule, should be performed.
Important Note:
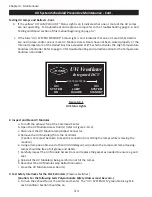
Ventilators incorporating UV Lamps require special maintenance as shown on page 3-3.
Some of the required maintenance on Ventilators with UV can be performed by the operator. However,
direct exposure to UV light is hazardous to your skin and eyes and contact with live electrical components
poses a significant risk of shock or death.
Recommended Scheduled Maintenance
Daily
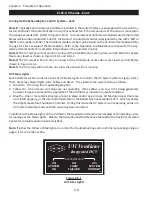
If equipped with UV, make sure the green “UV System On” lamp on the Ventilator is on when the exhaust fan
is on. If the light is not on refer to the Troubleshooting procedures on Page 4-3.
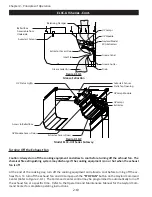
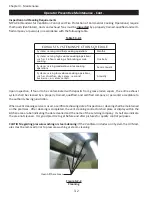
For general cleanliness the underside of the Ventilator should be wiped down as shown in Figure 3-2-2.
Weekly
The Detergent Tank, located in the Wash Control Cabinet, should be checked and kept full with detergent.
Refer to Page 2-17 for recommend detergent.
Monthly
1. The detergent fittings should be checked. This is an airtight system and fittings should be tight. For com
-
plete details on the Detergent Pump refer to the Operation and Maintenance manual for the Gaylord Com
-
mand Center and Wash Control Cabinet.
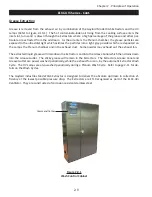
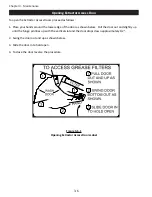
2. When a wash cycle is not on, open the Extractor Access Doors and remove the Extractors. (Refer to
Figure 3-6-1). Check the Extractors and Plenum area to ensure they are adequately cleaned. If the Ventila
-
tor includes UV Lamps check to ensure that they are adequately cleaned. If overall cleaning appears to be
inadequate, refer to the Troubleshooting procedure on Page 4-2.
3. Check the entire Grease Gutter and Drain Outlet and remove any foreign material such as paper towels,
order chits etc. Also check to ensure the gutter is being adequately cleaned by the wash cycle. If overall
cleaning appears to be inadequate, refer to the Troubleshooting procedure on Page 4-2.
Every Six Months
1. Check the exhaust fan(s) for belt tightness, belt alignment. Lubricate moving parts as required. Note: A
blue lithium based grease is best suited for high heat and speed bearing lubrication.
2. Check for proper velocity at the air inlet slot. Refer to page 5-1 procedures.
3. Clean the Detergent Tank and Foot Valve.
Every 12 Months
Remove the Grease Canal Inspection Plate and check for adequate cleaning (Refer to Figure 2-2-2 on page
2-2). Clean if necessary.
Summary of Contents for ELXC Series
Page 40: ...4 6 INTENTIONALLY LEFT BLANK ...
Page 74: ...7 1 Chapter 7 Wiring Diagrams ELXC GBD with AUTOSTART ...
Page 75: ...7 2 Chapter 7 Wiring Diagrams ELXC GFBD with AUTOSTART ...
Page 76: ...7 3 Chapter 7 Wiring Diagrams ELXC GBD UVi with AUTOSTART ...
Page 77: ...7 4 Chapter 7 Wiring Diagrams ELXC GFBD UVi with AUTOSTART ...
Page 83: ...A 6 INTENTIONALLY LEFT BLANK ...

